Adding a subaccount in our client area allows you to grant access to certain parts of your account without sharing your main account credentials.
Here’s how you can add a subaccount:
1- Log in to the Client Area
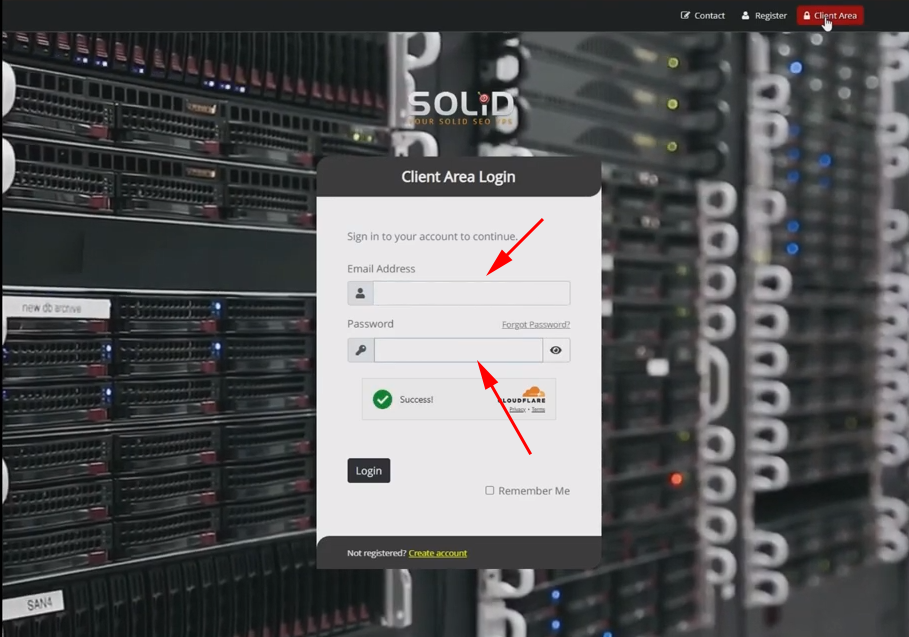
Click on the red button at the top right corner of our homepage.

Enter Your Credentials
After clicking the red “Client Area” button at the top of our homepage, you’ll be prompted to enter the email address and password you used when signing up for your Solid VPS service.
On the login page, enter the username and password you used to sign up
Two-Factor Authentication (If Enabled)
if you have two-factor authentication (2FA) enabled, you’ll need to enter the code sent to your mobile device or email to proceed.
2- Access the Profile Section
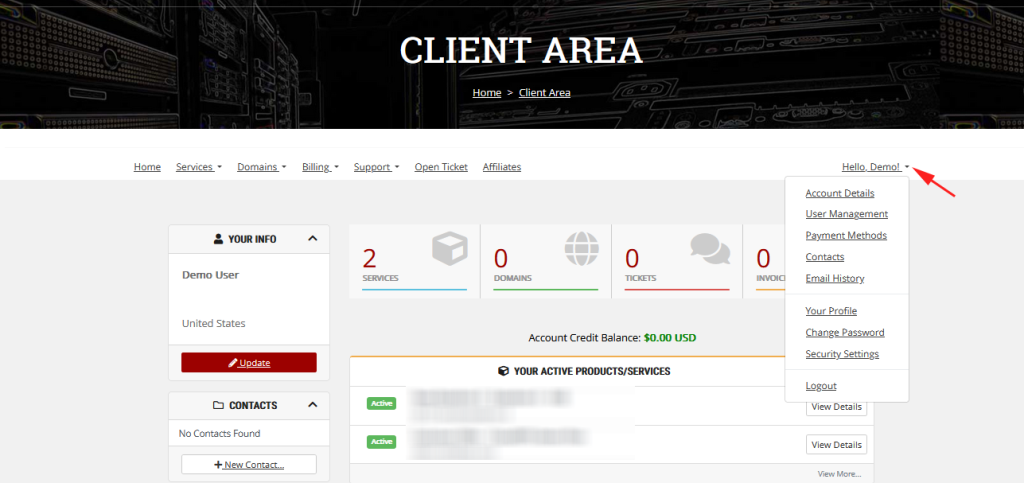
After logging in, go to the “profile” dropdown arrow in the upper-right corner of the main menu in your client area.
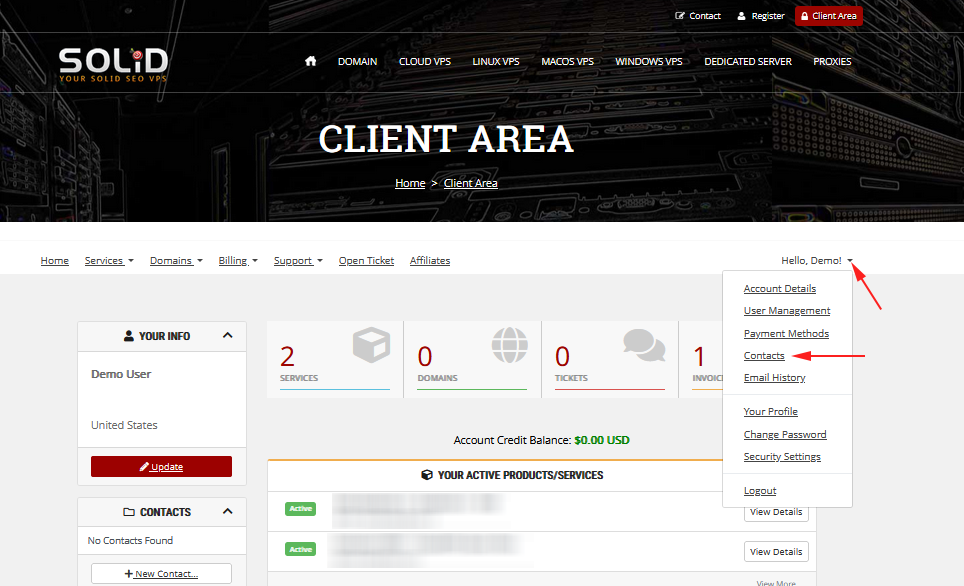
3- Go to the “Contacts” Section
Find and select the “Contacts” option.
Step 4: Click “Add Subaccount”
In the “Subaccounts” section, click the “Add Subaccount” button to begin creating a new subaccount.
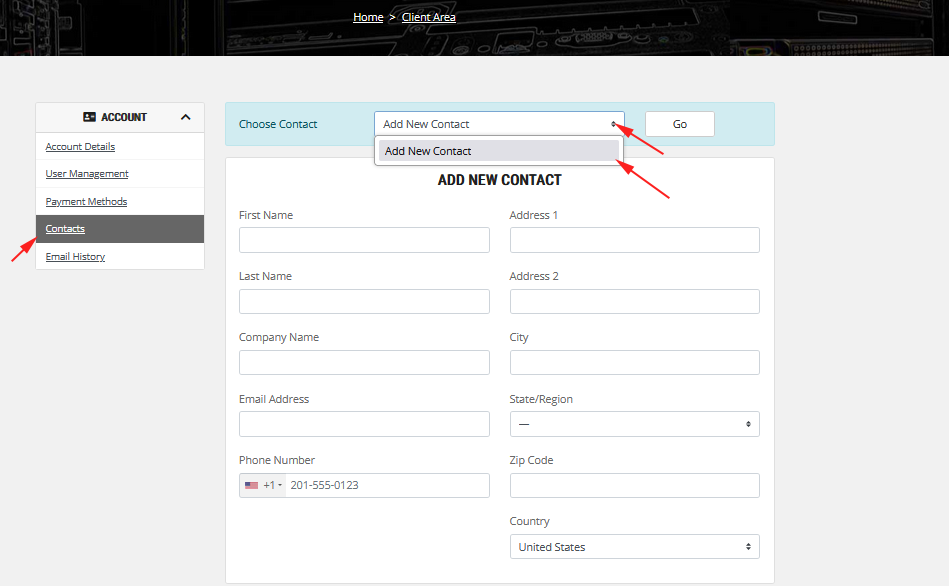
Subaccounts are a useful option if you need to update the contact details on your invoices to another company or address, or if you want to make changes separate from the primary contact on file.
Step 5: Fill in Subaccount Details
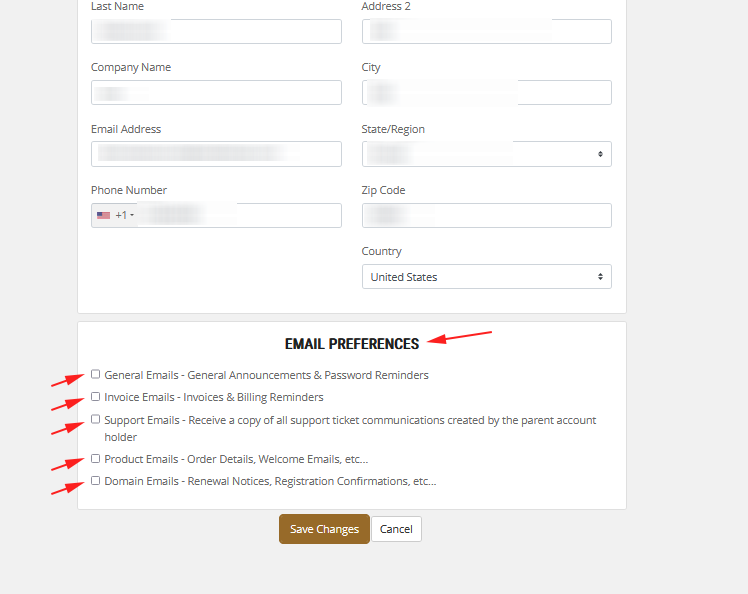
Enter the required details for the subaccount, including the username, email address, and email preferences specifying the types of emails to receive related to your account under “Email Preferences”
Step 6: Click on “Invite New User”
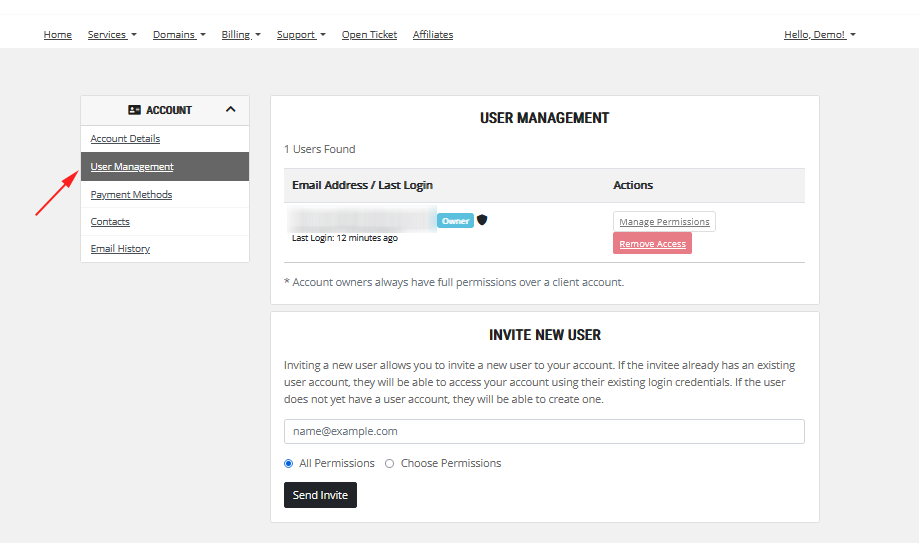
To invite a new user, click on “User Managment” and navigate to the “Invite New User” section.
Inviting a new user allows you to invite a new user to your account.
If the invitee already has an existing user account, they will be able to access your account using their existing login credentials.
If the user does not yet have a user account, they will be able to create one.
Step 7: Set Permissions
Select the appropriate permissions for the subaccount user.
You can grant them full or limited access, depending on what level of control you wish to provide.
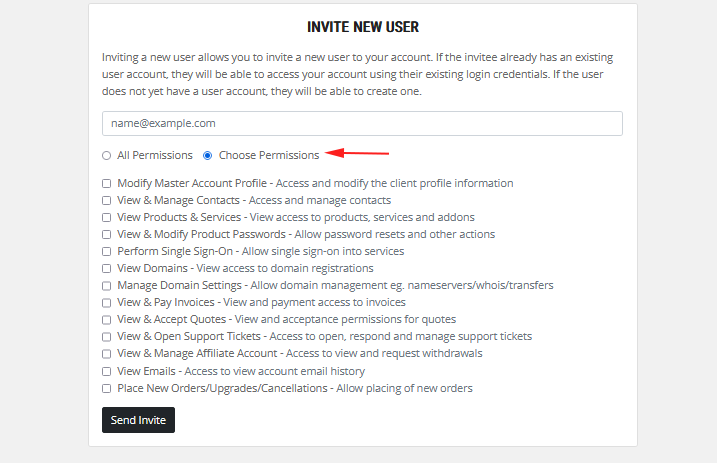
You can choose what level of access you’d like to grant to the subaccount (e.g., view invoices, manage services).
Step 8: Send Invitation
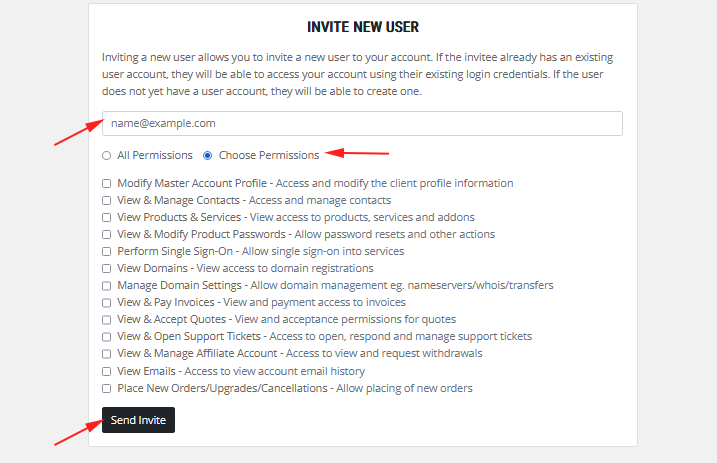
After completing the details and setting the permissions, click “Send Invitation.”
The invited user will receive an email with instructions on how to create their subaccount and log into the client area.
Step 9: Confirm Subaccount Creation
Once the invited user accepts the invitation and creates their subaccount, you will be able to see it listed in the “Subaccounts” section of your profile.
You can also modify their permissions or remove the subaccount at any time.
By following these steps, you can easily invite new users to your SolidVPS client area account as subaccounts and delegate management tasks securely.
This is a great way to share responsibility without compromising your account’s security.
If you need further assistance, feel free to reach out to support.
