Paying your invoice in our client area is quick and easy.
Here’s a step-by-step guide to help you complete the payment process:
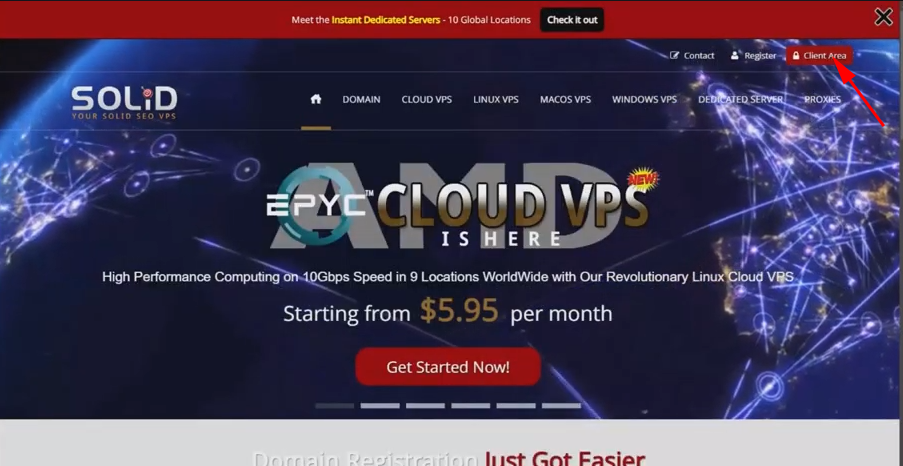
1- Log in to the Client Area
Click on the red button at the top right corner of our homepage.
Enter Your Credentials
After clicking the red “Client Area” button at the top of our homepage, you’ll be prompted to enter the email address and password you used when signing up for your Solid VPS service.
On the login page, enter the username and password you used to sign up
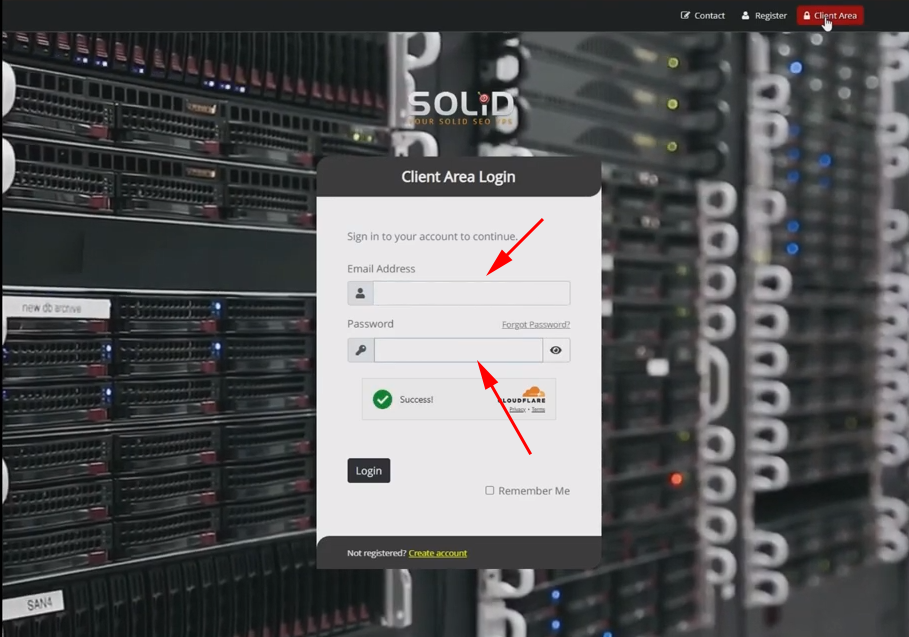
Two-Factor Authentication (If Enabled)
if you have two-factor authentication (2FA) enabled, you’ll need to enter the code sent to your mobile device or email to proceed.
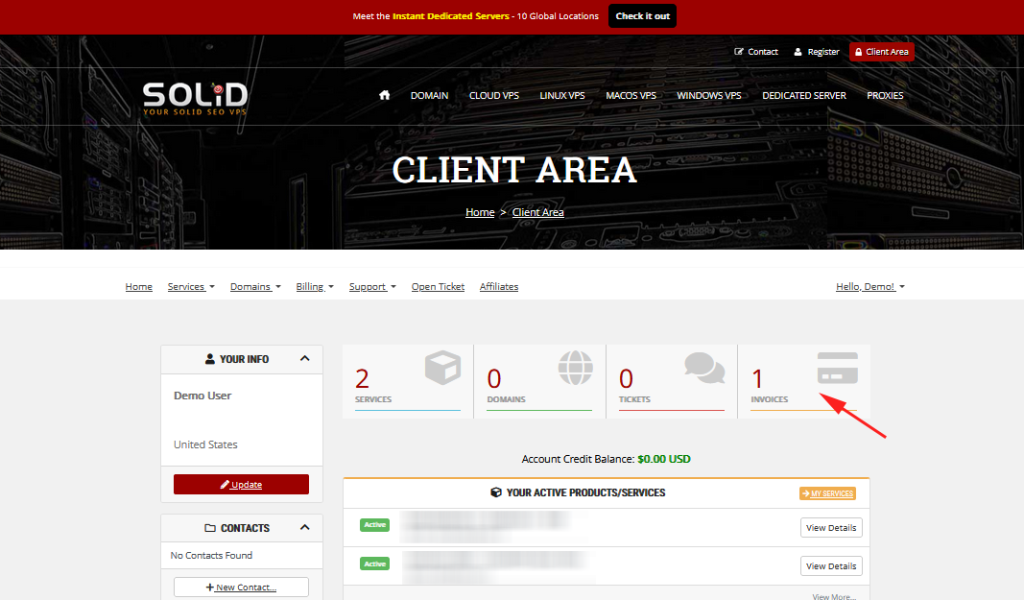
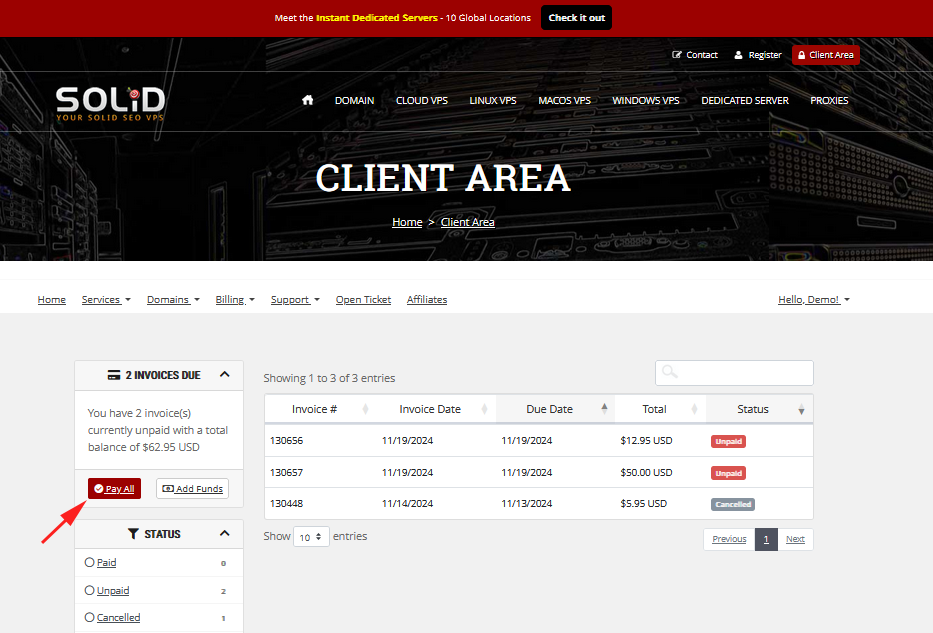
2- Go to the “Invoices” Section
Once logged in, navigate to the “Invoices” section from the main menu. This is where all your active and past invoices are listed.
Step 3: Select the Invoice to Pay
Find the invoice you wish to pay and click on it to view the details.
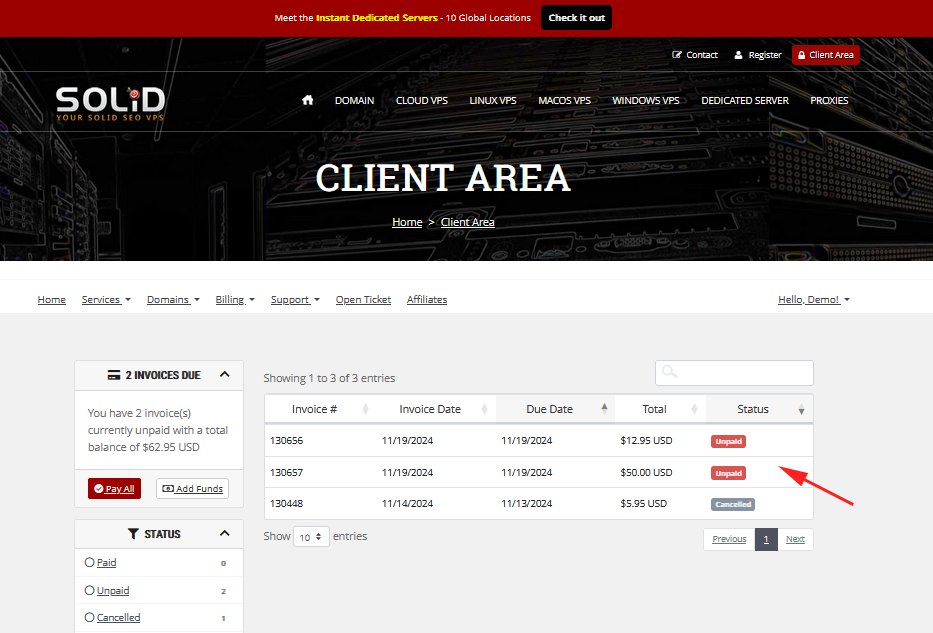
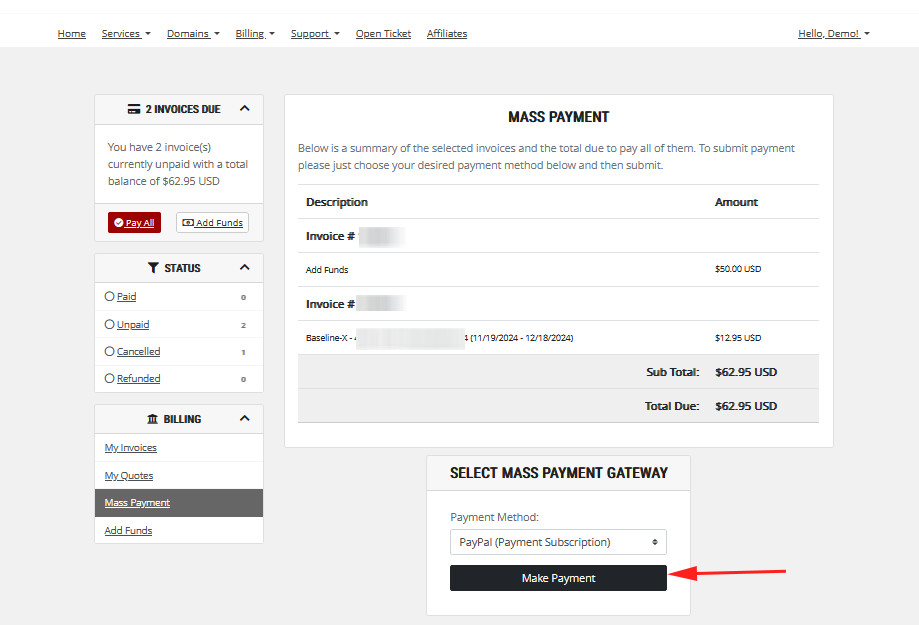
You can pay the invoice individually or choose to pay multiple invoices at once “Pay All“.
Step 4: Review the Invoice
Check the invoice details, including the amount due, service items, and payment terms.
Make sure everything is correct.
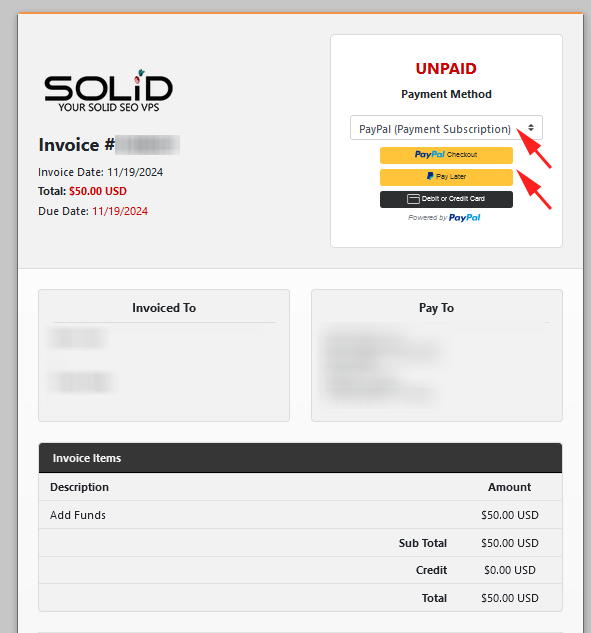
Step 5: Click “Pay Now”
Once you’ve reviewed the invoice, click on the “Pay Now” button to proceed with payment.
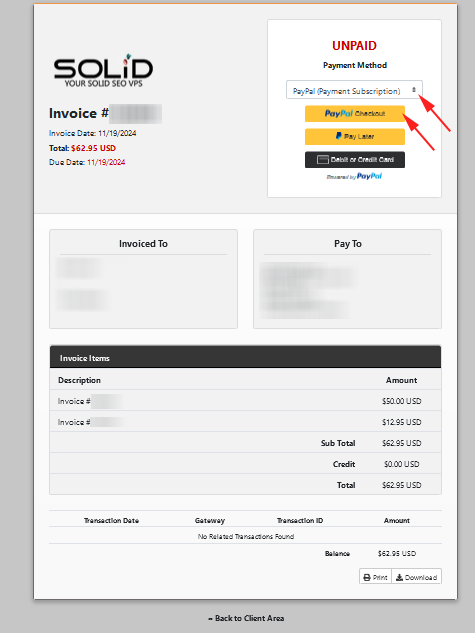
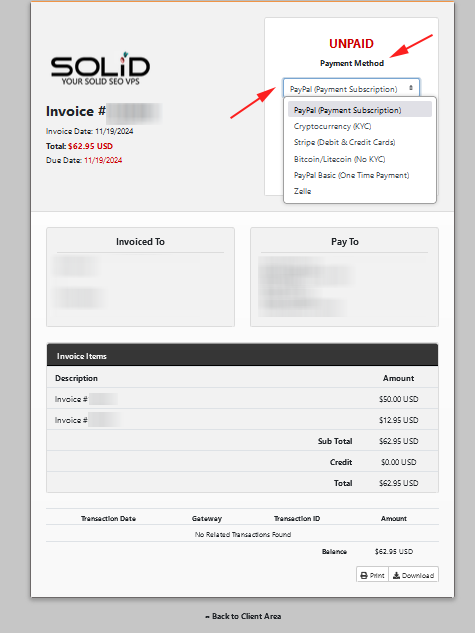
Step 6: Choose Your Payment Method
Select your preferred payment method (credit card, PayPal, etc.) from the available options.
Step 7: Complete the Payment
Follow the prompts to enter your payment details and complete the transaction.
Once the payment is successful, your invoice will be marked as paid.
Step 8: Confirm Payment Status
You can check the status of your invoice in the “Invoices” section of your client area to confirm the payment was processed successfully.
Paying your invoice ensures that your services remain active without interruption.
If you have any questions or need assistance, feel free to contact our support team.