Getting Started with Our Control Panel
Managing your Windows VPS can be seamless and efficient with SOLIDVPS, especially when you utilize their user-friendly client area.
Here’s a simple guide to get you started with managing your VPS directly from the SOLIDVPS dashboard:
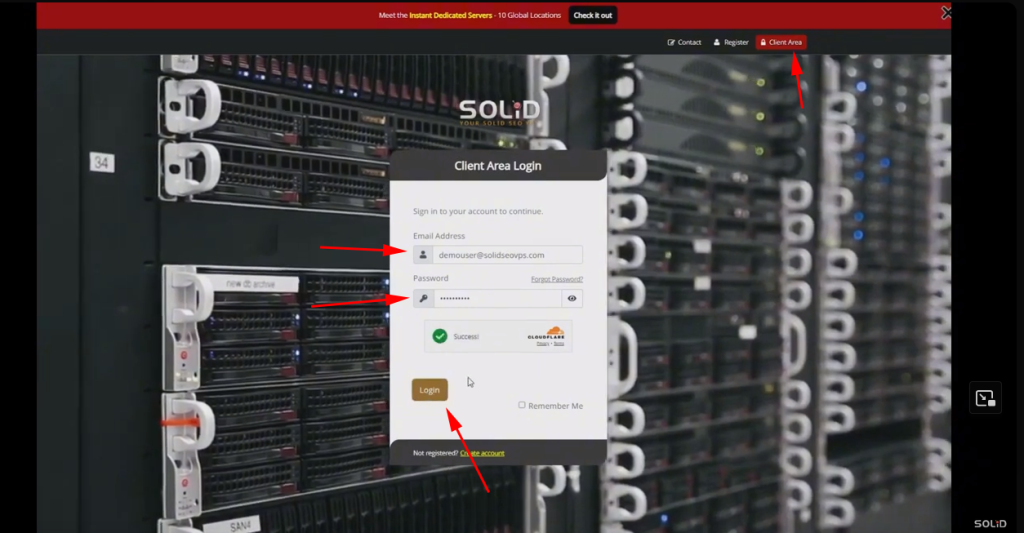
Log in to the Client Area
1- Open your Web Browser: Start by launching your preferred web browser.
2- Visit the Client Area URL: By clicking on the client area login button located on the top right corner
.3- Enter Your Credentials: Log in with your username and password.
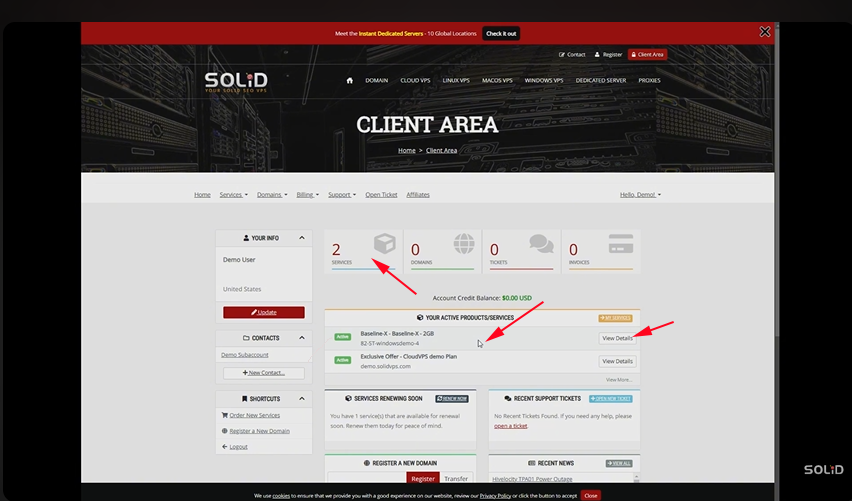
Navigate to the Windows VPS
- Find the Services Tab: Look for a tab or section labeled “Services” or “My Services.”
- Select Your Windows VPS Plan: Click on the service related to your Windows VPS. This will open up specific details about your VPS plan and configuration.
This page displays an overview of your VPS status, including usage stats and basic information about the plan.
Access the Windows VPS Client Area Panel
1- Locate the VPS Panel Option: Within the VPS service details, look for an option like “View Details”
2- Click to Enter the Panel: Selecting this option should automatically open the Windows VPS client area panel.
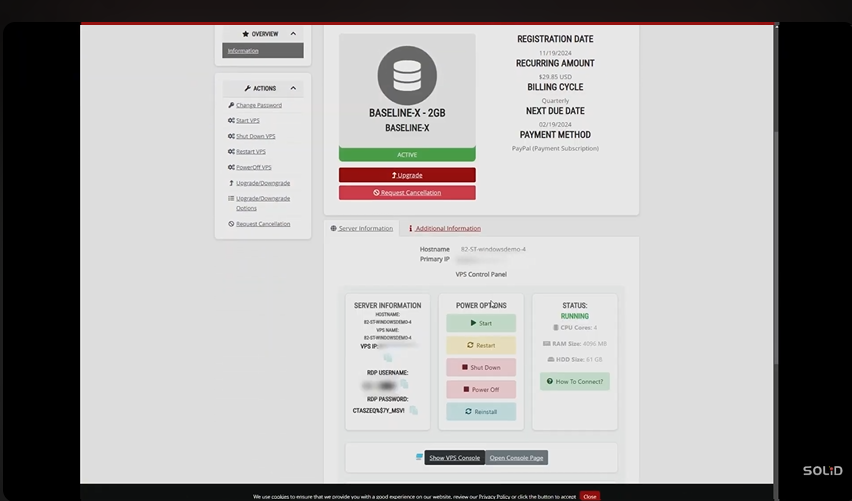
On the left side, you’ll find quick action buttons to
- Change the VPS password
- Start VPS
- Shutdown VPS
- Restart VPS
- Power off the VPS.
- There are also options to upgrade or downgrade the service
- Cancel the service if needed

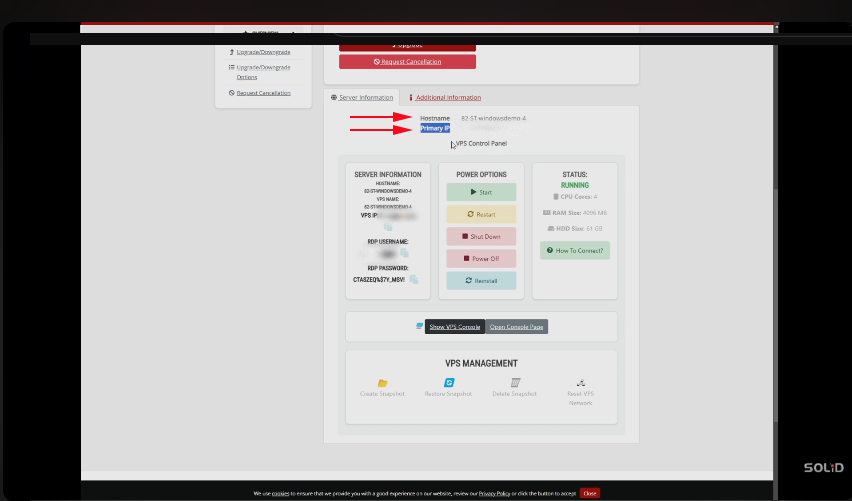
Access The VPS Management Tools Dashboard
In the VPS management dashboard, navigate to the Server Information tab.
Here, you will find important details about your Windows VPS, including the server hostname and server IP address.
This section provides a quick overview of your server’s key identifiers, helping you easily manage and connect to your VPS.
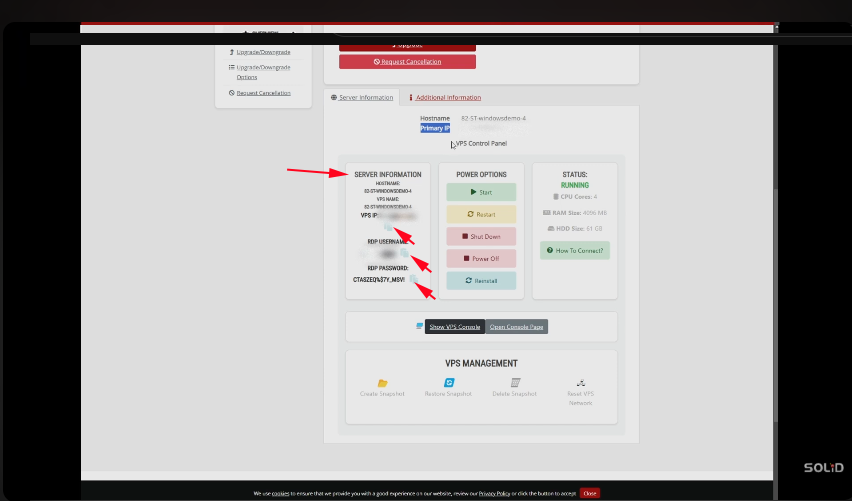
VPS Control Panel
Under the VPS control panel, you will see several sections displayed in separate boxes.
On the leftmost box, you will find the Server Information, which includes essential details such as the server hostname, server name, server IP, RDP username, and RDP password.
Next to the server IP, RDP username, and RDP password, there are convenient icons that allow you to copy these details to your clipboard for easy access at any time.
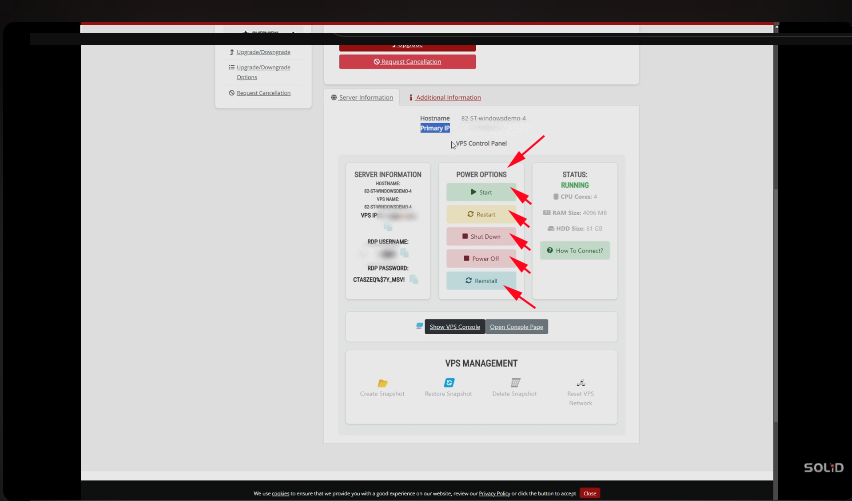
Power Control & OS Reload
In the middle box, you will find all the essential power and OS reload controls for your Windows VPS. These include options to start, restart, shutdown, and power off your server.
Additionally, if needed, you can also use the Reinstall option to reinstall the operating system.
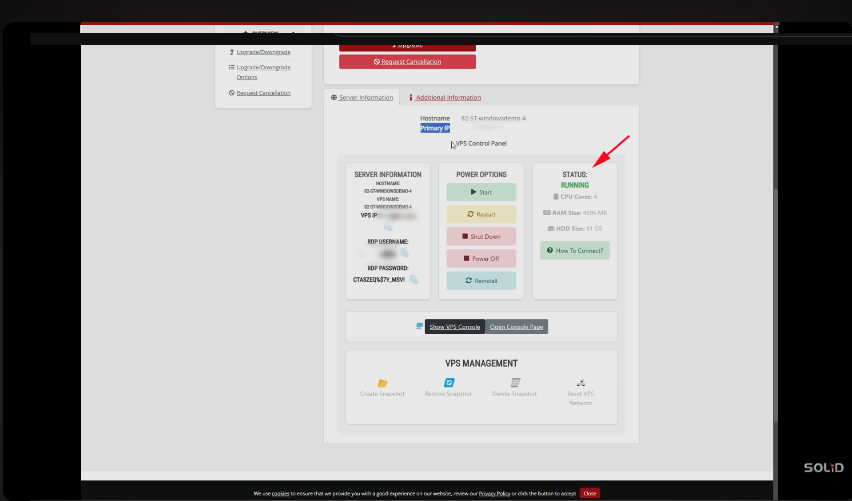
On the right side box, you will find your server’s power status, such as whether it is currently running, along with details about your VPS plan, including Cores, RAM, and HDD size.
Additionally, there is a How to Connect button that will direct you to the relevant section of our knowledge base for easy access to connection instructions.
VPS Console
In the VPS Console box, you will find two buttons: “Show VPS Console” and “Open Console Page”.
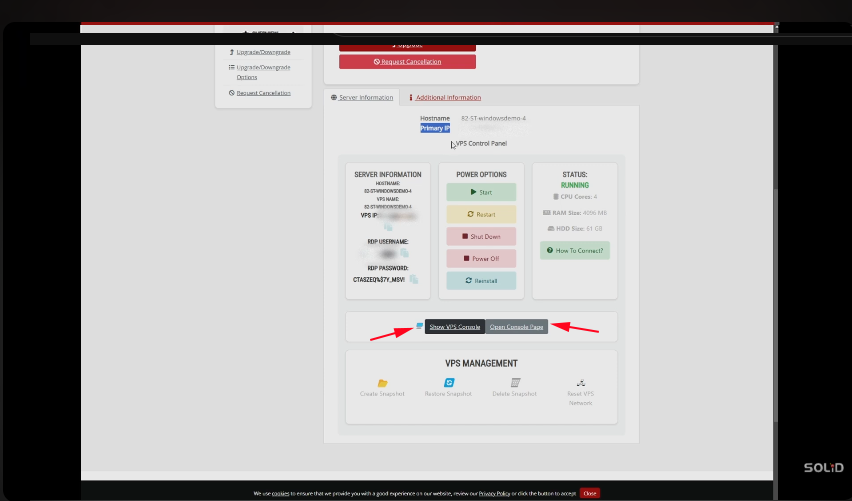
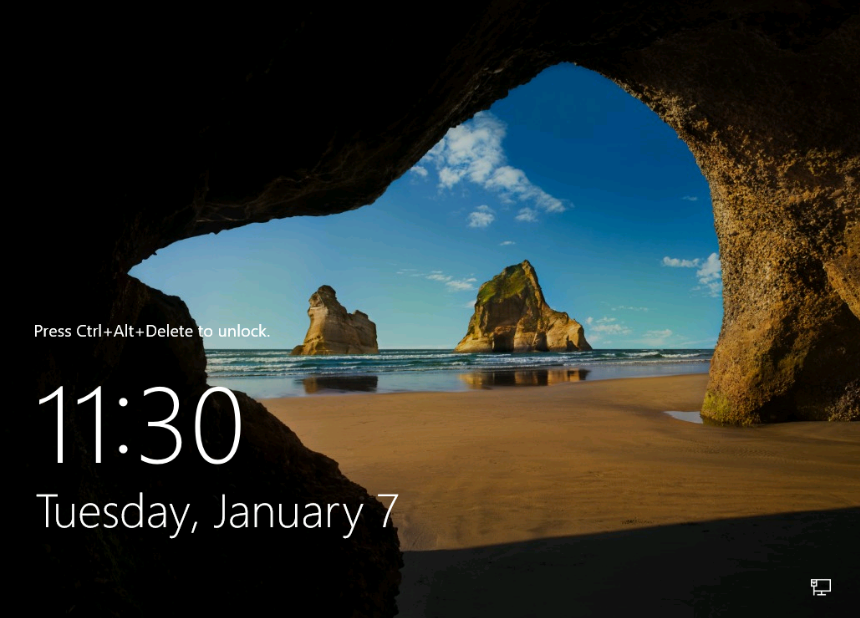
- The “Show VPS Console” button provides a quick screen view of your VPS status.
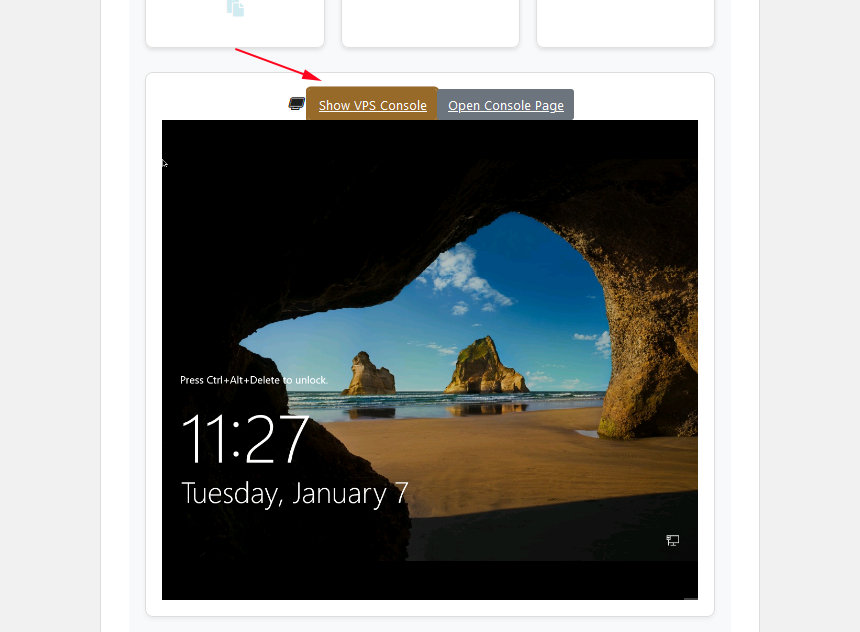
- If you need to gain full control over the VPS, you can do so directly from the Show VPS Console option.

When you click on the “Open Console Page” button, a new tab will open, allowing you to start controlling your VPS directly through the console.
For detailed instructions on how to use the console, refer to our comprehensive “How to Launch Windows VPS Console” tutorial.
VPS Managment
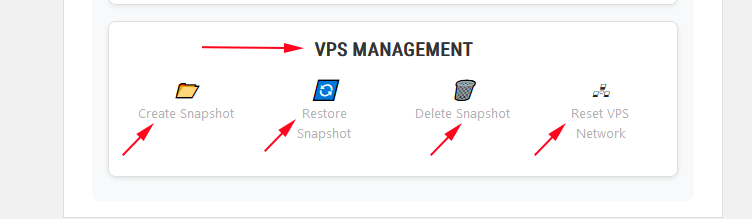
Under the VPS Management box, you will find four icons:
- Create Snapshot: This is useful if you want to install new software but are concerned it might cause issues. You can create a snapshot first, and if anything goes wrong, you can easily roll back to this snapshot.
- Restore Snapshot: This option allows you to restore a snapshot you previously created, returning your VPS to its exact state at the time of the snapshot.
- Delete Snapshot: Use this option to delete a snapshot that you no longer need.
- Reset VPS Network: This is a valuable tool if you accidentally disable the network on your VPS or change the network IP. Clicking this option will revert the network settings to their default state, helping you regain access to your VPS.
Connect To Your Windows VPS:
For a detailed guide on how to connect to your Windows VPS, please check the link below.
https://kb.solidvps.com/article-categories/windows-vps
We have provided step-by-step instructions for connecting from various devices, including a PC, MacOS, iPhone/iPad, Android phone/tablet, or a Linux system.