We’re excited to introduce our Instant Dedicated Server Panel, designed to simplify server management and give you instant access to dedicated resources.
Here’s a quick guide to help you get started.
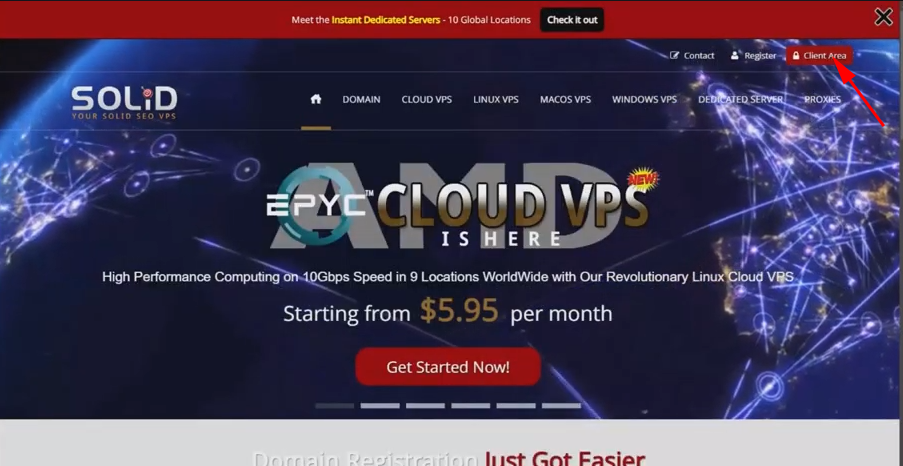
Step 1: Login to Your Account
Begin by logging into your account.
Click on the red button at the top right corner of our homepage.
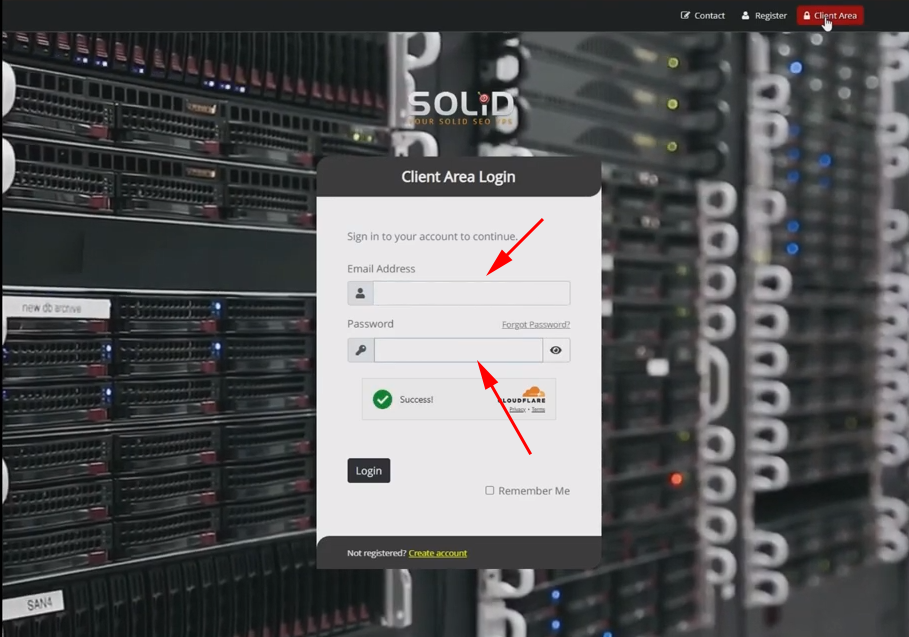
On the login page, enter the username and password you used to sign up.
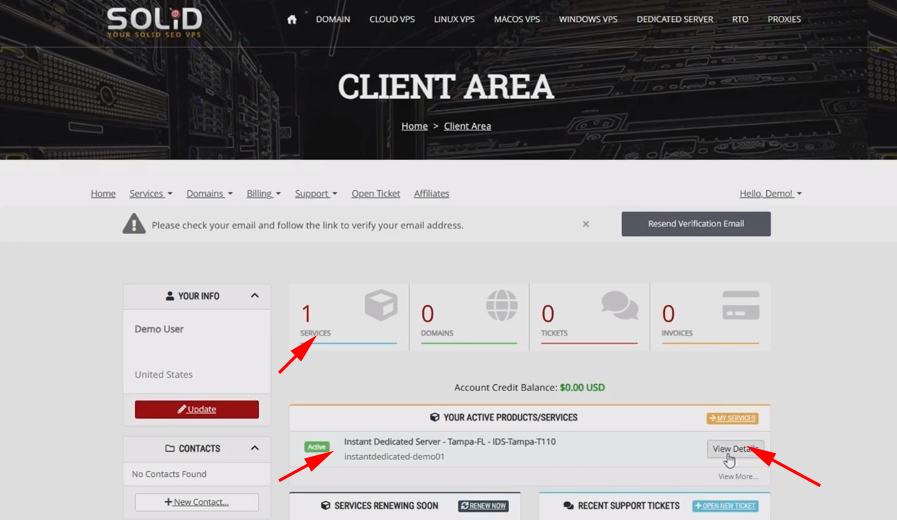
After logging in, locate your dedicated server in the service list. You can access it by clicking on the services icon or finding it in the list under “Your Active Product/Services”. Once found, click on “View Details” or simply click on it.
Step 2: Access the Instant Dedicated Server Service Page
Here, you’ll find the Instant Dedicated Server Panel, designed for intuitive, on-demand access to the dedicated server.
Let’s walk you through each section of our panel.
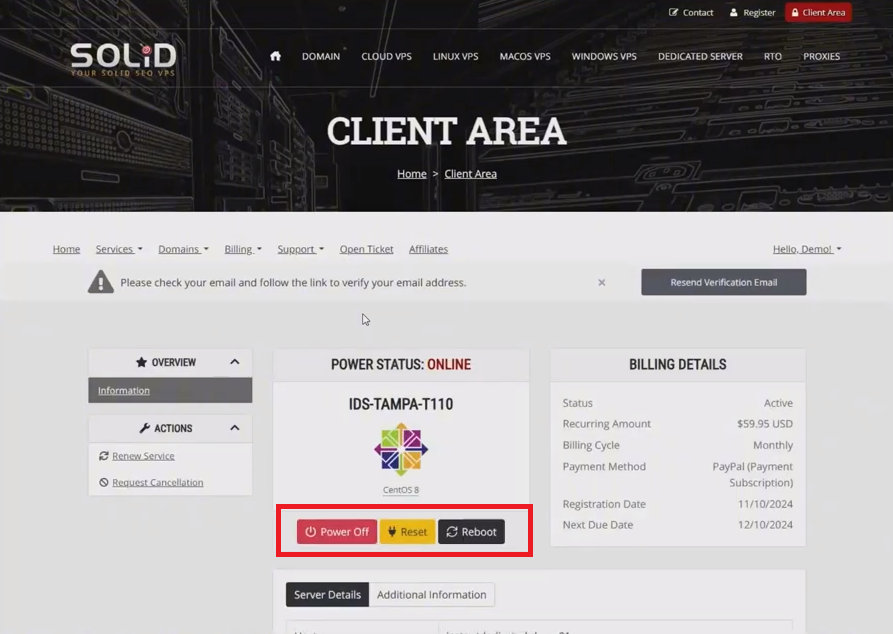
Starting with the box on the left, you can view your server’s power status, plan name, and the installed operating system.
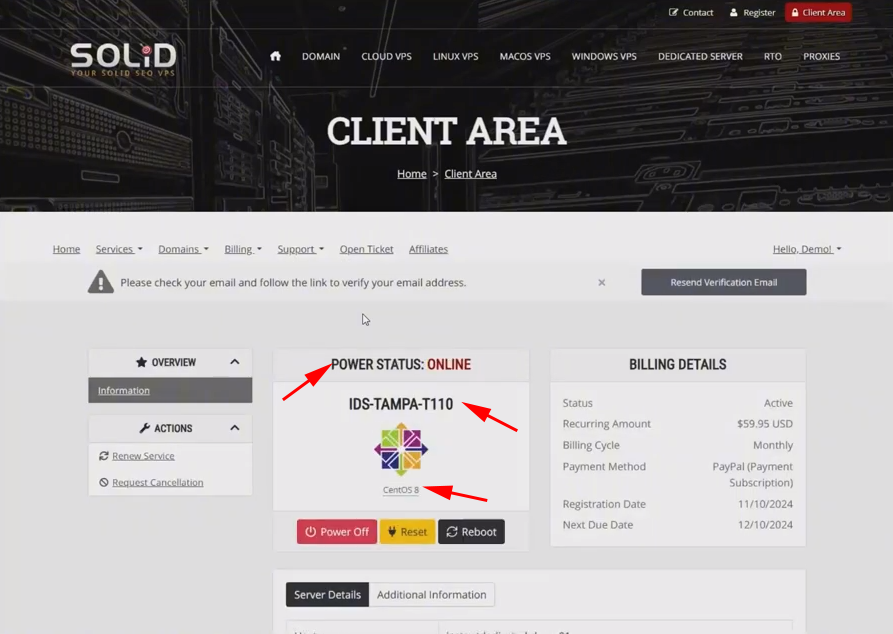
Below the OS version/name, you’ll find control buttons to power on, reset, or reboot your server.
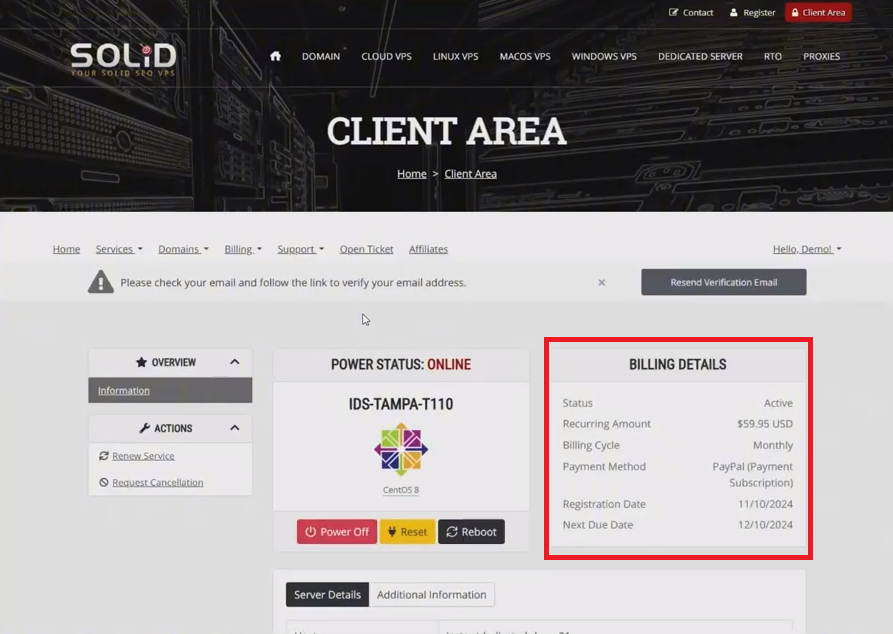
In the top right box, you’ll find all your billing information, including service status, recurring amount, billing cycle, payment method, registration date, and next due date.
Scrolling down to the “Server Details” tab, you’ll see the server hostname used during signup, along with options to add a description and a server tag.
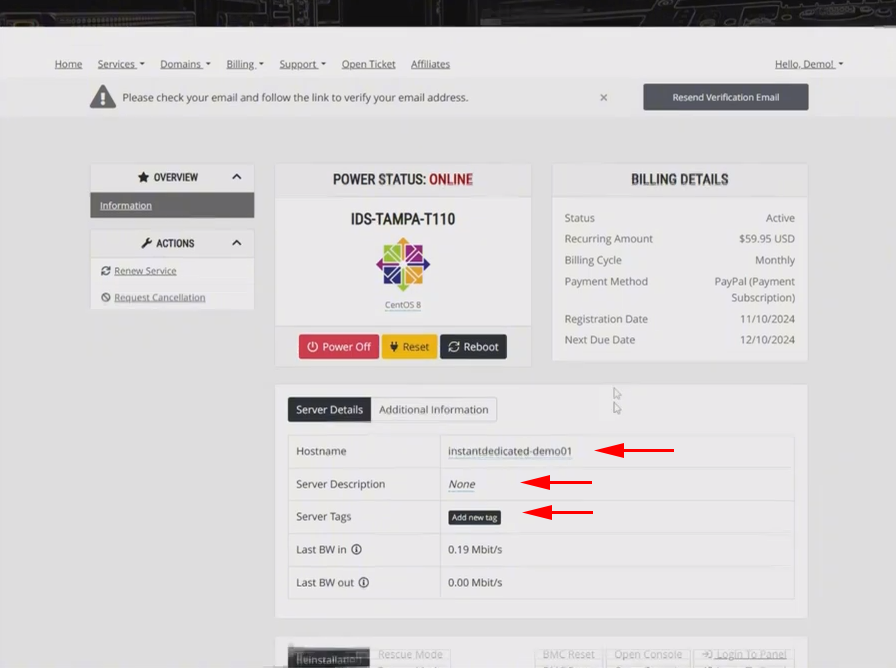
It will also display a brief overview of the last bandwidth usage for both inbound (IN) and outbound (OUT) traffic. This section gives you a quick snapshot of your server’s recent data usage.
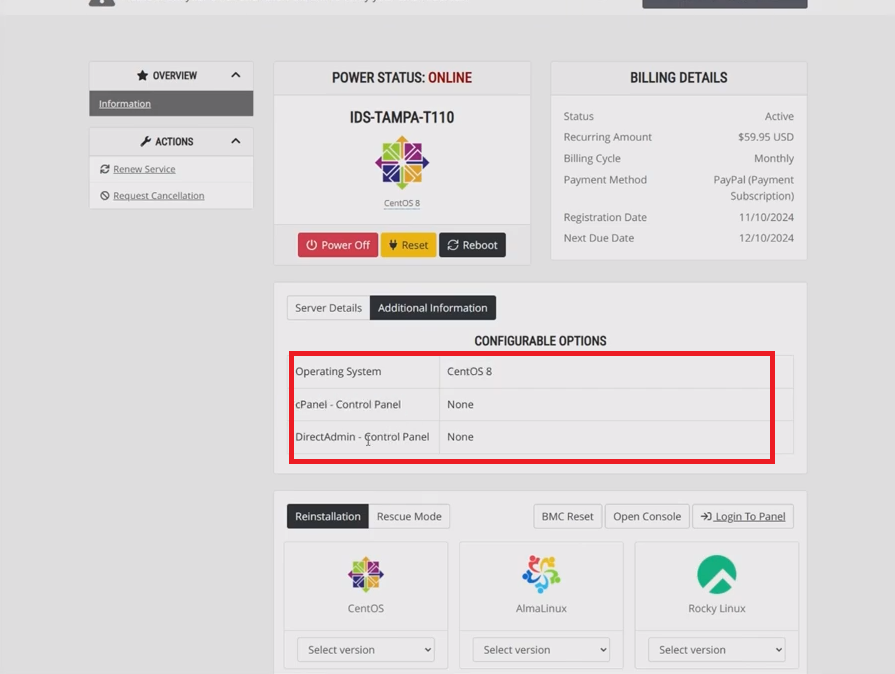
In the “Additional Information” tab, you’ll find the OS edition and version. If you have ordered a cPanel or DirectAdmin license, the details will also be listed in this section.
Scrolling down to the “Reinstallation” tab, you’ll find all available Linux distributions if you ordered a Linux server. For Windows dedicated servers, you’ll see an additional section with all available Windows reinstallation editions.
Scrolling down, you’ll find a list of all available distributions for instant OS deployment from which you can choose.
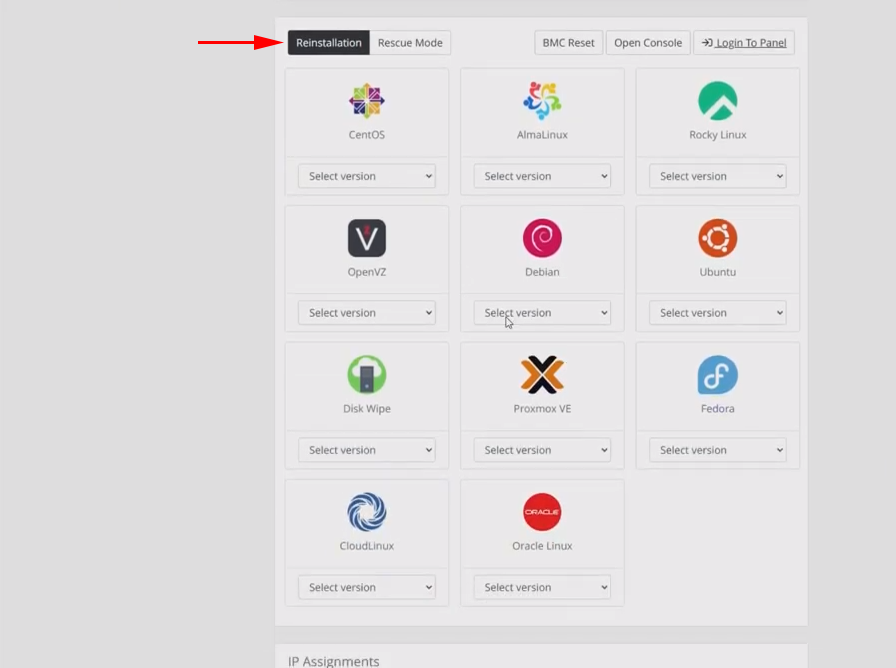
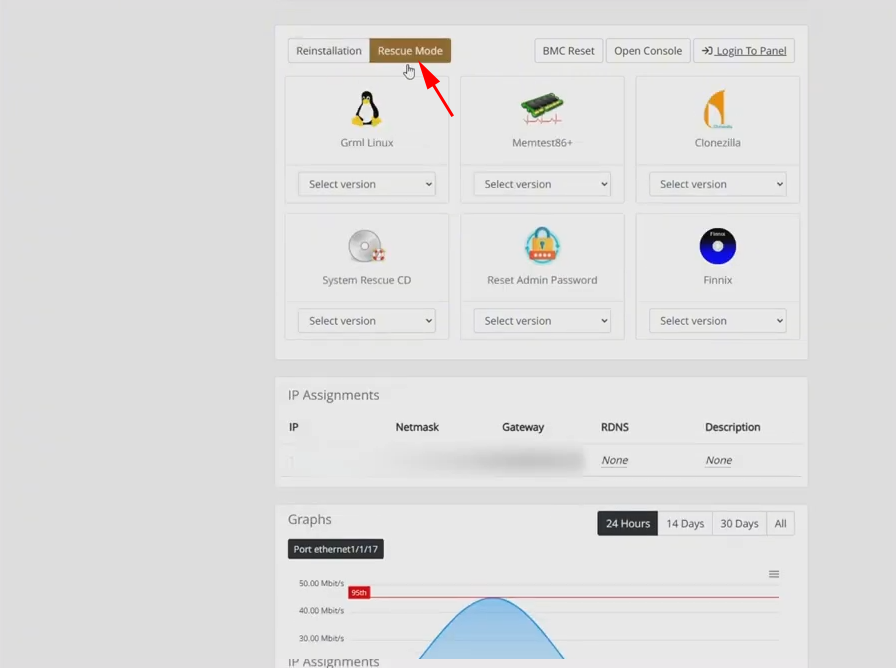
If needed, rescue mode is also available.
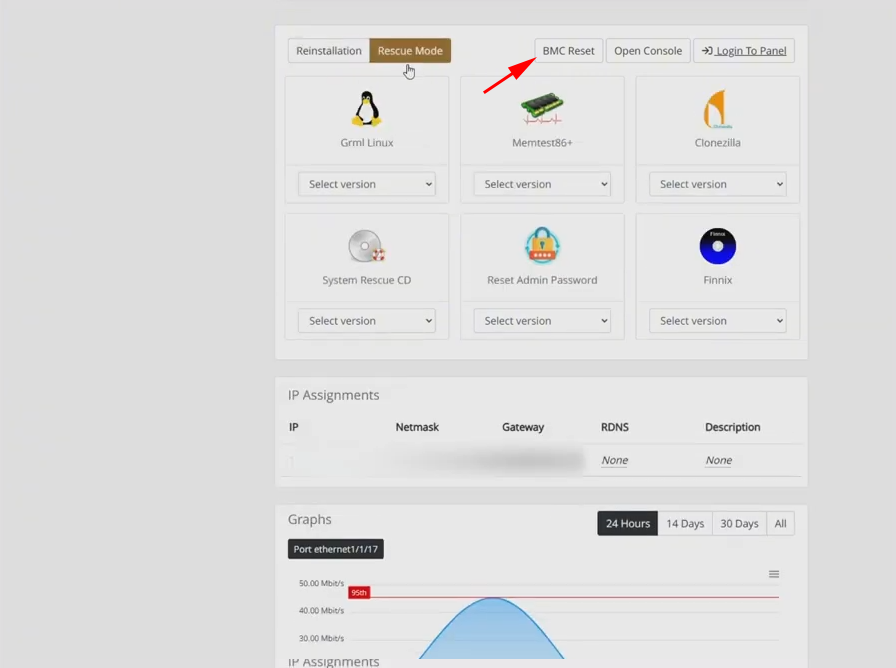
Within the reinstallation box, you can also choose to perform a BMC reset by clicking the “BMC Reset” button
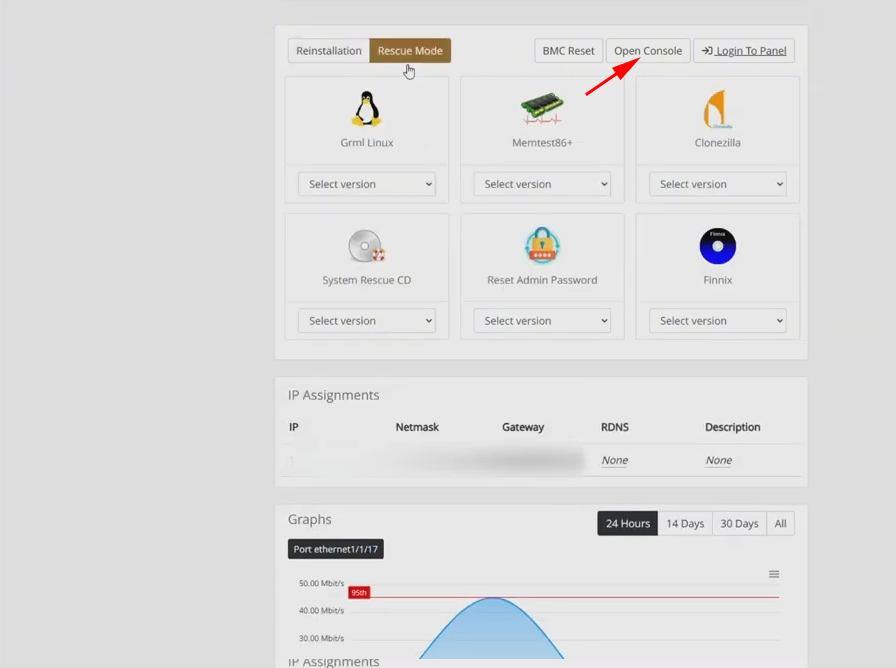
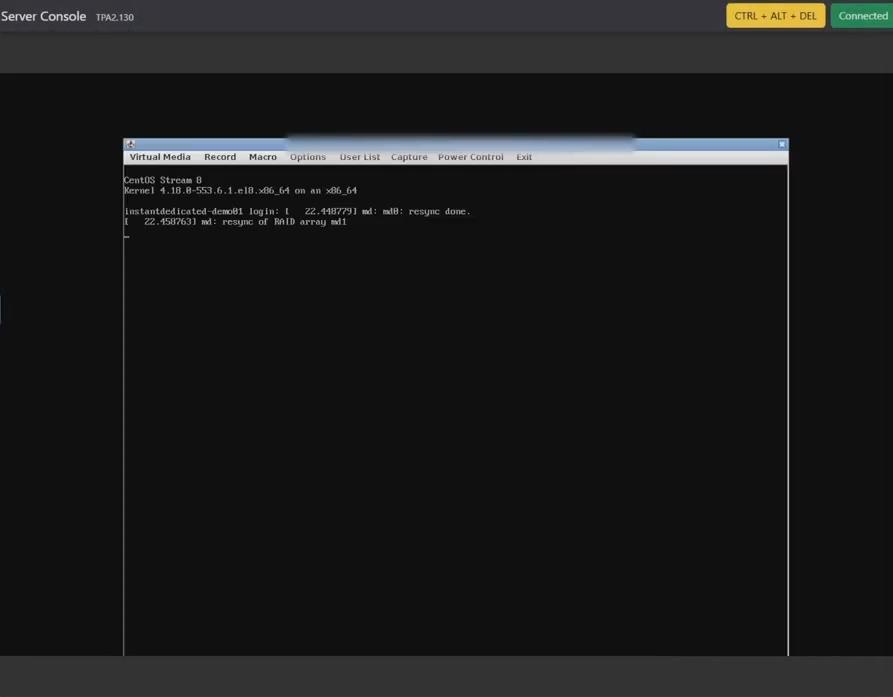
Or to launch the server management console by clicking “Open Console,”
Or log in to our dedicated server panel by clicking “Login to Panel.”

Scrolling down to the “IP Assignment” box, you’ll find your server’s IP address(es), subnet mask, and gateway. You also have the option to set your server’s IP RDNS record and add a short description if needed.

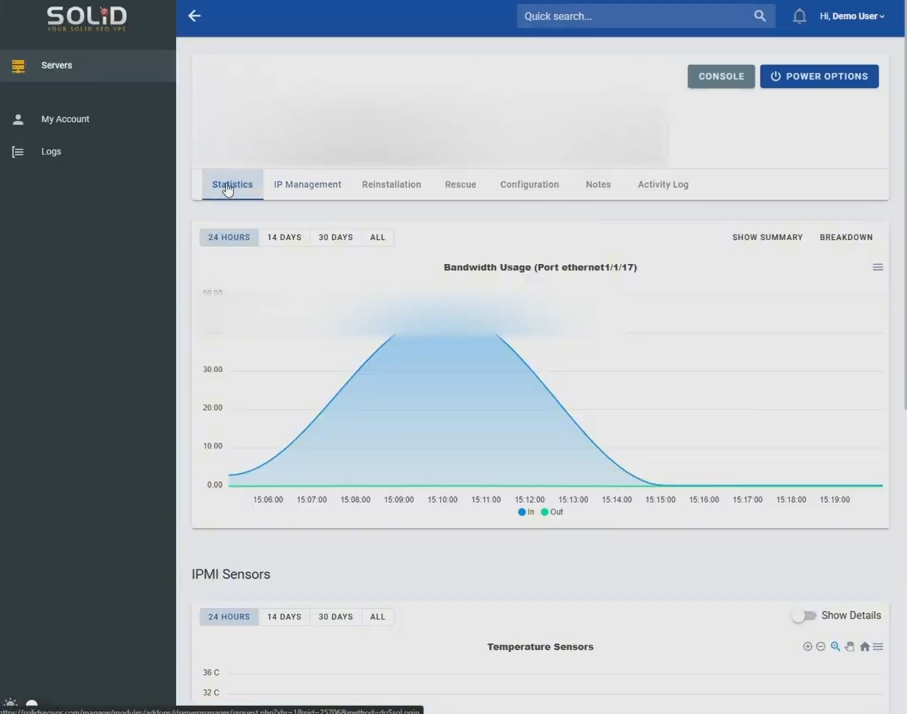
Finally, you can monitor your bandwidth usage directly from the “Graphs” section
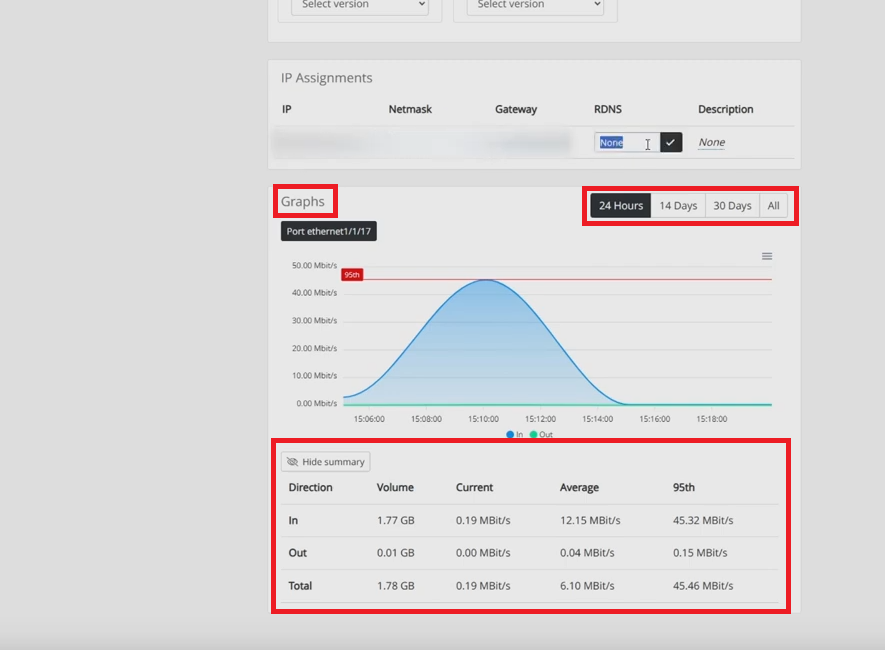
Along with your usage across various time period tabs.