Mounting a custom ISO (International Organization for Standardization) image on your dedicated server is a common task when you need to install a new operating system, run custom recovery tools, or deploy specific server configurations.
By using the management console provided by your hosting provider, you can mount the ISO image remotely without needing physical access to the server.
In this article, we’ll walk you through the steps to mount a custom ISO through the management console for your dedicated server.
Prerequisites
Before we dive into the steps, ensure you have the following:
- A bootable custom ISO image that you want to mount.
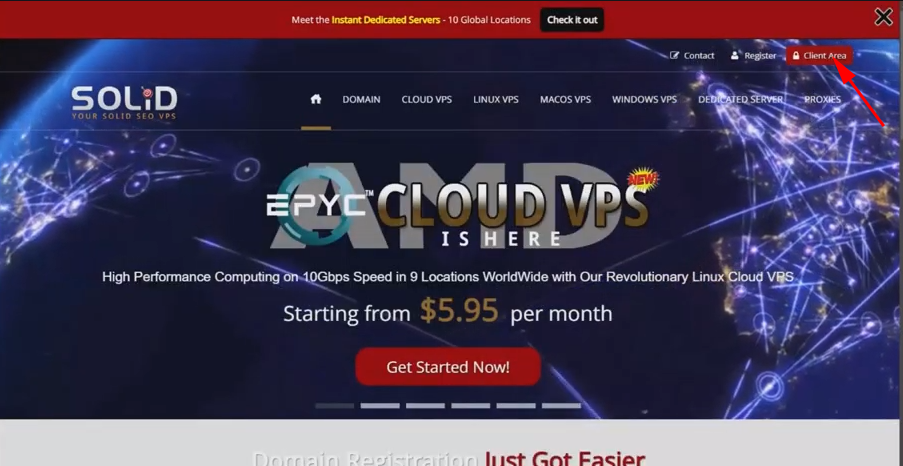
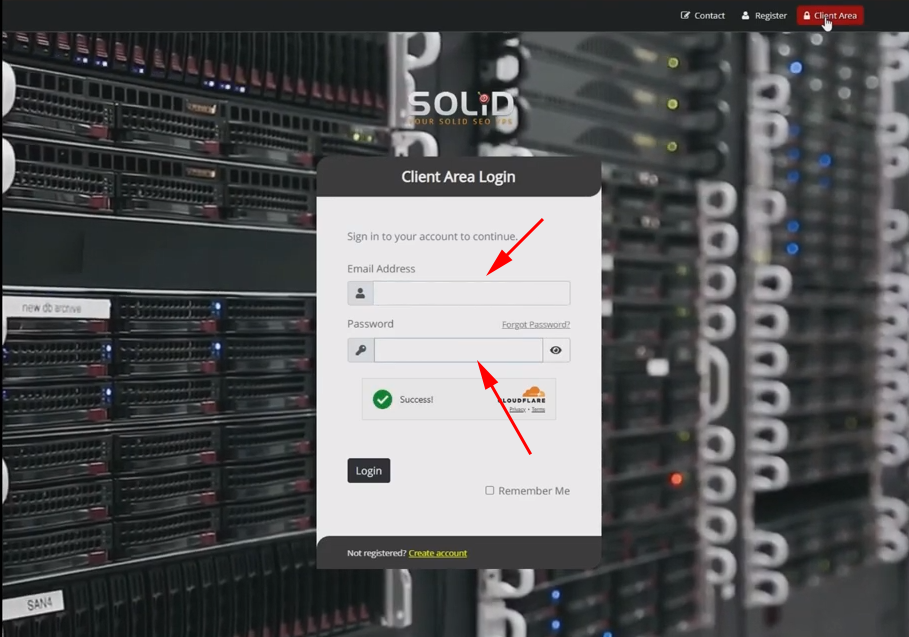
Step 1: Login to Your Account
Begin by logging into your account.
Click on the red button at the top right corner of our homepage.
On the login page, enter the username and password you used to sign up
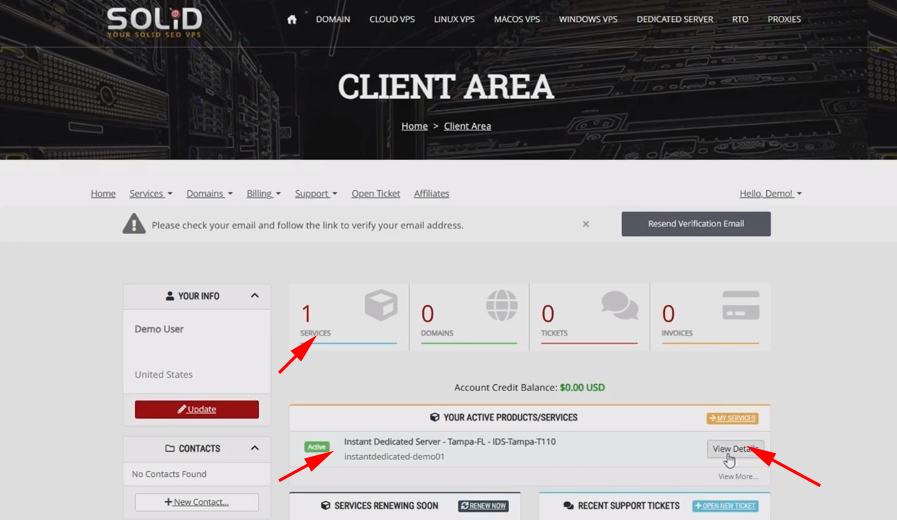
Step 2. Select The Server From The Service Page.
Once you’re logged in, select the server from your active Products/Services.
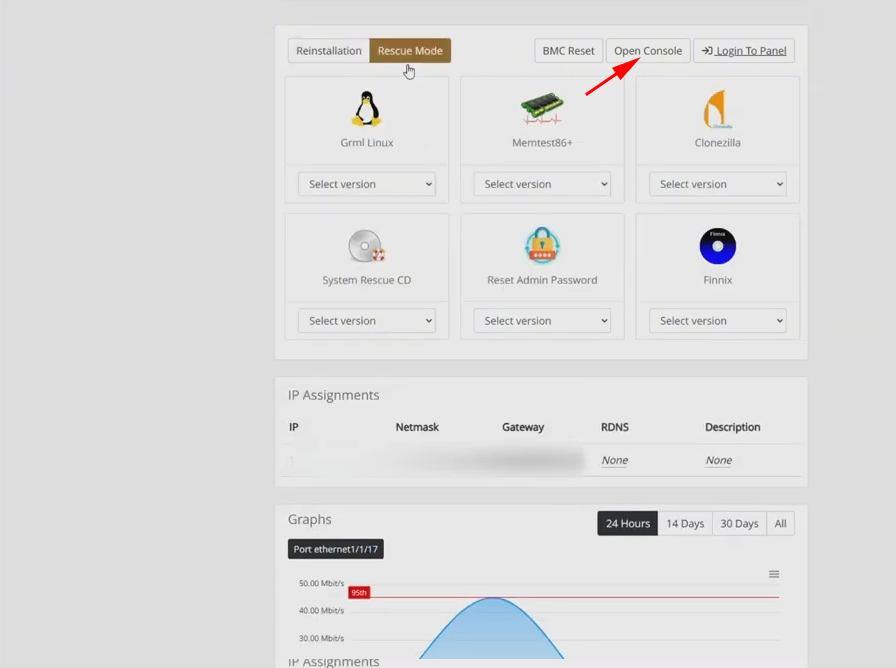
Step 3. Launch The Management Console
Scrolling down to the “Reinstallation” tab, launch the server management console by clicking “Open Console,”
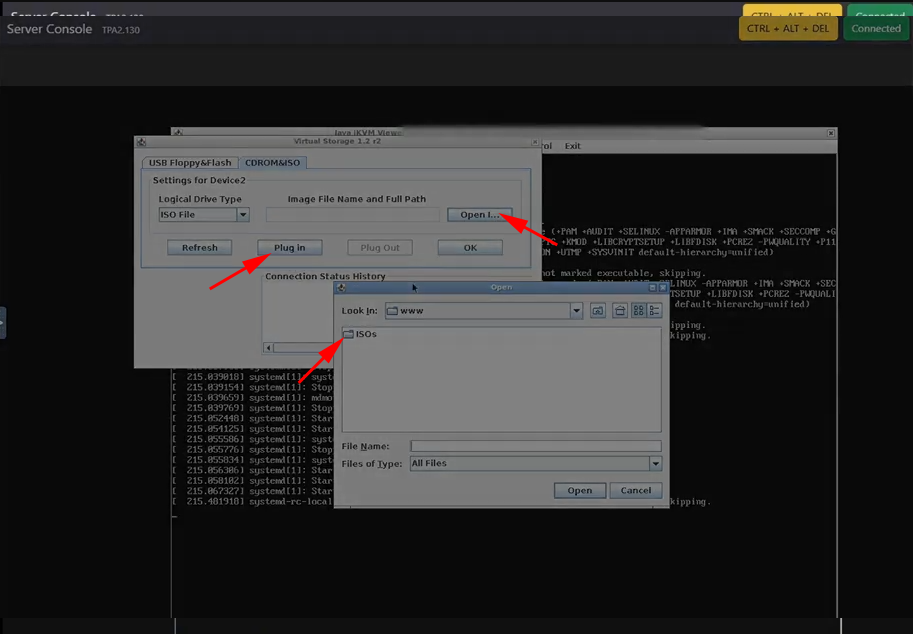
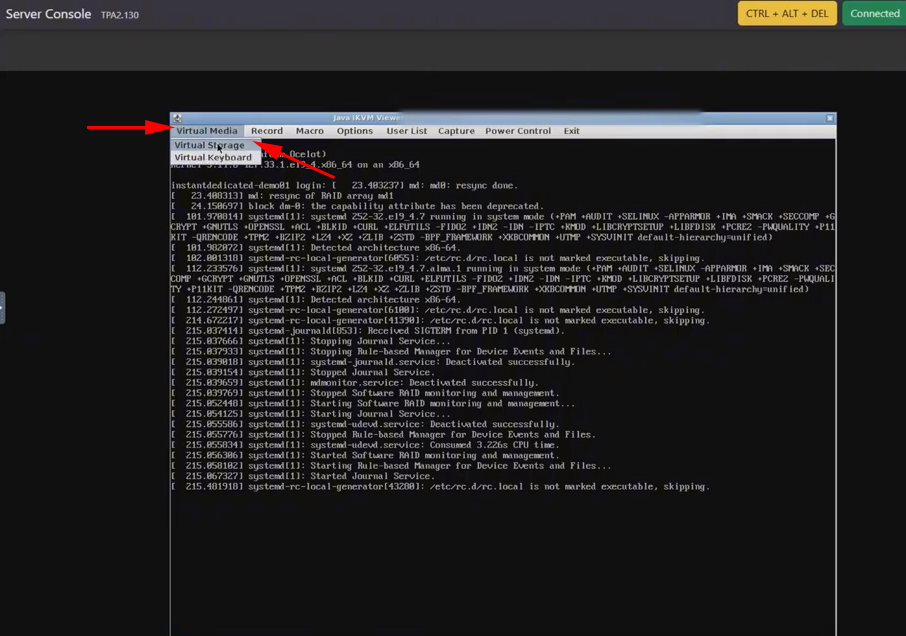
Step 4. Mount the ISO
On the “Virtual Media” drop-down menu, select “Virtual Storage“.
In the CD-ROM/ISO tab, go to the Logical Drive Type section and choose ISO image from the drop-down menu.
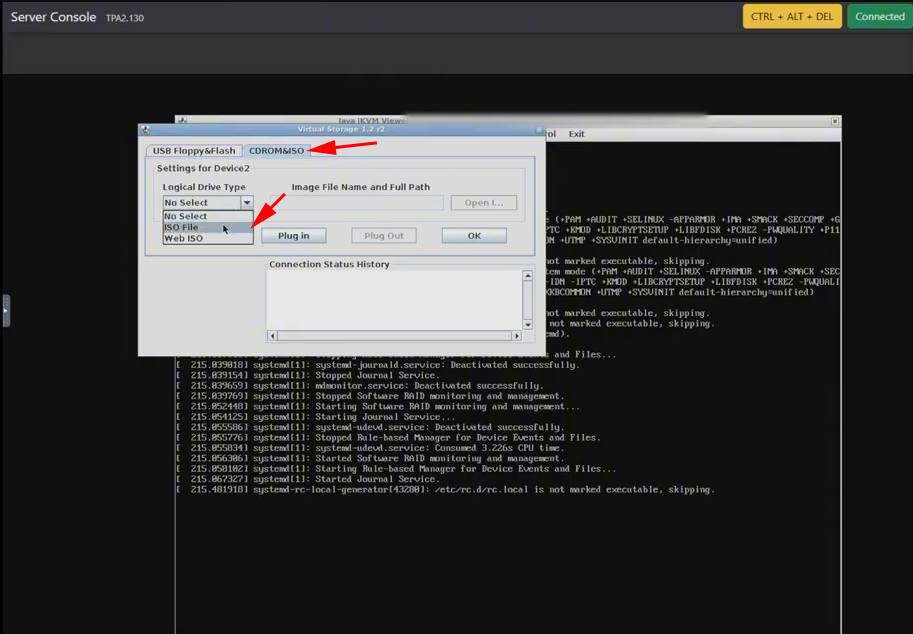
Click on “Open ISO Folder” to locate and select the ISO you wish to mount.
Once selected, click “Plug-in” to mount the ISO to the server console.