Managing your Linux Cloud VPS has never been easier, thanks to the user-friendly panel and streamlined access from the client area.
This guide walks you through how to access the end-user features in your Linux Cloud VPS panel from the client area and end user “Full Guide”, enabling you to handle essential functions efficiently.
Getting Started – Client Area Panel
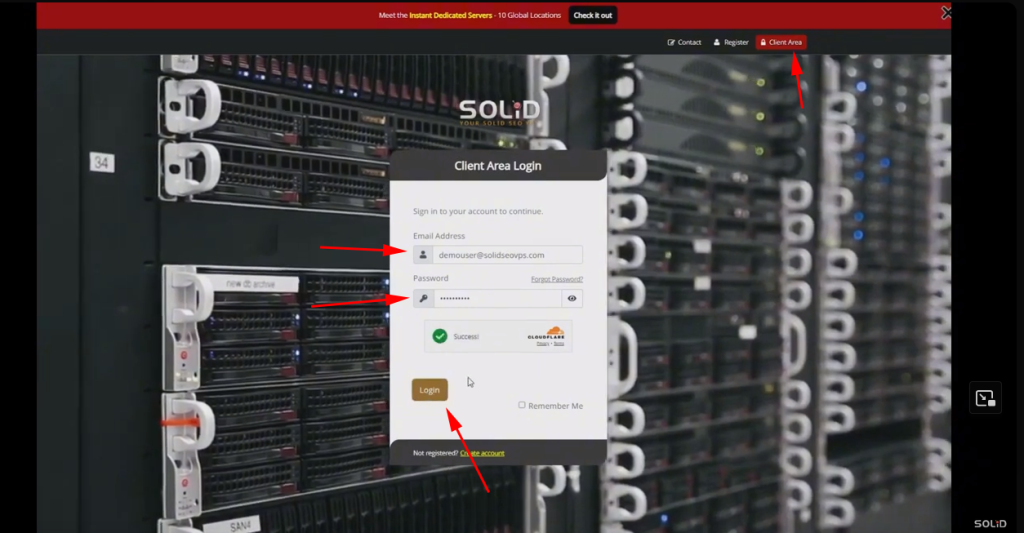
Step 1: Log in to the Client Area
1- Open your Web Browser: Start by launching your preferred web browser.
2- Visit the Client Area URL: By clicking on the client area login button located on the top right corner
.3- Enter Your Credentials: Log in with your username and password.
Step 2: Navigate to the Linux Cloud VPS
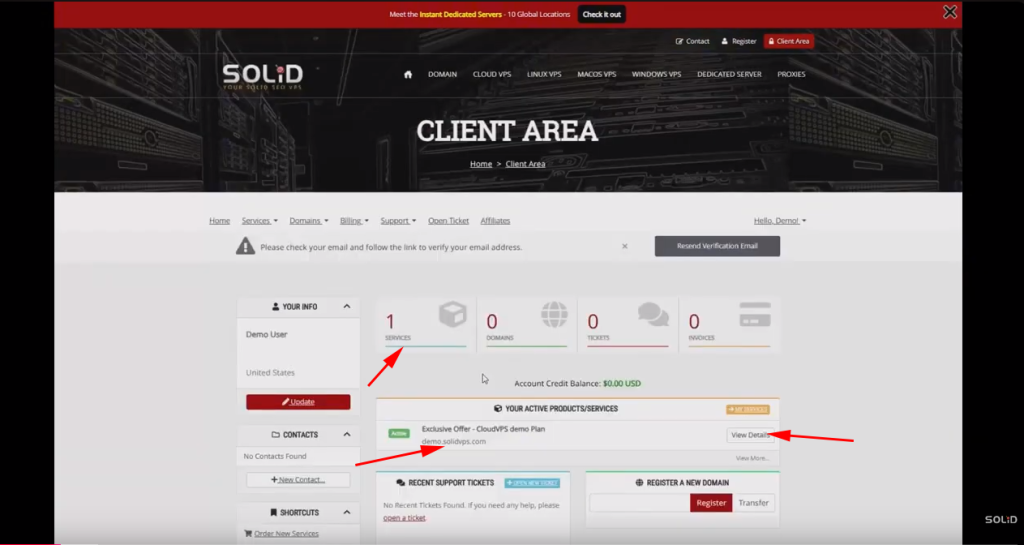
- Find the Services Tab: Look for a tab or section labeled “Services” or “My Services.”
- Select Your Linux Cloud VPS Plan: Click on the service related to your Linux Cloud VPS. This will open up specific details about your VPS plan and configuration.
This page displays an overview of your VPS status, including usage stats and basic information about the plan.
Step 3: Access the Linux Cloud VPS ClientArea Panel
1- Locate the VPS Panel Option: Within the VPS service details, look for an option like “View Details”
2- Click to Enter the Panel: Selecting this option should automatically open the Linux Cloud VPS client area panel.
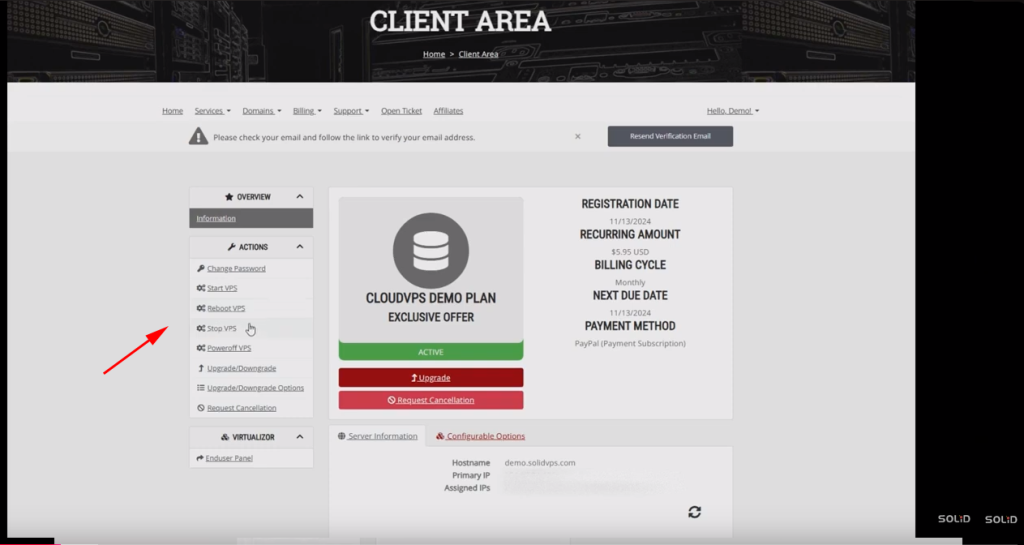
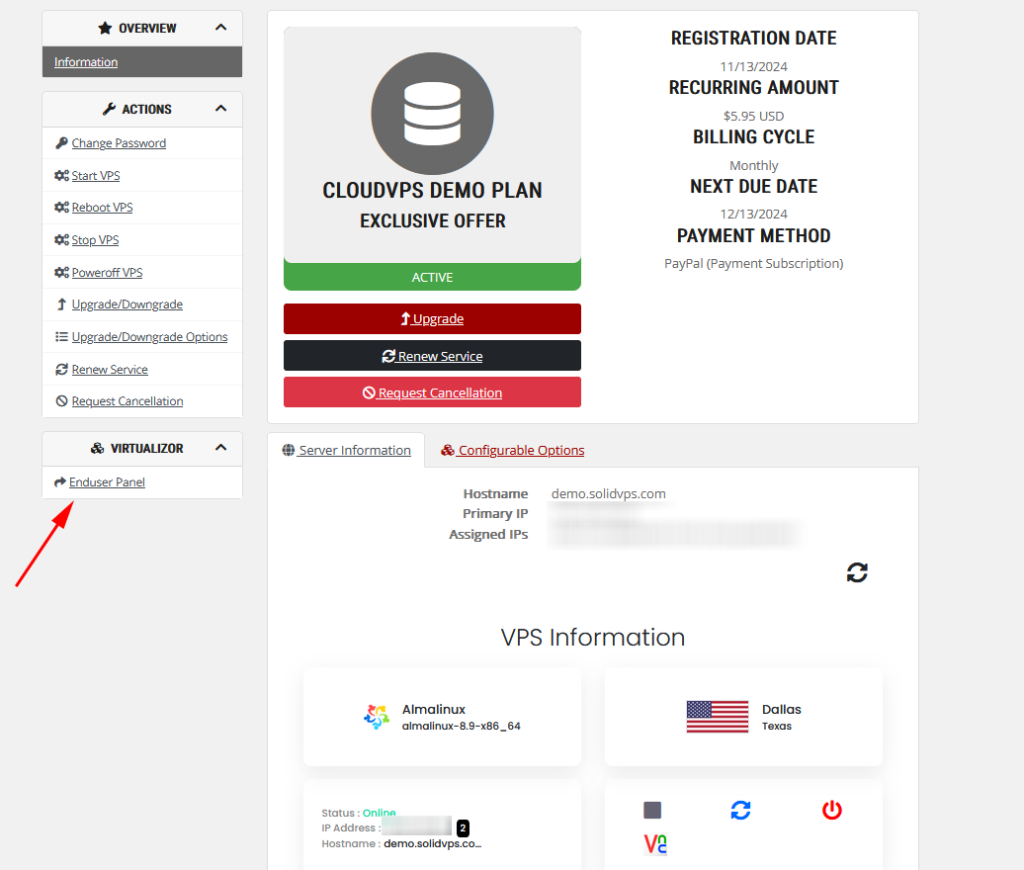
On the left side, you’ll find quick action buttons to
- Change the VPS password
- Start
- Reboot
- Stop
- Power off the VPS.
- There are also options to upgrade or downgrade the service
- Cancel the service if needed
- And access the Enduser panel link.
Under the Server Information tab, you’ll find the server hostname, primary IP, and assigned IPv4 and IPv6 addresses.
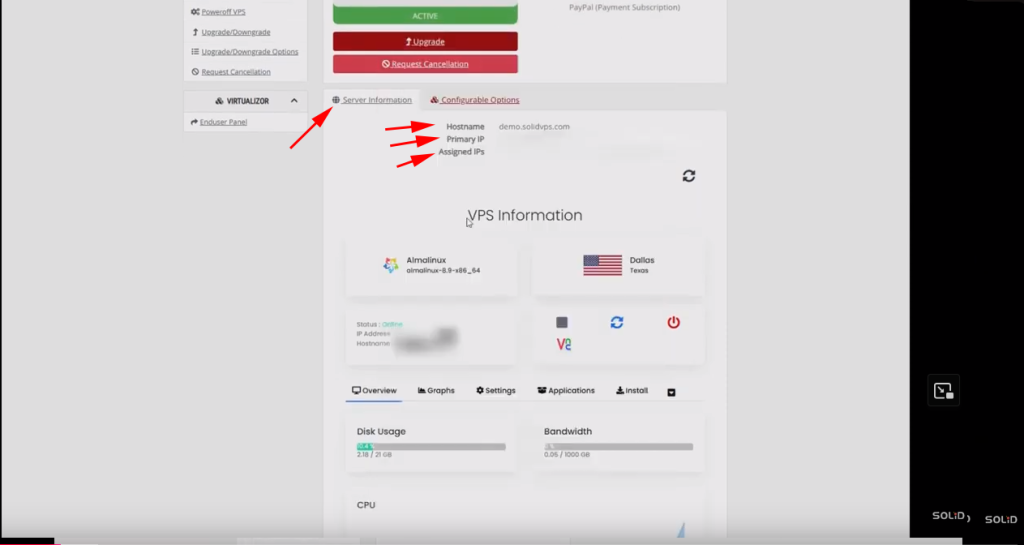
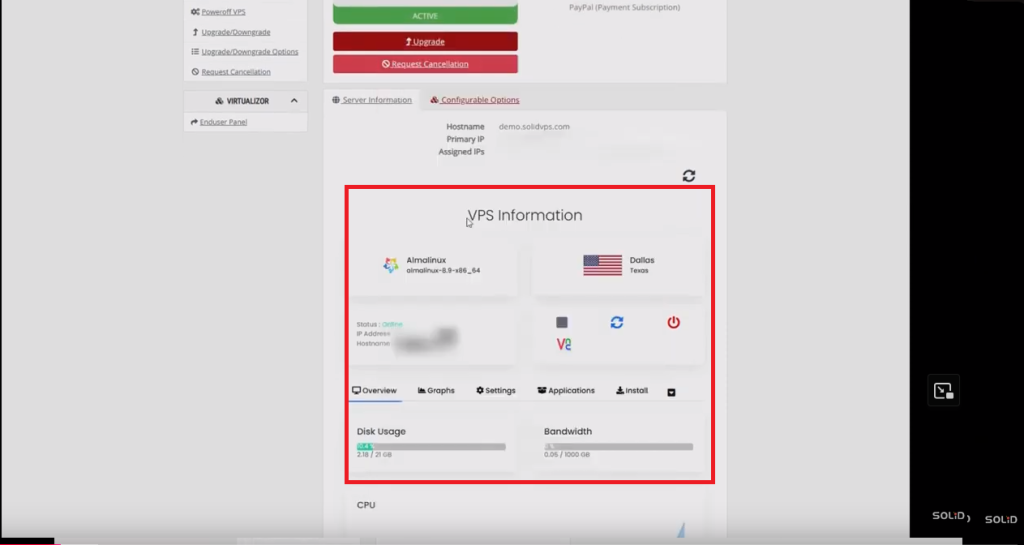
Under the VPS Information section:
The left box displays the installed Linux distribution and its version
The right box shows the service location, including the city and state.
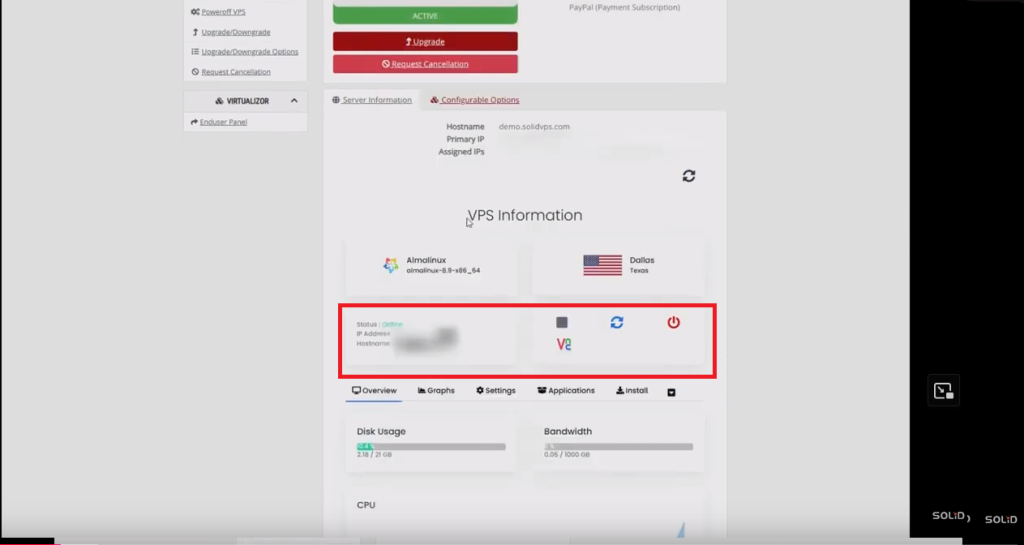
As you scroll down, you’ll find
The left box shows the server’s power status, IP address, and hostname.
The right box provides buttons for powering off, restarting, stopping the server, and launching the VNC console.
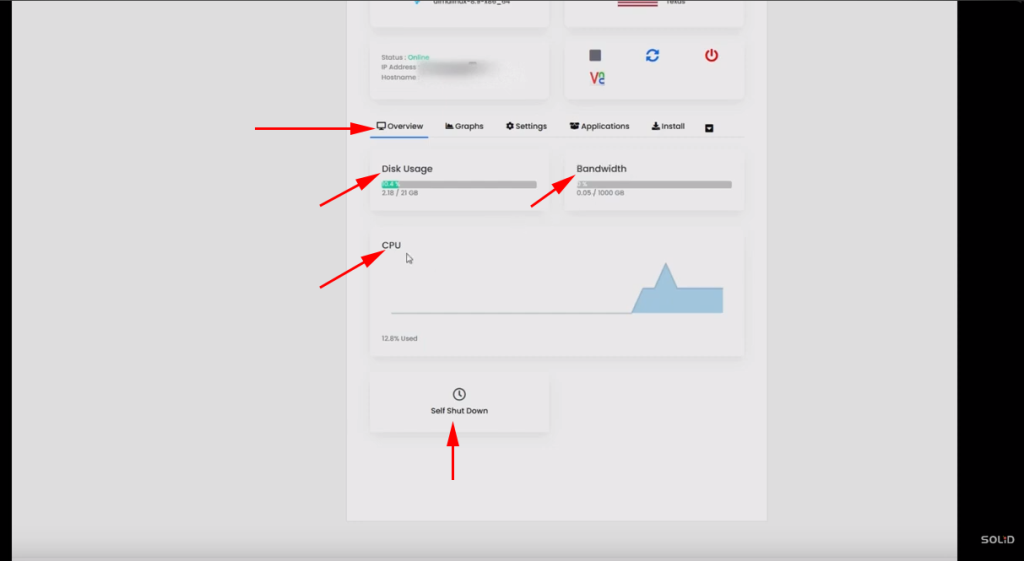
In the “Overview” tab, as you scroll down, you’ll find key server statistics, including disk usage, bandwidth usage, and CPU usage.
There is also an option to set a self-shutdown timer if needed.
The “Graphs” tab provides detailed information on bandwidth usage and server resource statistics, including CPU usage, all presented in a graphical format.
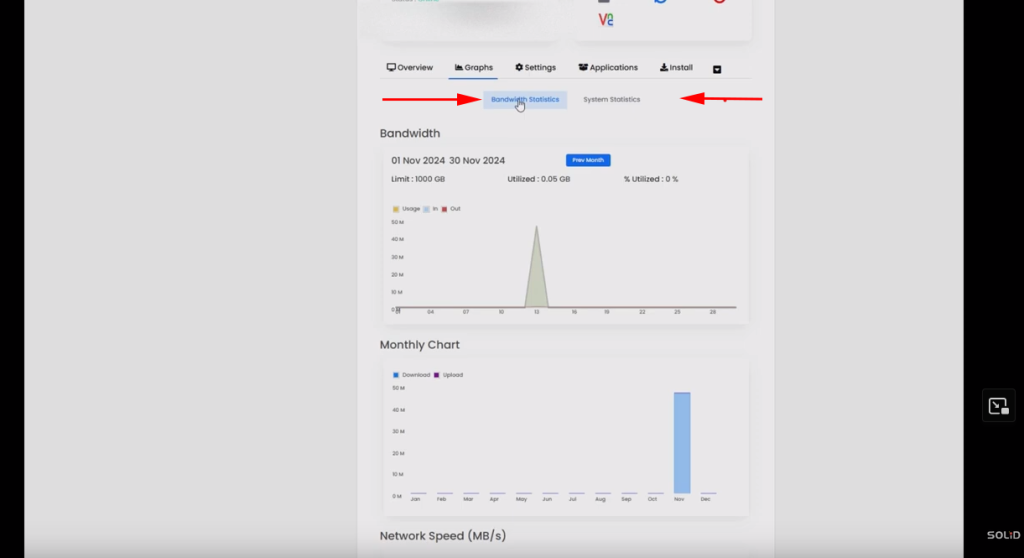
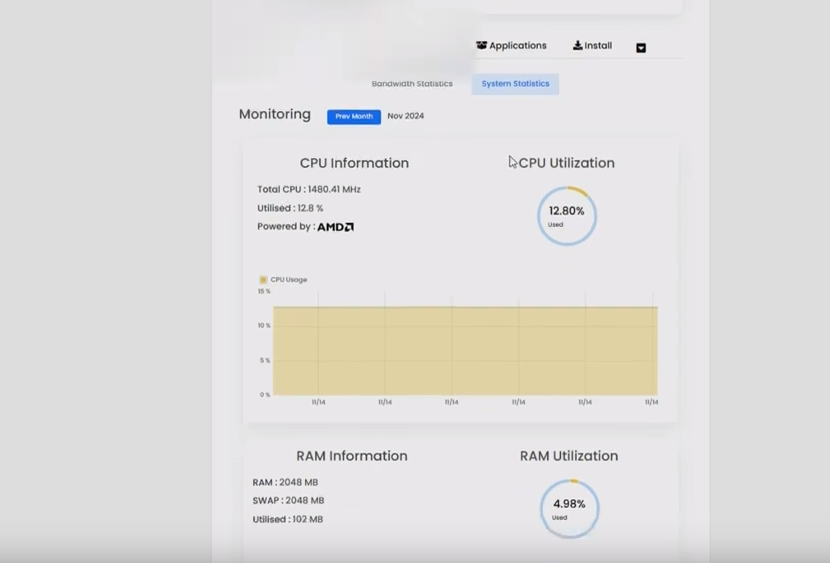
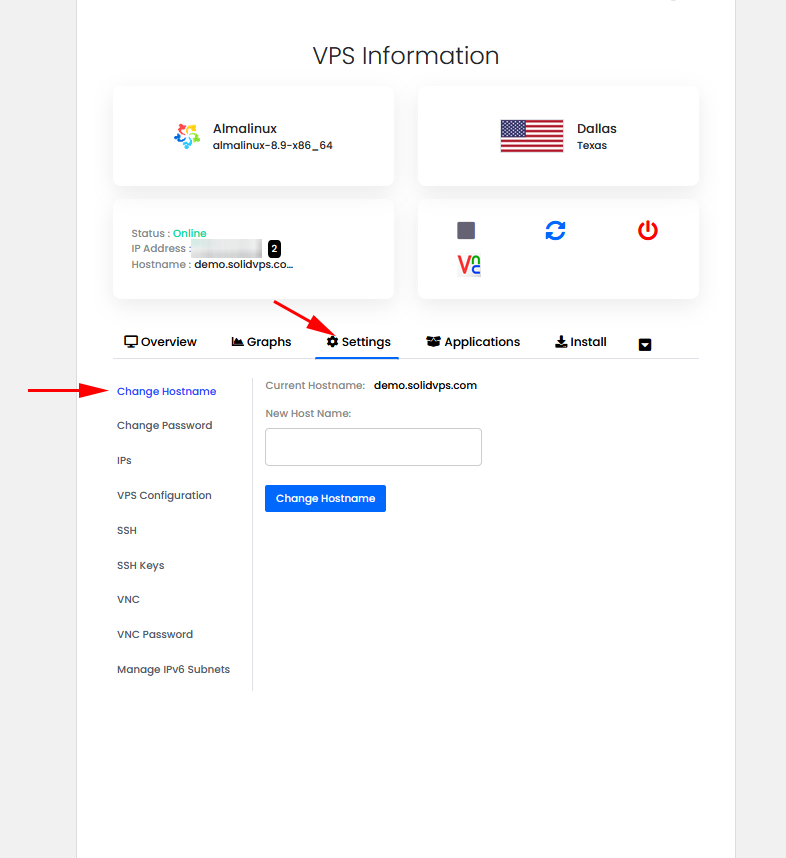
The “Settings” tab provides options to manage the VPS such as:
Change Hostname
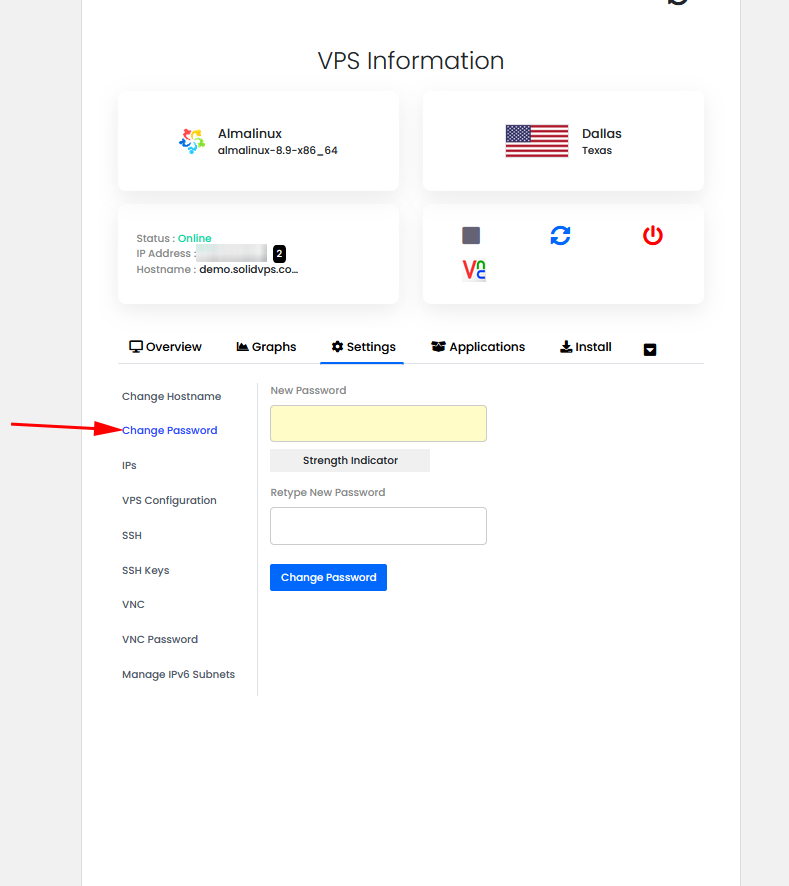
Change the Password
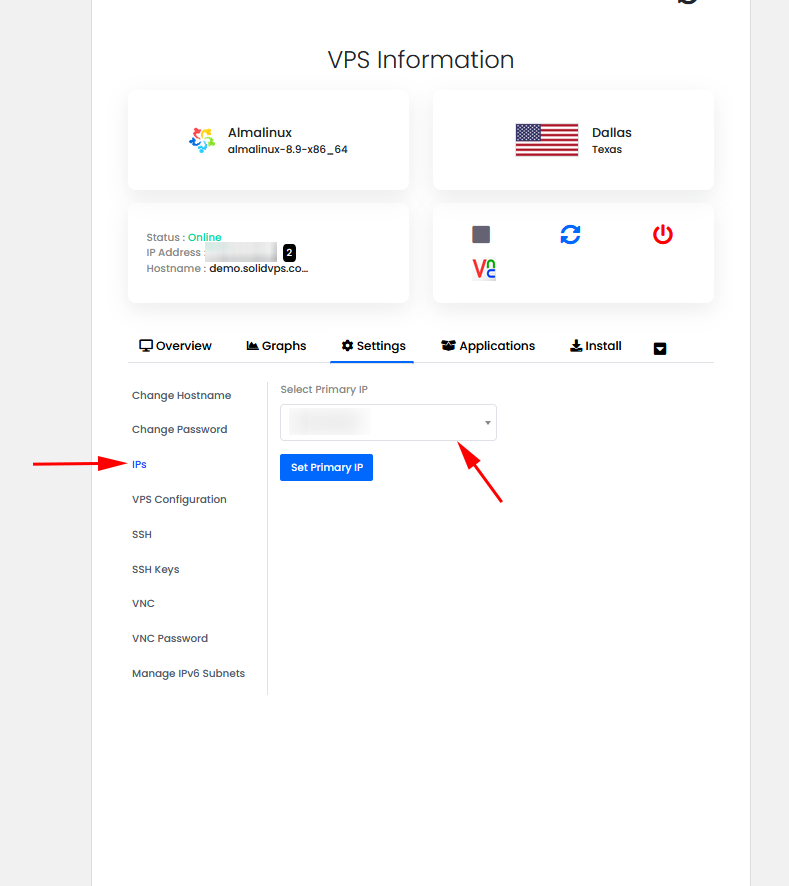
Manage IPs
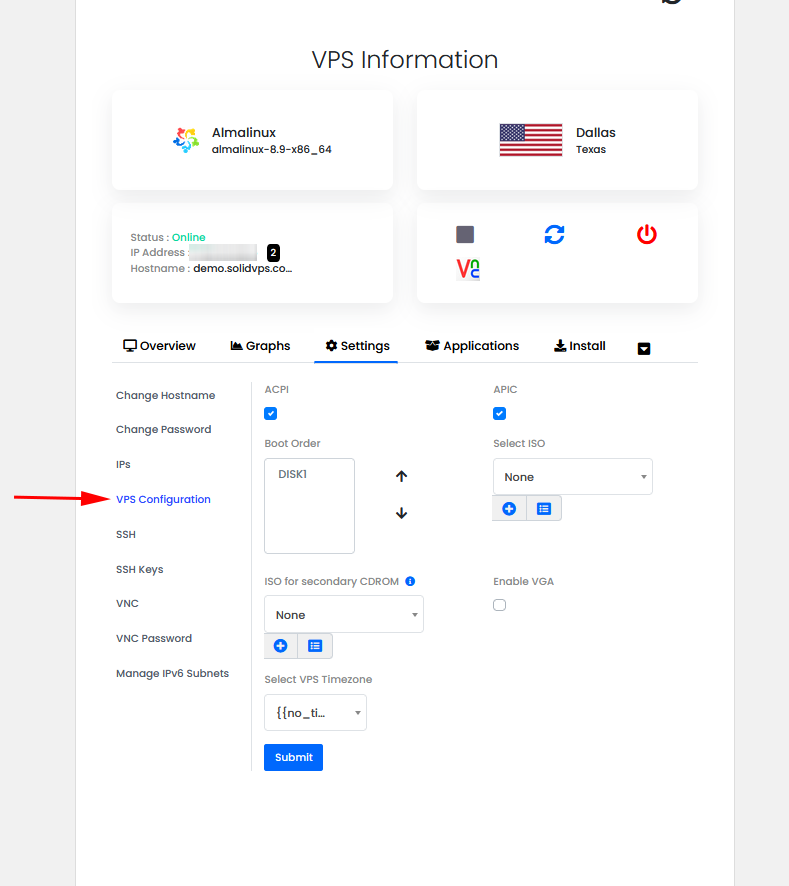
VPS Configuration
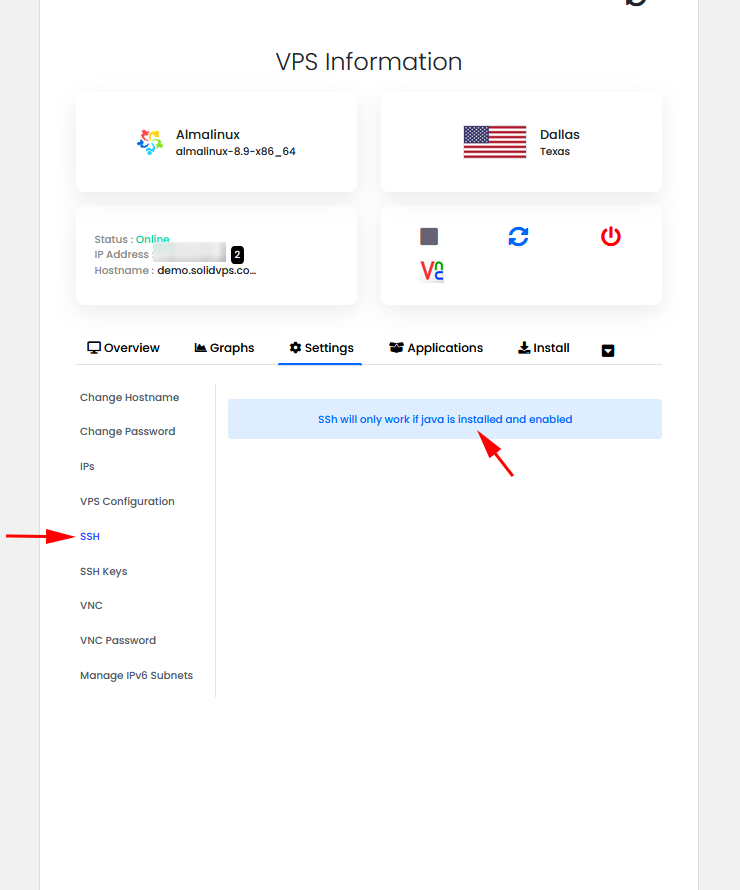
Manage SSH Keys
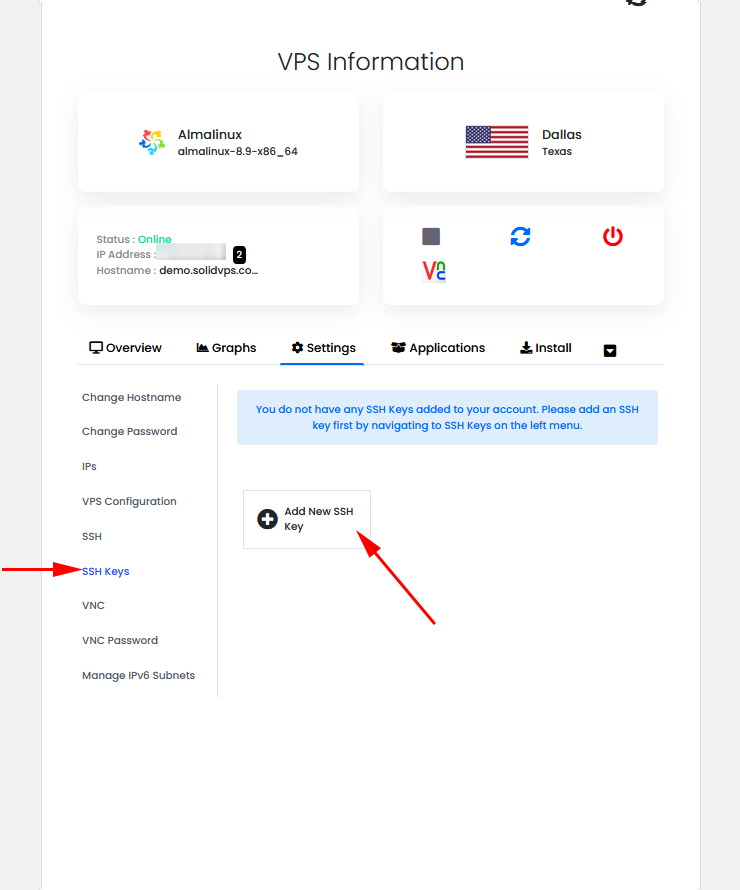
Add SSH Keys
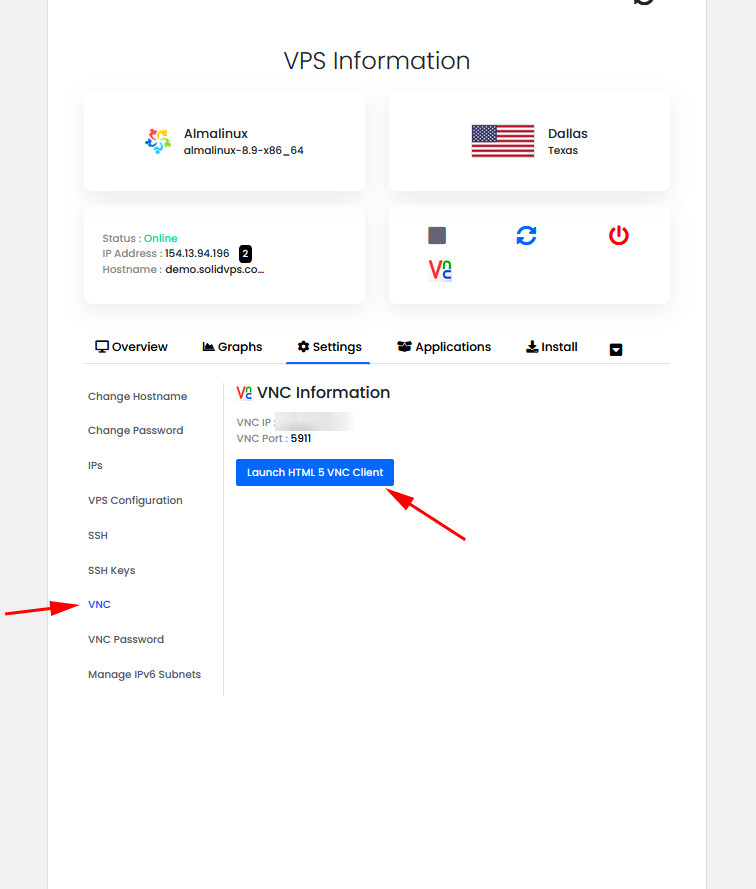
Launch VNC Console
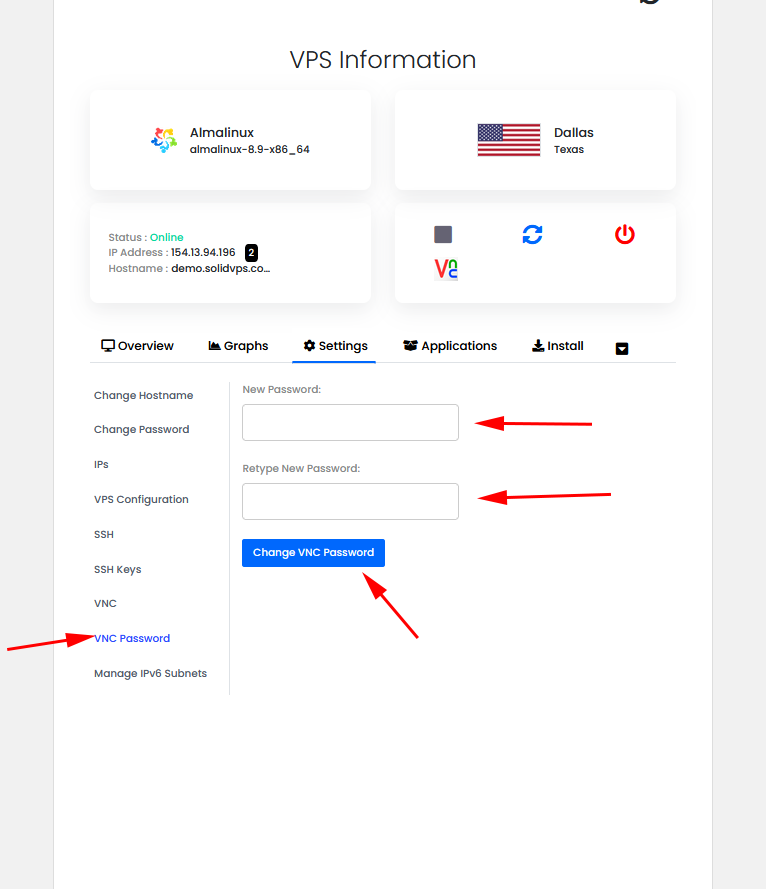
Change VNC Password
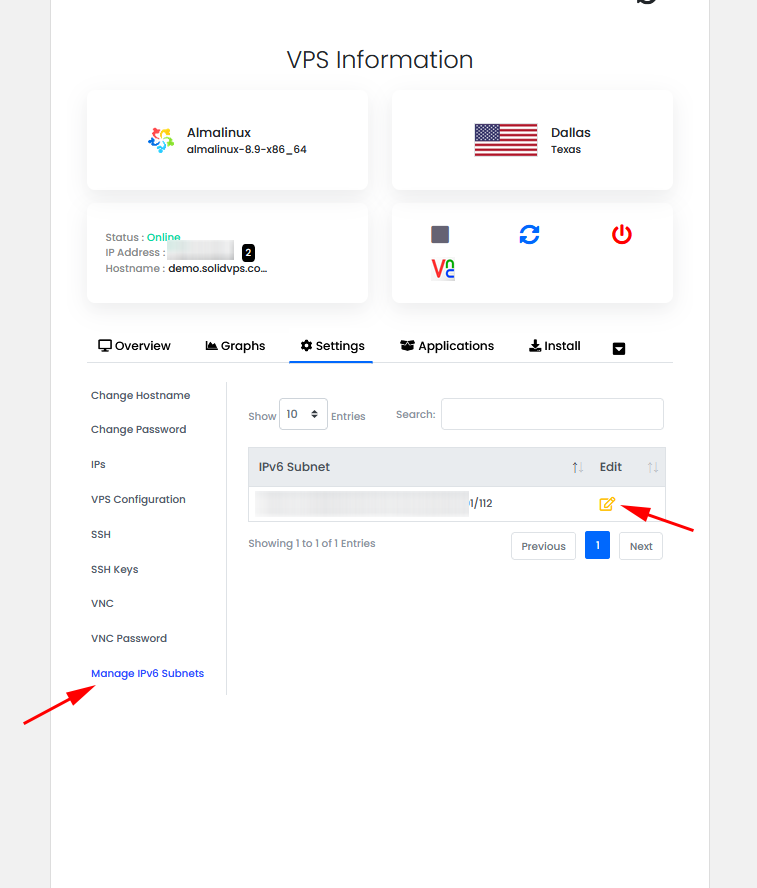
Manage IPv6 Subnets
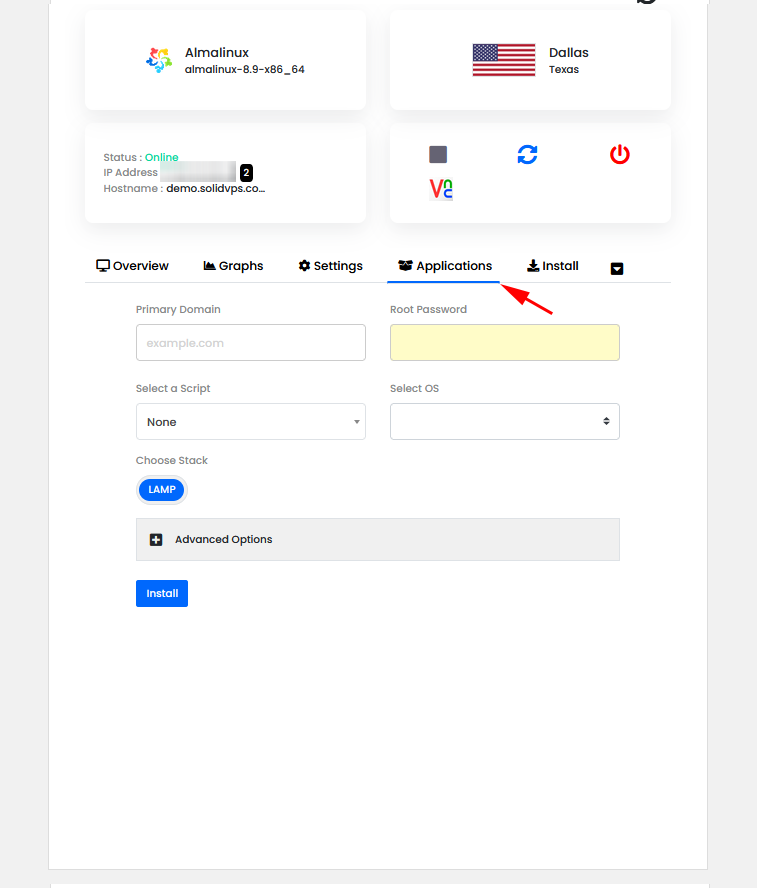
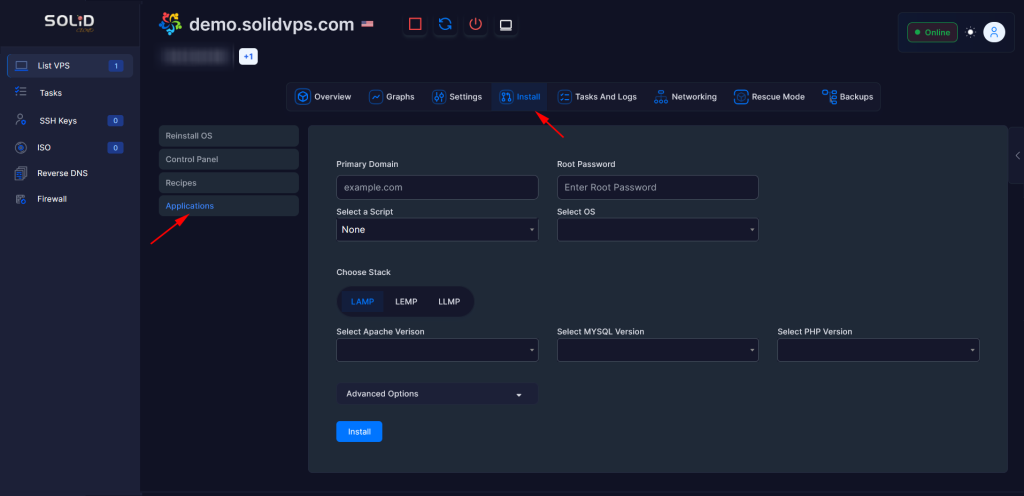
The “Applications” tab provides options to manage all your application deployments and scripts:
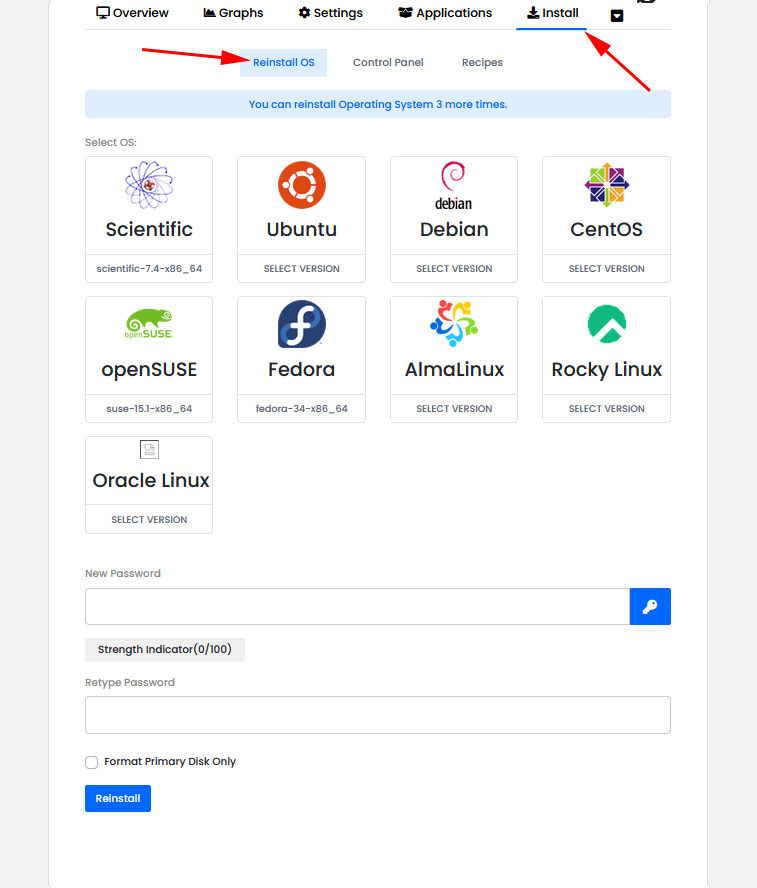
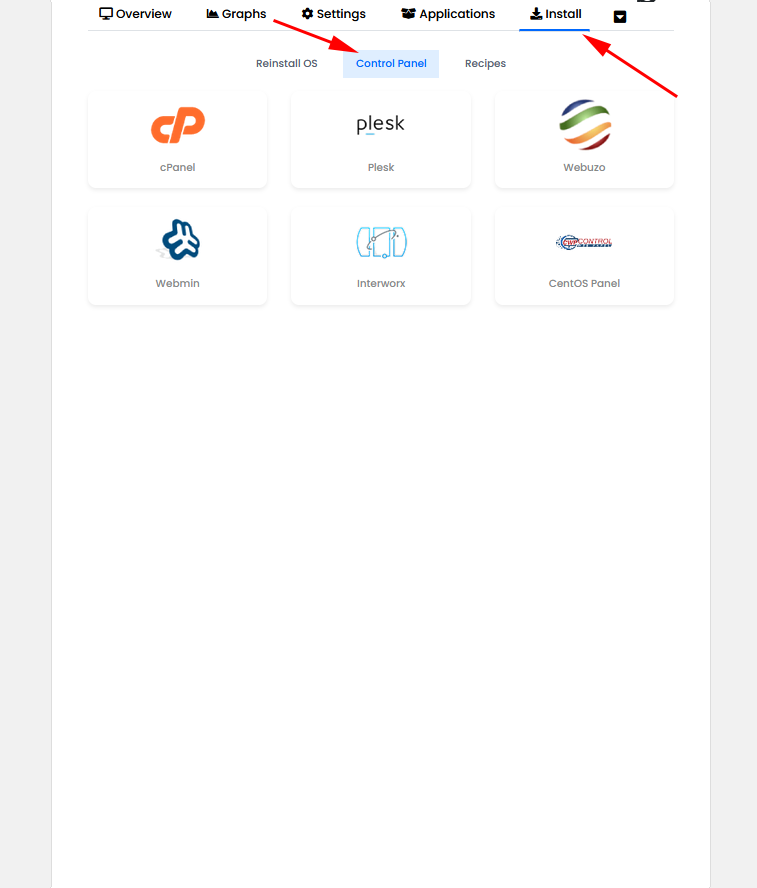
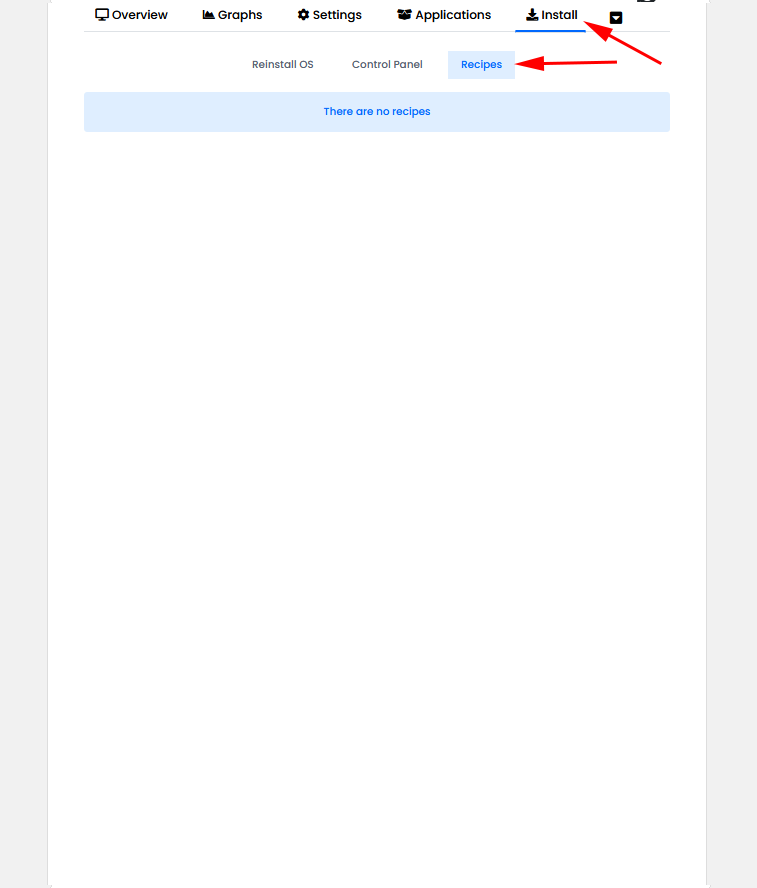
The “Install” tab provides options to Reload OS, install a Control Panel and to add a recipe if needed.
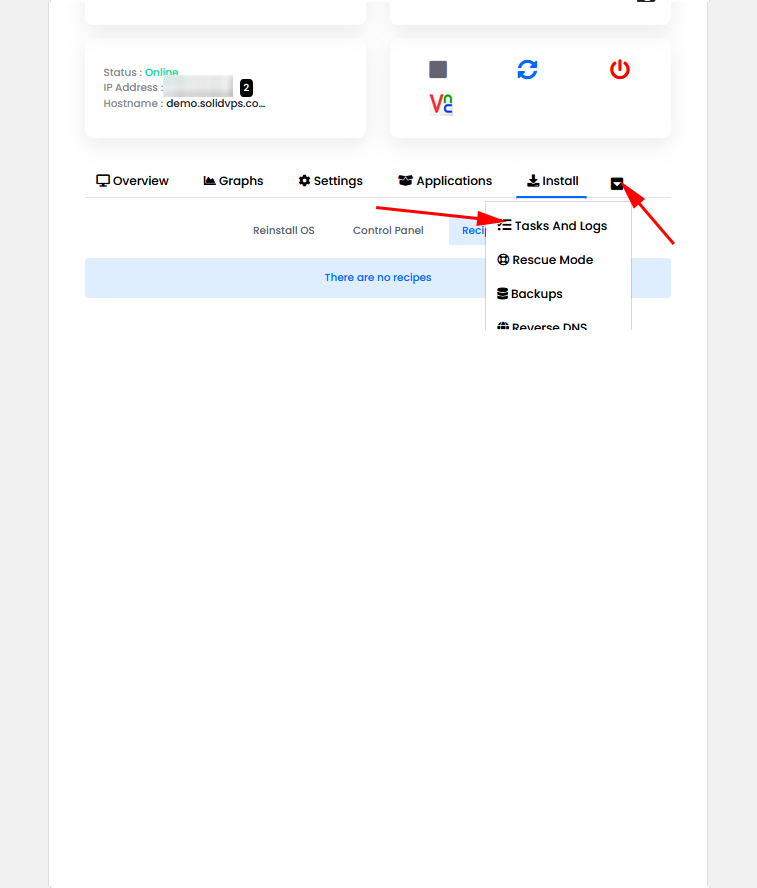
The “Tasks and Logs” tab provides detailed information on all completed tasks and logs related to your servers.
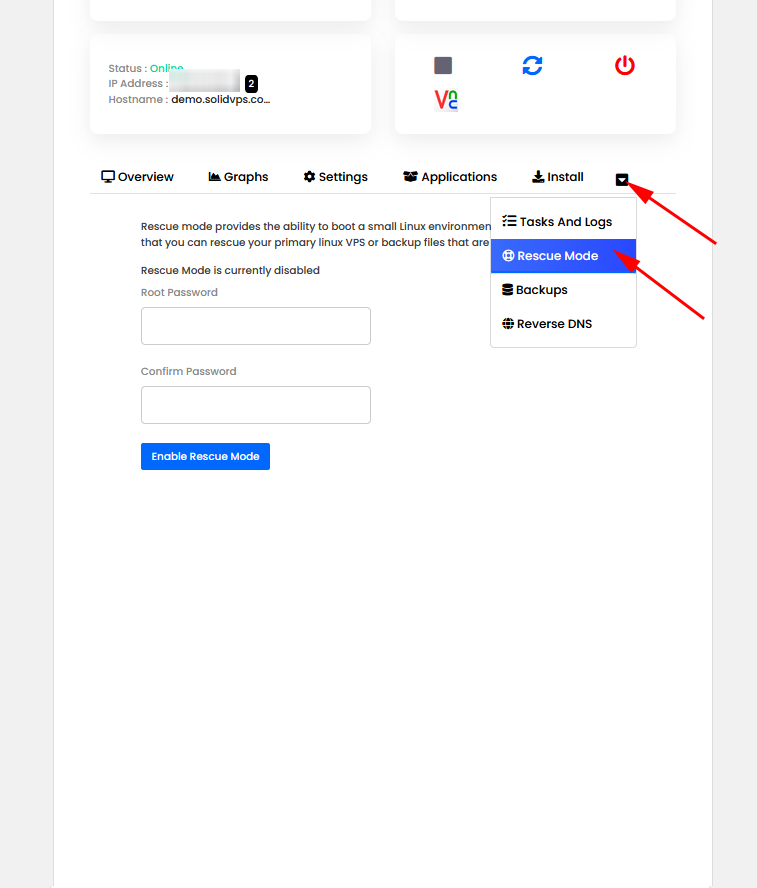
The “Rescue mode” tab allows you to boot your VPS into rescue mode for troubleshooting and recovery.
In this mode, you can access your server even if it is unresponsive, allowing you to perform tasks such as fixing configuration issues, recovering lost files, or repairing system errors.
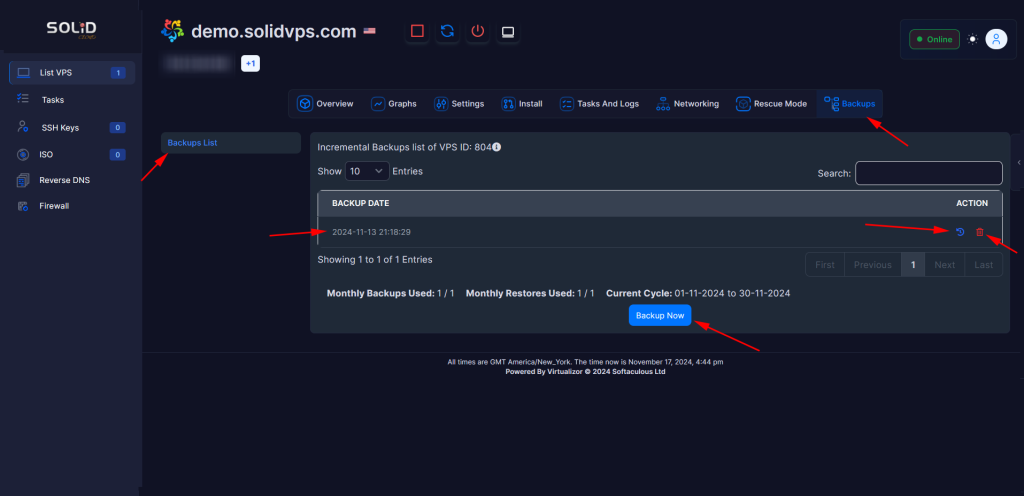
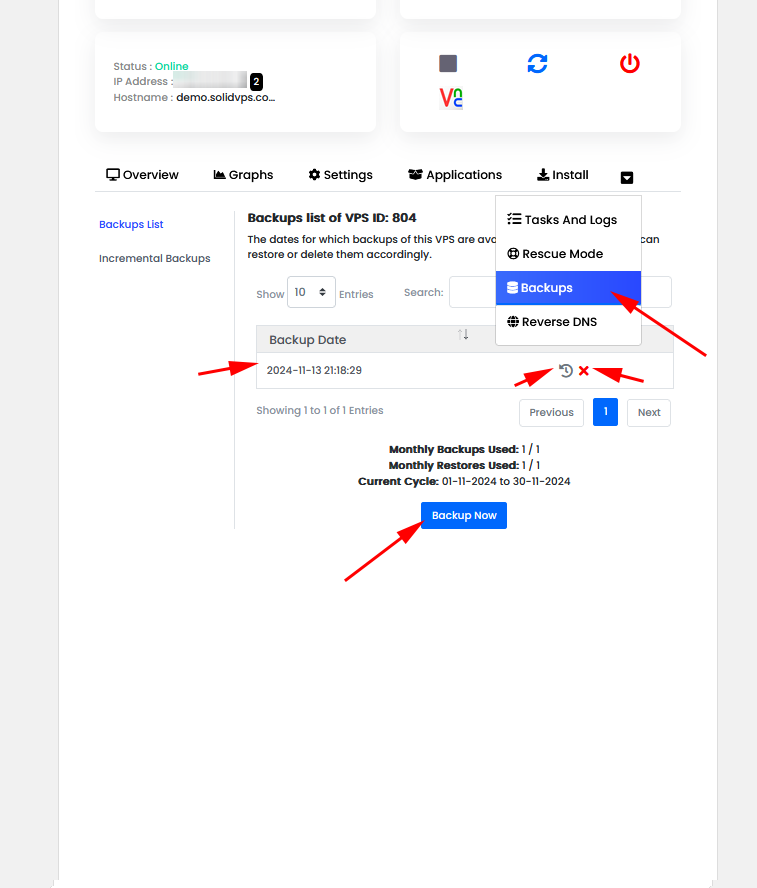
The “Backup” tab allows you to create, manage, and restore backups of your VPS.
You can use this feature to ensure your data is secure and easily recoverable in case of any issues. It offers options for creating full or partial backups, as well as restoring from previously saved backups.
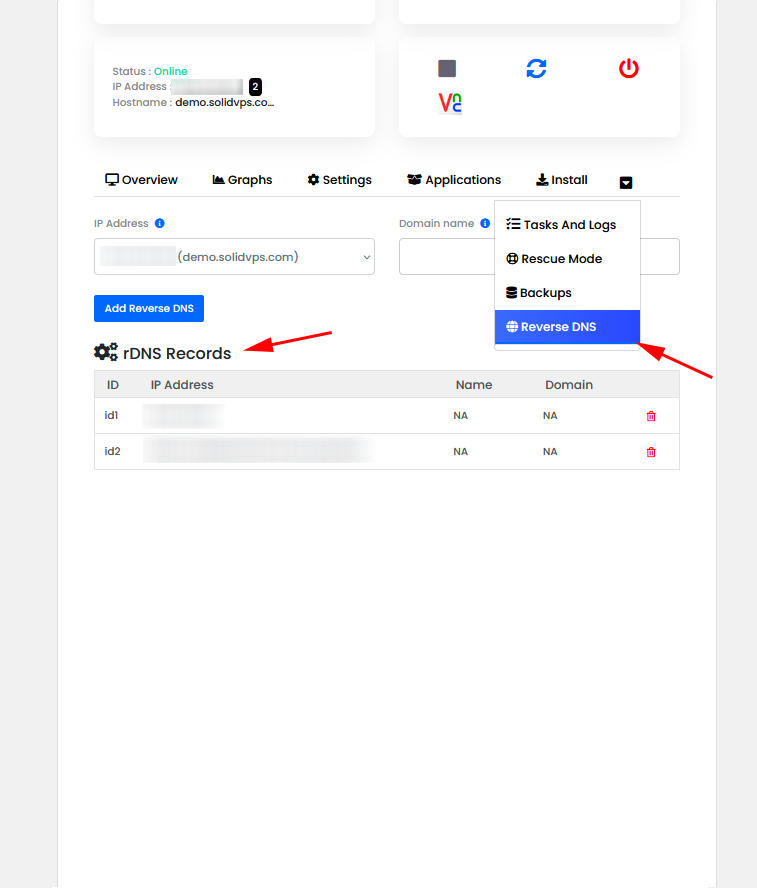
The “Reverse DNS” tab allows you to configure reverse DNS (rDNS) for your server’s IP addresses. This feature is essential for ensuring proper email delivery and improving your server’s reputation by associating your IP address with a domain name.
You can set up and manage reverse DNS records to match your server’s hostname or a custom domain.
Getting Started – Enduser Panel
The Enduser Panel is a powerful and user-friendly interface designed for managing your VPS (Virtual Private Server).
Whether you’re a novice or an experienced user, SolidVPS provides a streamlined experience that enables you to control various aspects of your server.
This article will guide you through the essential features and functions of the our Enduser Panel, helping you make the most out of your VPS hosting experience.
What is the SolidVPS Enduser Panel?
The Enduser Panel is the control panel provided by Virtualizor, a VPS and dedicated server management platform.
It offers users an intuitive dashboard where they can manage their virtual private servers, access server stats, modify settings, and perform crucial tasks like rebooting, shutting down, and reinstalling the OS. The panel is designed to be simple yet powerful, offering all the necessary tools to manage your VPS.
How to Access the Enduser Panel
1- From Client Area
Navigate to the “My Services” Section
- Once logged in, locate and click on the “My Services” tab
- This section will list all the services that you have including any active VPS services.
Select Your VPS Service
- In the “My Services” section, find the VPS hosting service you wish to manage.
- Click on the VPS service to open its details page.
Access the Enduser Panel
- On your VPS service details page, on the top left side menu, you should see a button labeled “Enduser Panel”
- Click this link or button to be redirected to the Enduser Panel for that specific VPS.
2- From Welcome Email
In your welcome email, you will find the access details for our Enduser Panel, including the panel address, your login username, and password.
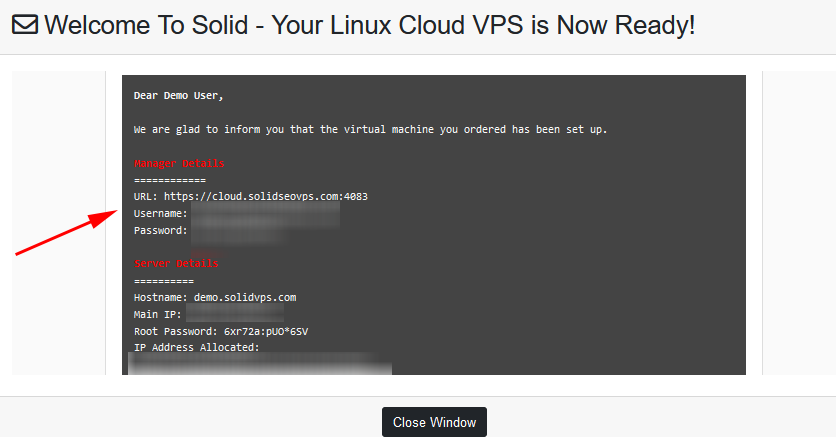
Access the Linux Cloud VPS Enduser Panel
This panel is where you’ll find all the end-user features for your VPS.
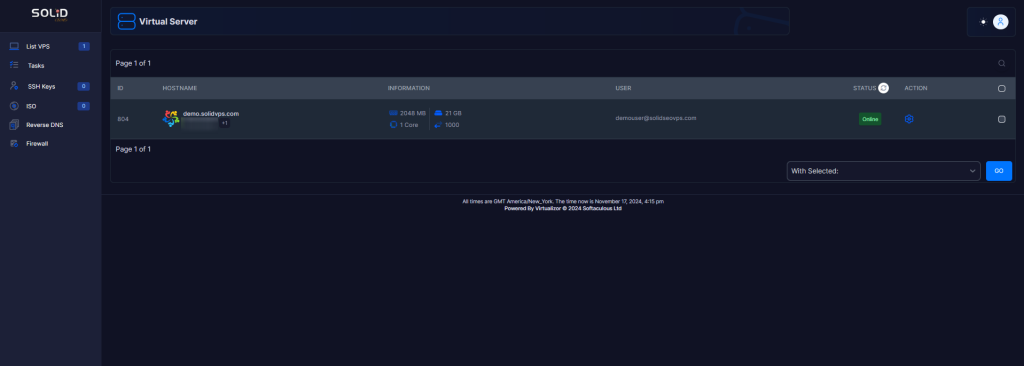
Starting with the left menu, you will find
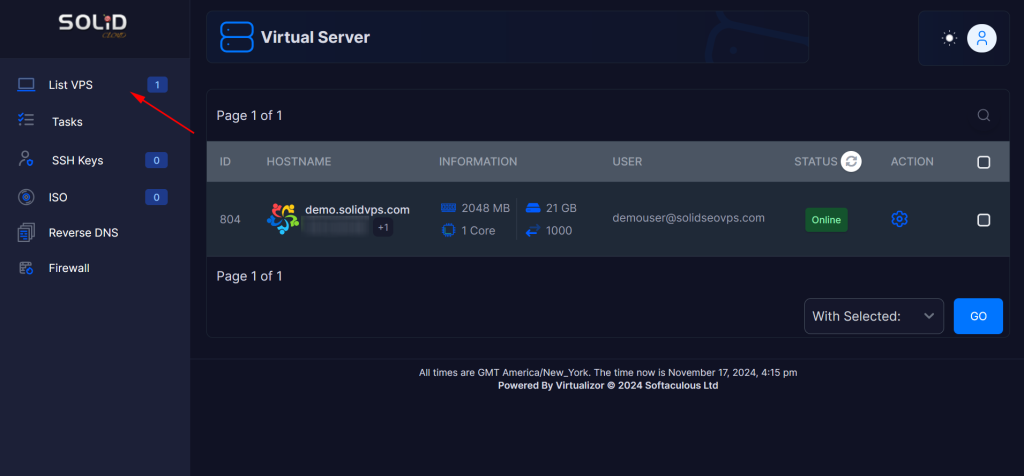
List VPS
Under “List VPS” you’ll find all the VMs plans you have with us, all conveniently listed within the same end-user panel for easier management.
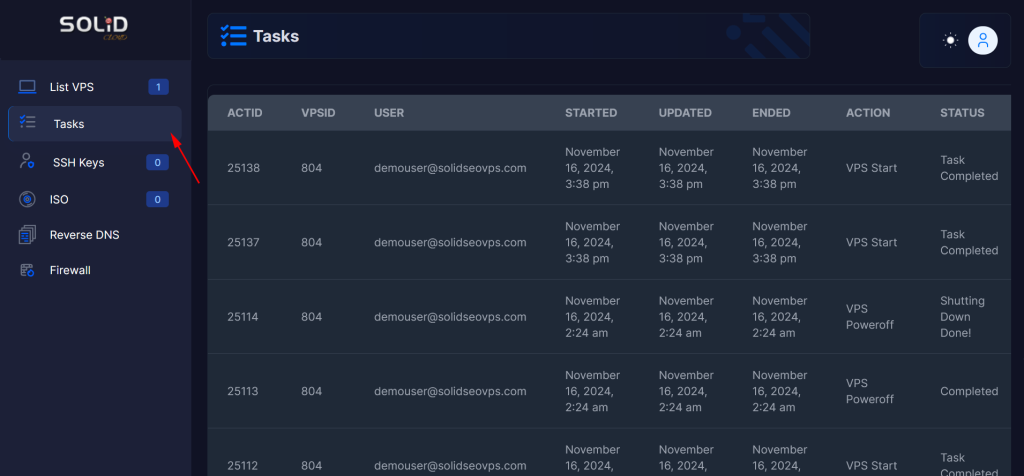
Tasks
The “Tasks” menu provides detailed information on all completed tasks and logs related to your servers.
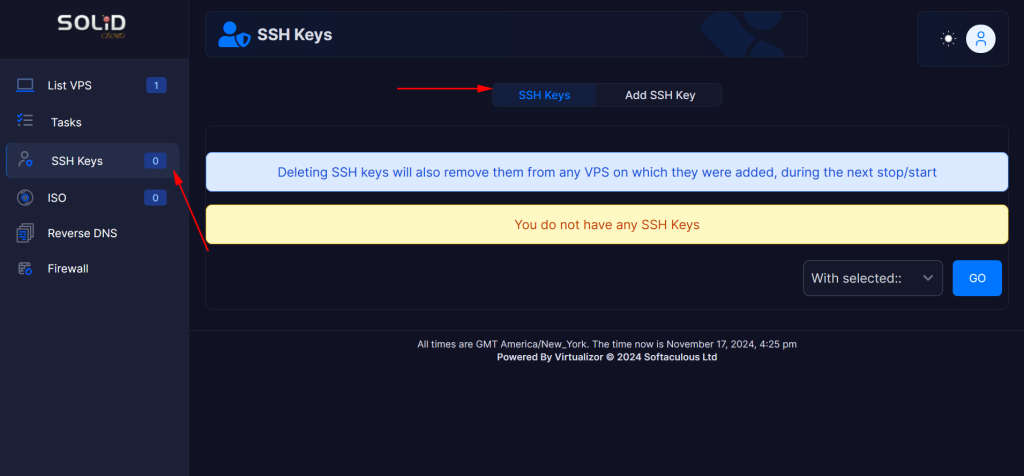
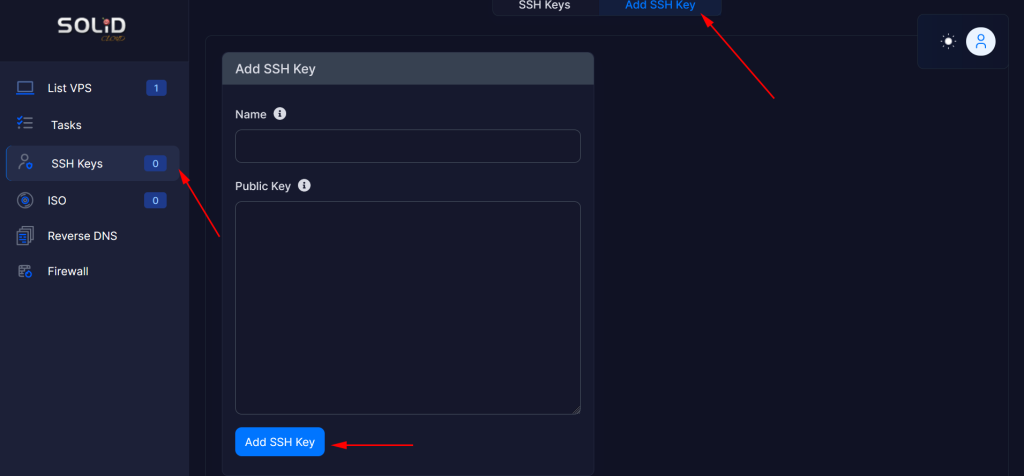
SSH Keys
The SSH Keys menu allows you to manage and configure SSH keys for secure, password-less login to your VPS.
This feature is essential for users who prefer SSH over traditional username and password authentication, offering enhanced security.
ISO
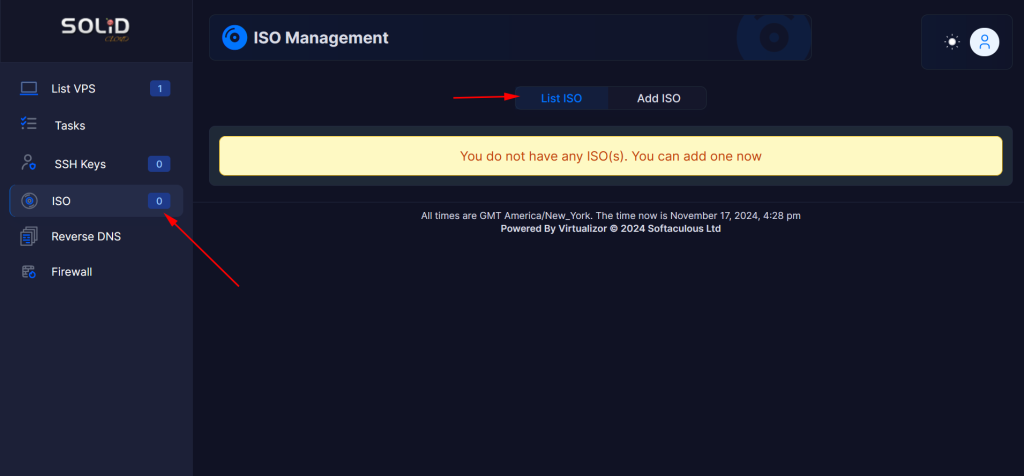
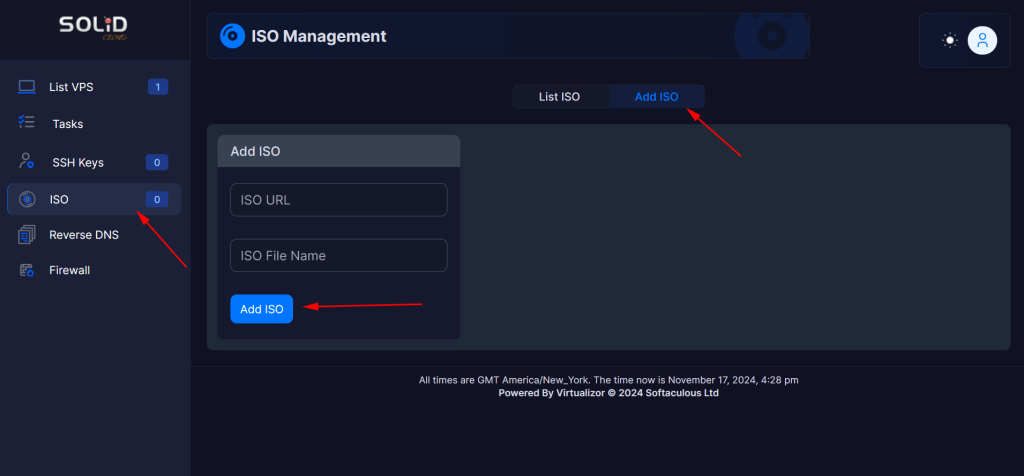
The ISO Menu in the Enduser Panel allows you to manage ISO images for your VPS.
ISO images are typically used for installing operating systems or other software on your server.
In this menu, you can:
- Upload ISO images: Upload custom ISO files for installing or reinstalling an operating system on your VPS.
- Mount ISO images: Attach an ISO image to your VPS to boot from it, enabling you to install or run software directly from the ISO.
- View available ISOs: See the list of ISO images currently available for your VPS.
This menu is essential for users who want to perform OS installations or software setups from custom images or specific versions.
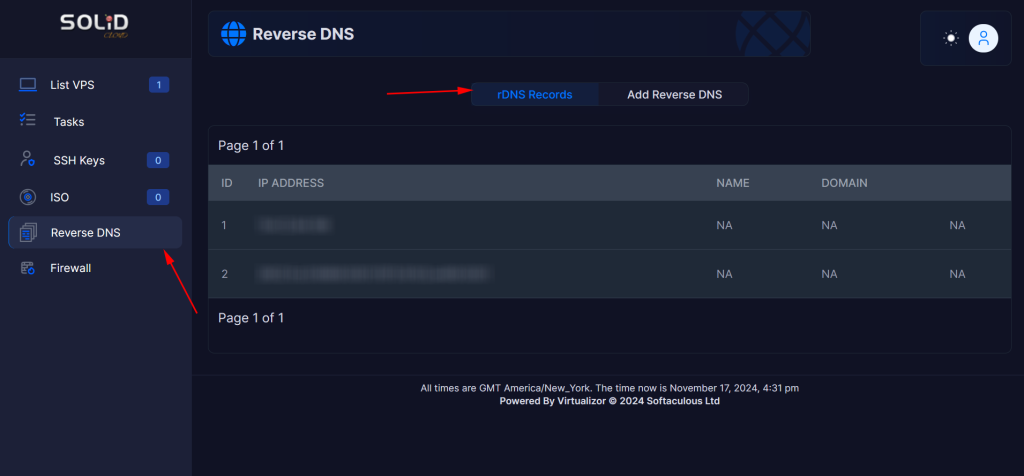
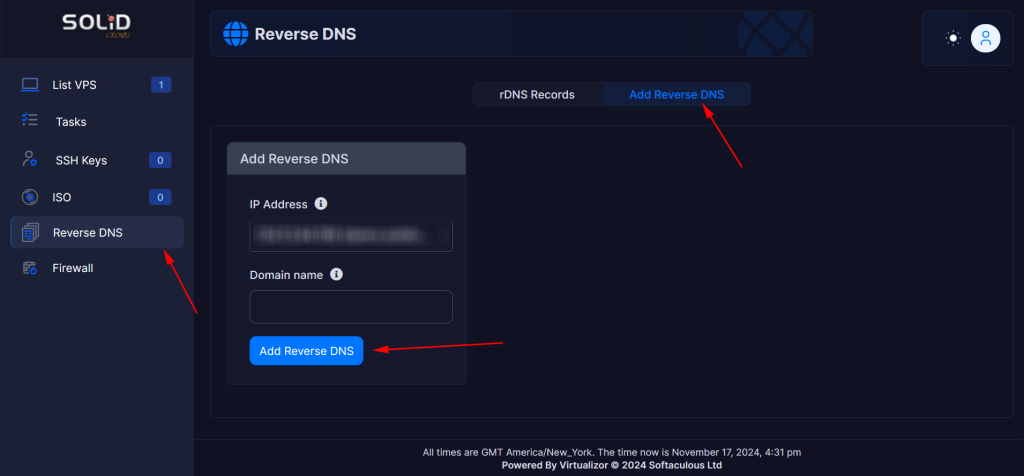
Reverse DNS
he Reverse DNS (rDNS) Menu in the Enduser Panel allows you to configure and manage reverse DNS records for your VPS’s IP addresses.
Reverse DNS is used to map an IP address back to a domain name, which is crucial for improving email deliverability and maintaining a positive reputation for your server.
In this menu, you can:
- Add or modify rDNS records: Set or change the reverse DNS record to associate your VPS’s IP address with a domain name.
- Verify rDNS settings: Check if the reverse DNS records are correctly configured.
Configuring rDNS helps prevent your VPS from being flagged as a potential spam source and ensures the proper functioning of services like email.
Firewall
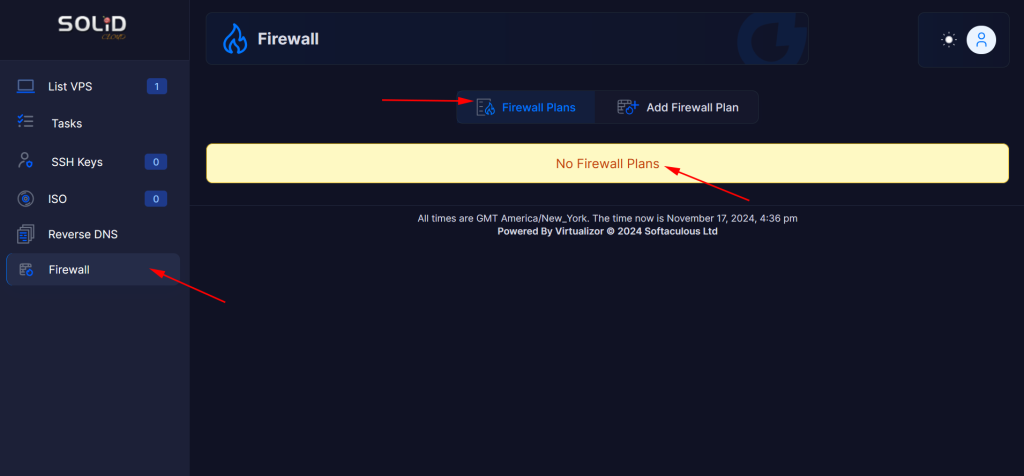
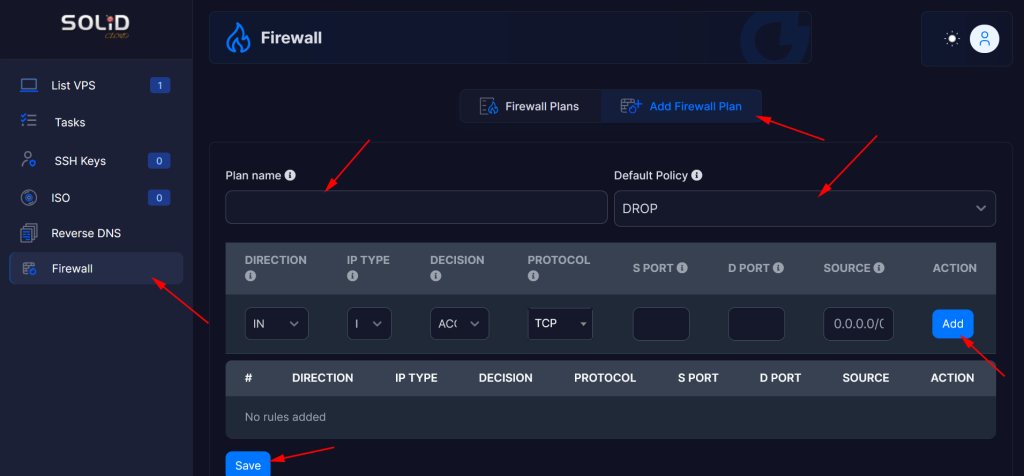
The Firewall Menu in the Enduser Panel allows you to manage and configure firewall rules for your VPS, enhancing its security by controlling incoming and outgoing traffic.
With this menu, you can create custom firewall rules to restrict access to your server based on IP addresses, ports, or protocols.
In this menu, you can:
- Add firewall rules: Create custom rules to allow or block specific traffic.
- View existing rules: See the current firewall settings and make adjustments as needed.
Using the firewall menu helps protect your VPS from unauthorized access and potential attacks by defining precise traffic management rules.
VPS Managing Gear
The VPS Managing Gear in the Enduser Panel is a section where you can perform various management tasks for your VPS with ease. This gear icon provides quick access to essential controls that allow you to manage your virtual server’s settings and operations.
In this section, you can:
- Start, stop, or reboot your VPS: Power on, power off, or restart your VPS as needed.
- Reinstall the operating system: Choose and install a new OS on your VPS.
- Access the VPS console: Open a VNC console for direct interaction with your VPS.
- Change the password: Modify the root or administrator password for your server.
The VPS Managing Gear centralizes the most important VPS management functions, making it easy to perform essential server tasks in just a few clicks.
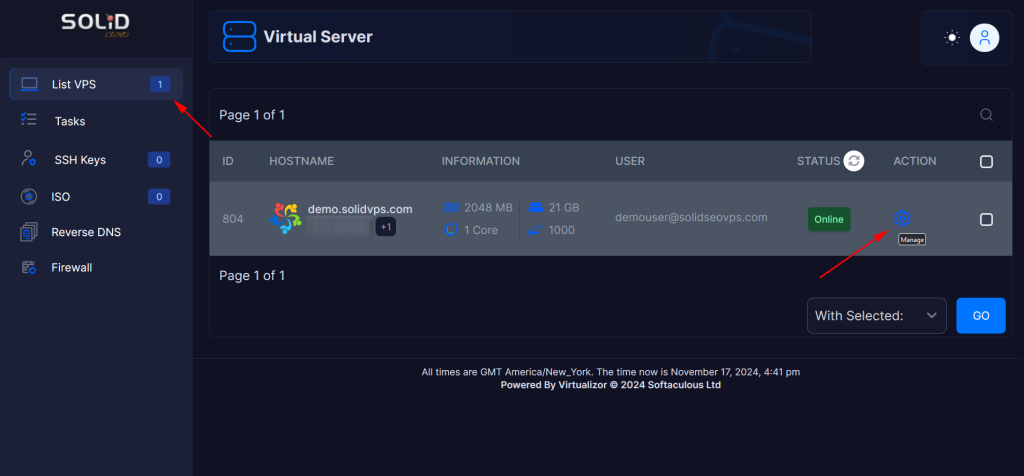
Let’s start by clicking on the “manage gear” to begin managing the VPS.
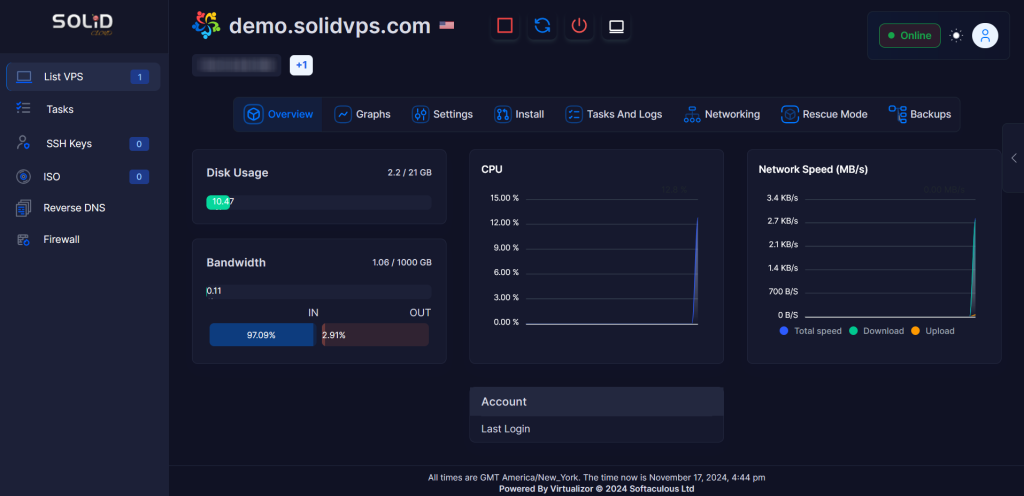
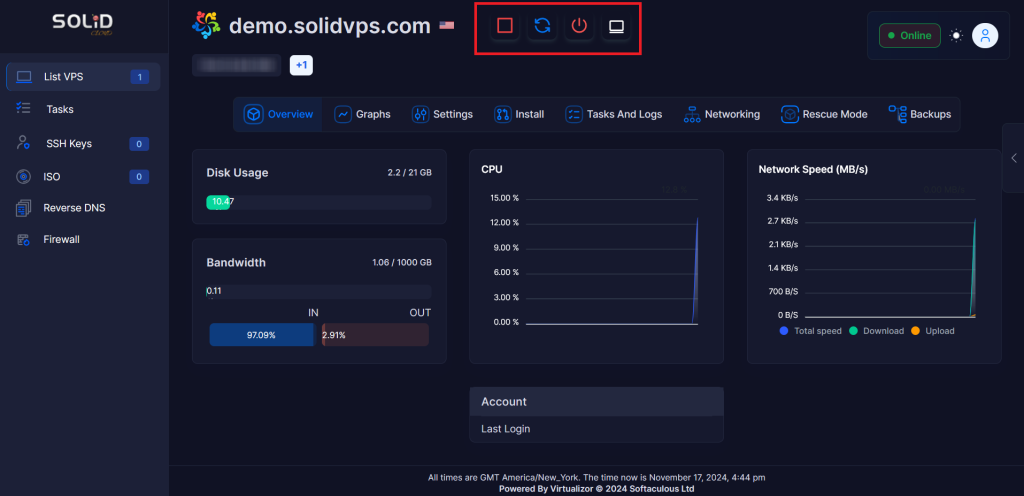
On the top right, you’ll find your profile details, along with options for settings, API credentials (if needed), and logging out.
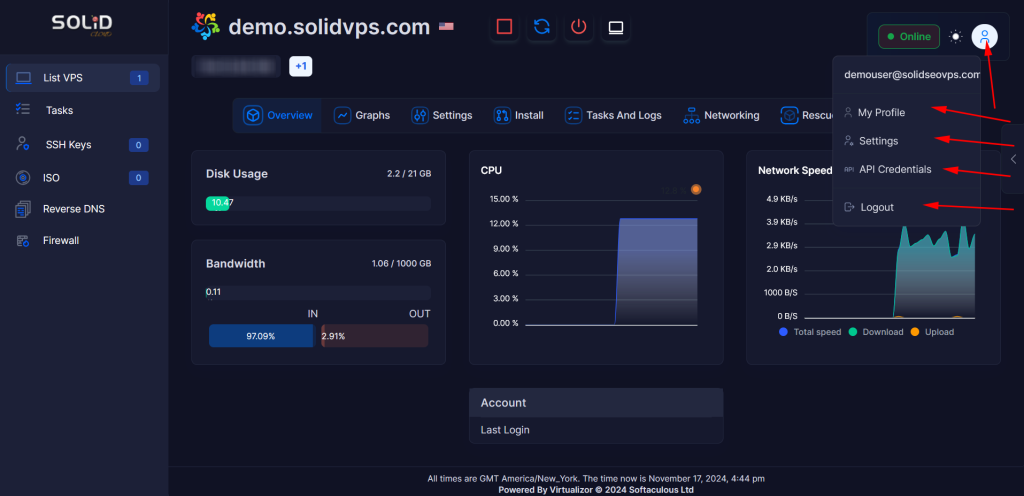
You will also see the server status as “Online” or “Offline.”
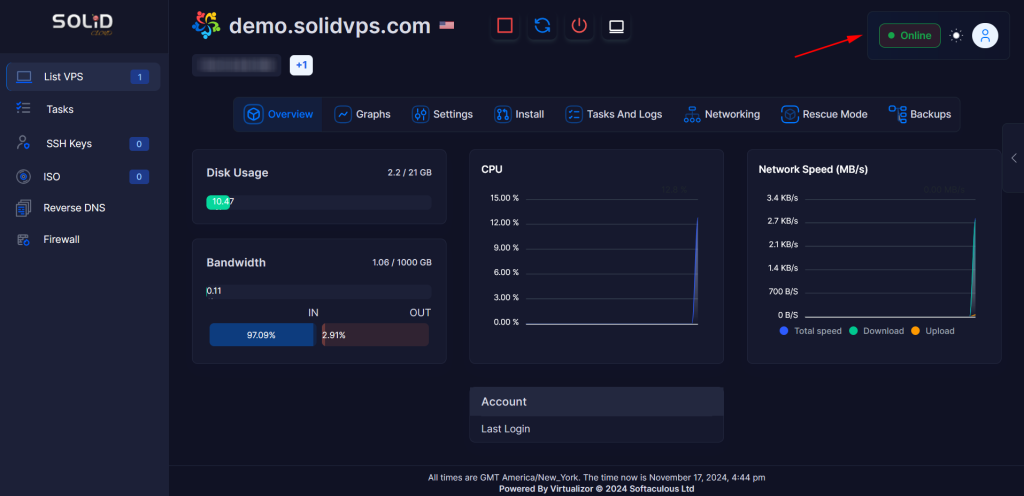
At the top center, you’ll find the VPS quick action buttons, including stop, reboot, power off, and launch VNC console.
Menu Tabs
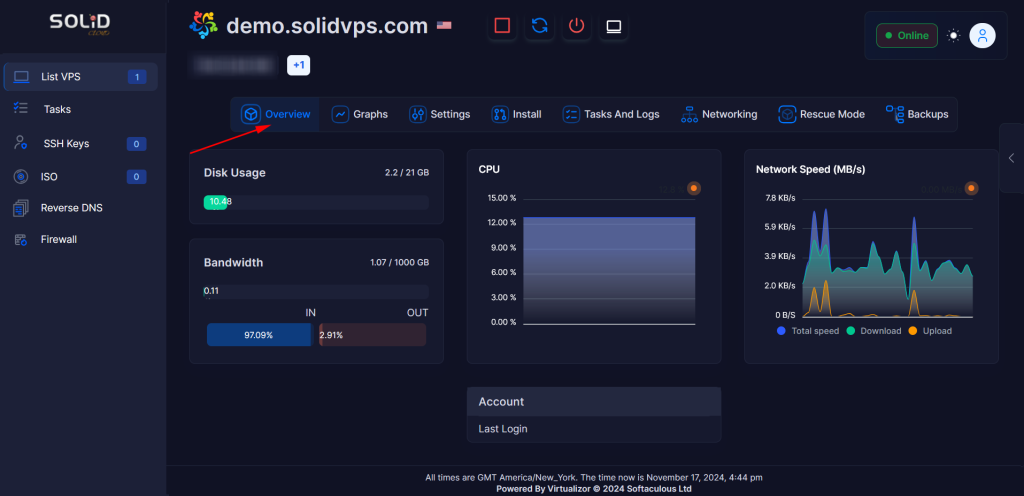
Overview
In the “Overview” tab, as you scroll down, you’ll find key server statistics, including disk usage, bandwidth usage, and CPU usage.
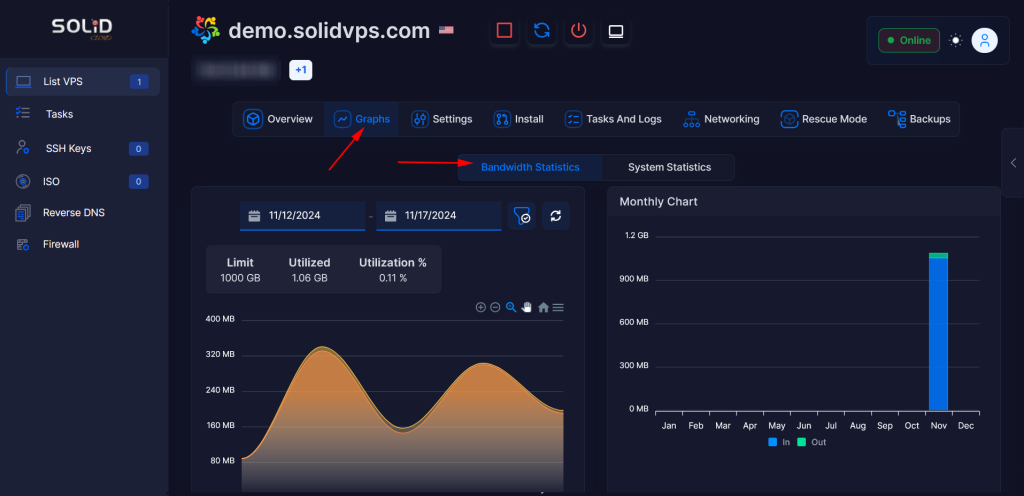
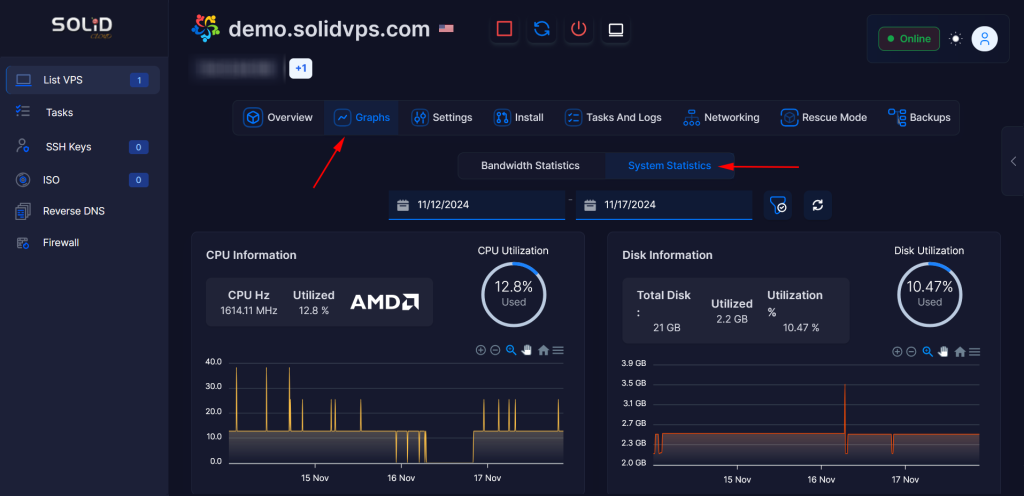
Graphs
The “Graphs” tab provides detailed information on bandwidth usage and server resource statistics, including CPU usage, all presented in a graphical format.
Settings
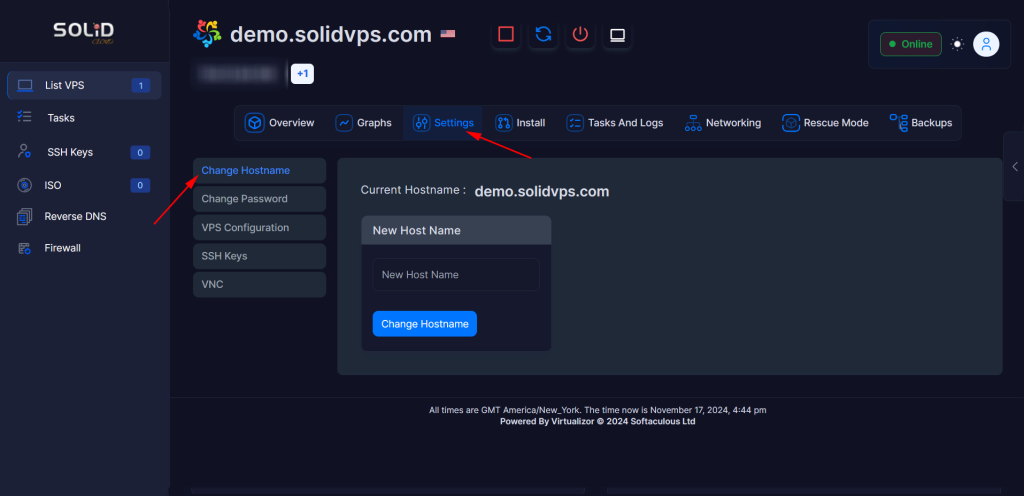
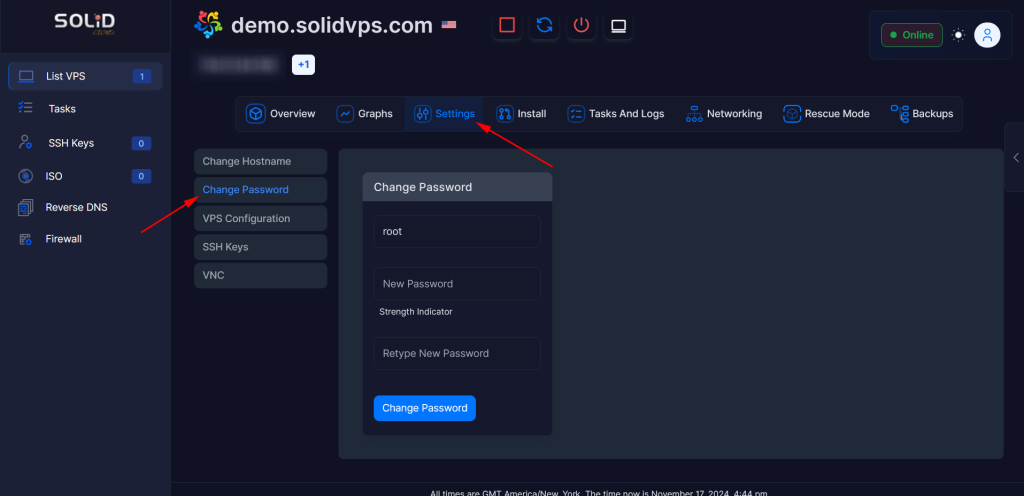
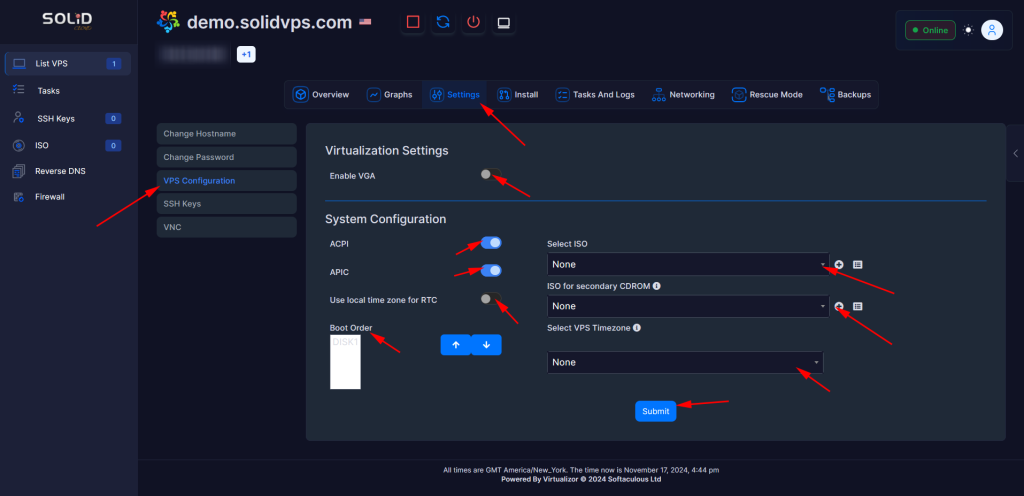
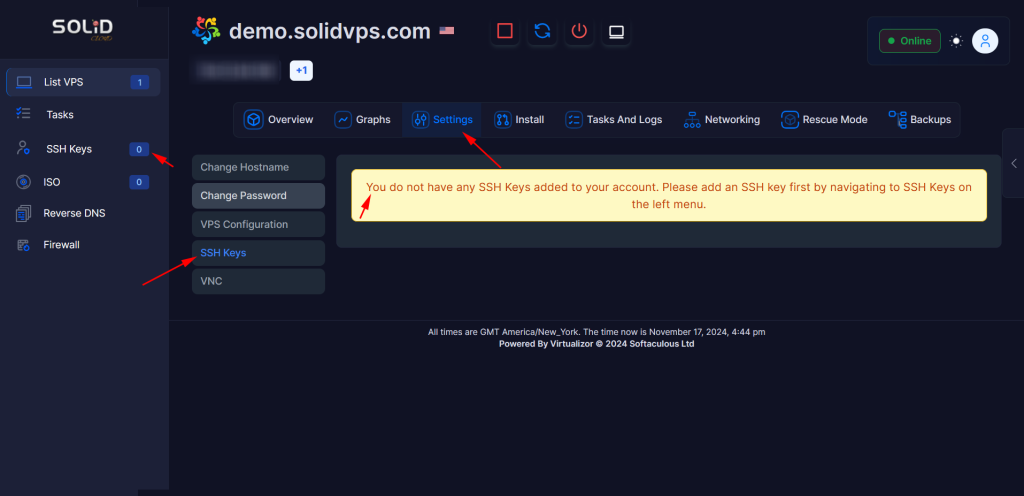
The “Settings” tab provides options to manage the VPS such as:
Change Hostname
Change the Password
VPS Configuration
Manage SSH Keys
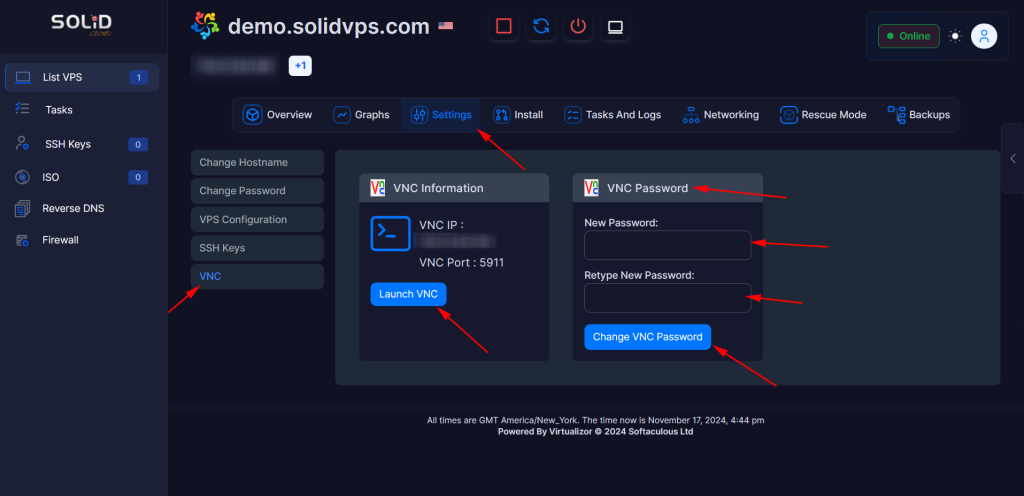
VNC
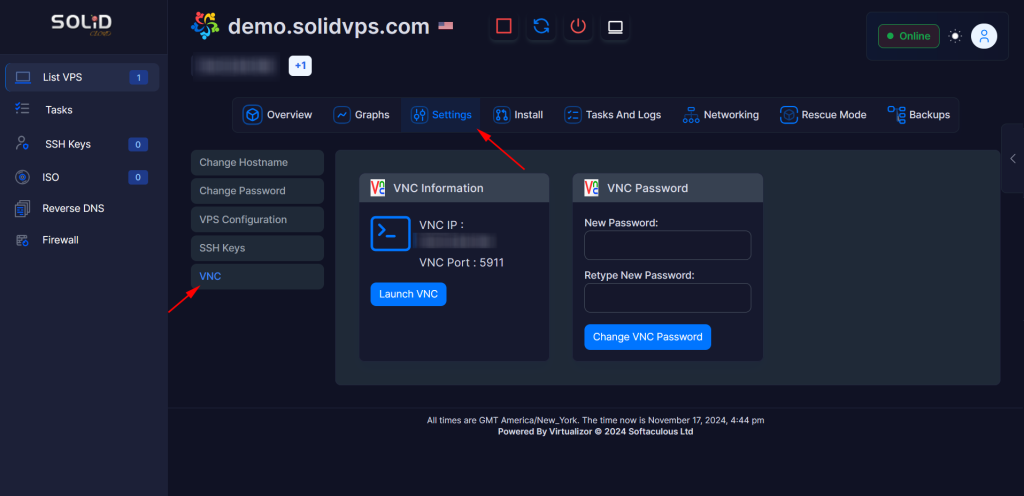
With options to launch the VNC console or change the VNC password.
Install
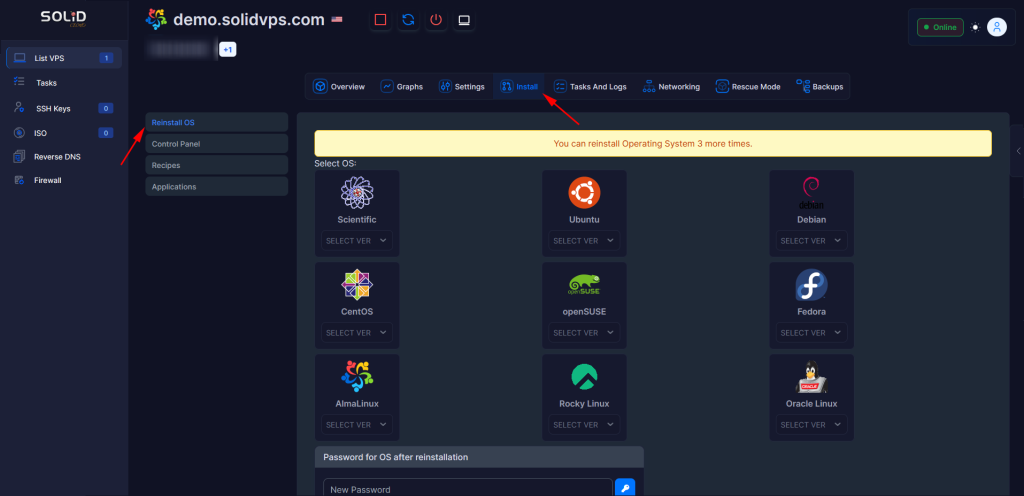
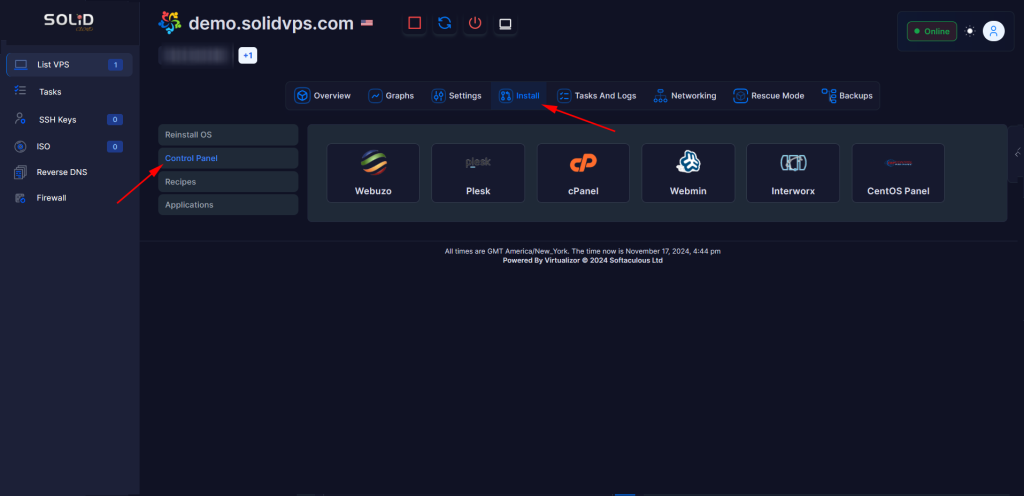
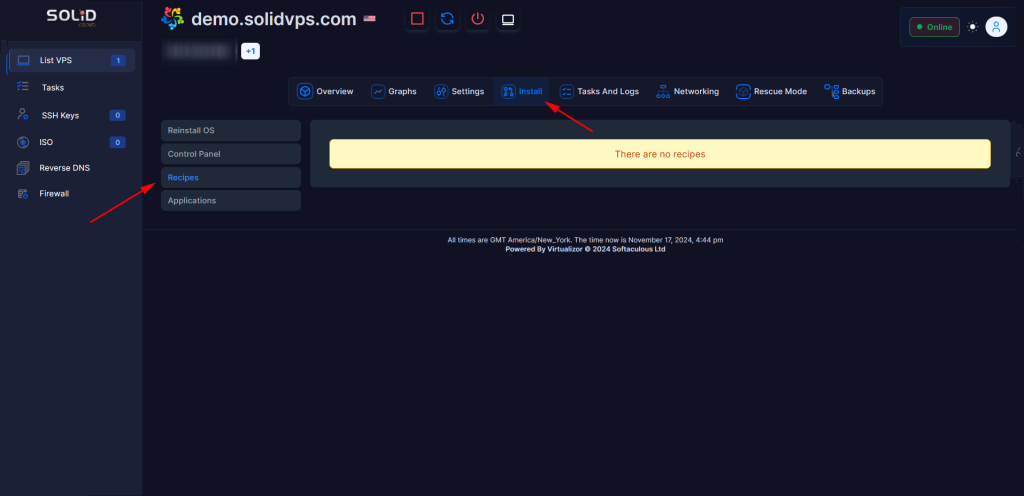
The “Install” tab provides options to Reload OS, install a Control Panel and to add a recipe if needed.
Reinstall OS
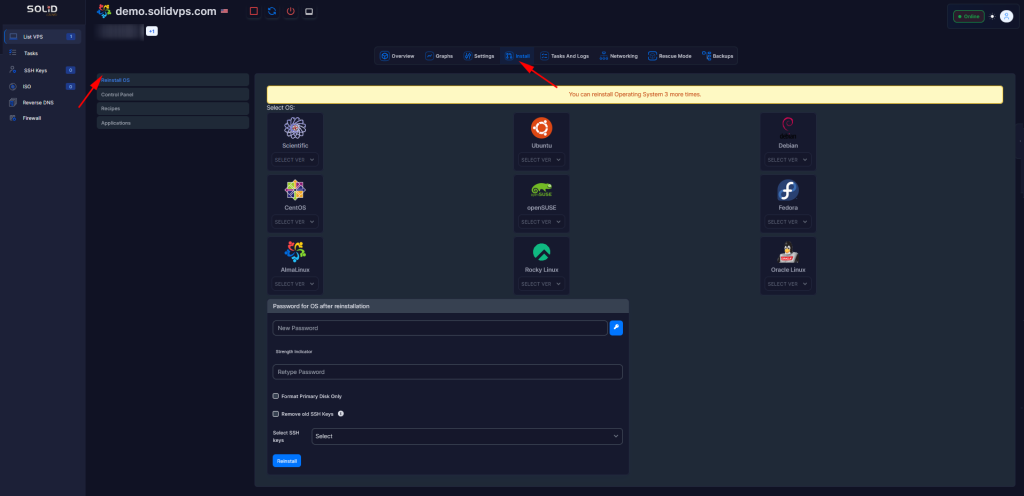
A closer look.
Control Panel
Recipes
Applications
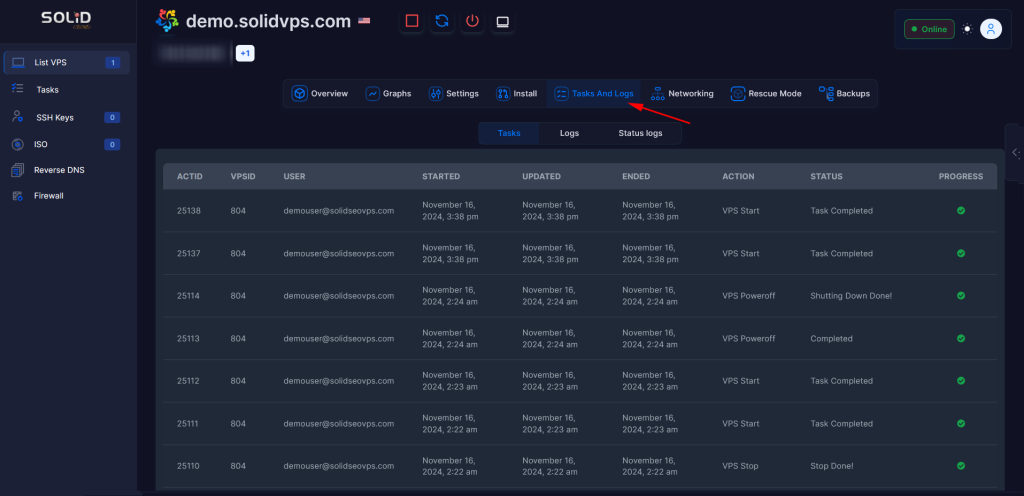
Tasks
The “Tasks and Logs” tab provides detailed information on all completed tasks and logs related to your servers.
Networking
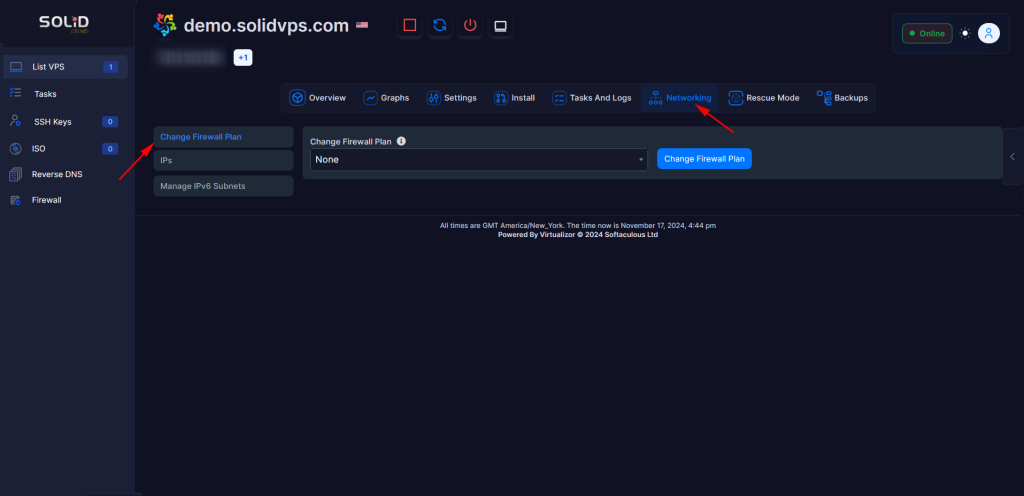
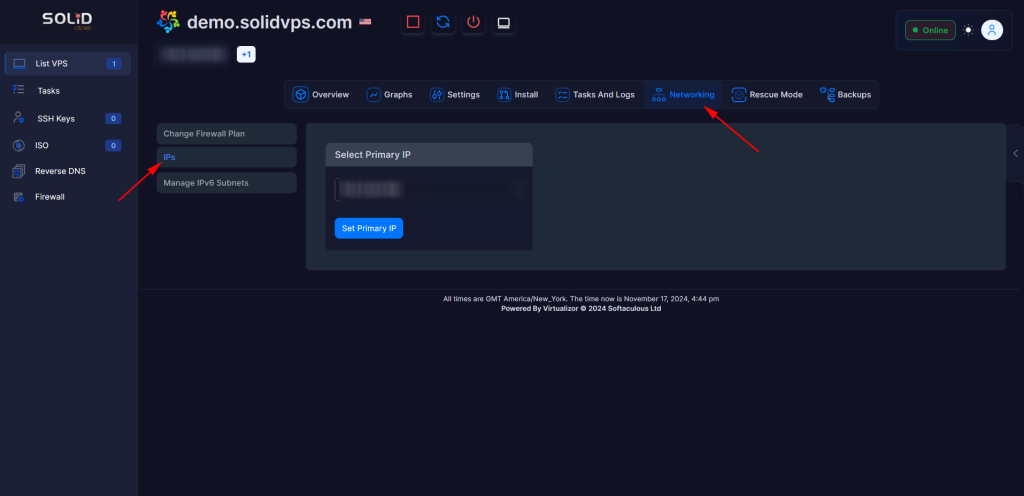
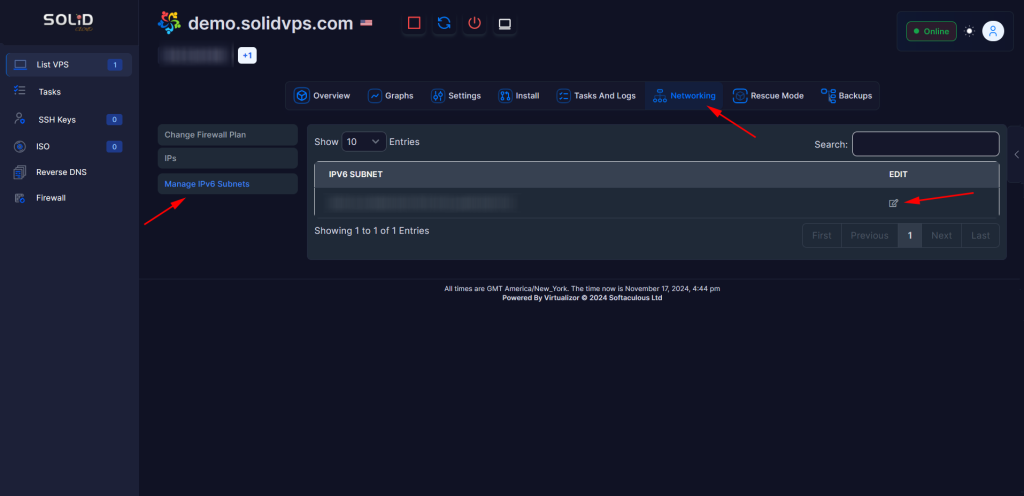
The Networking tab in the end-user panel lets you manage and configure firewall settings, along with both IPv4 and IPv6 addresses.
Rescue mode
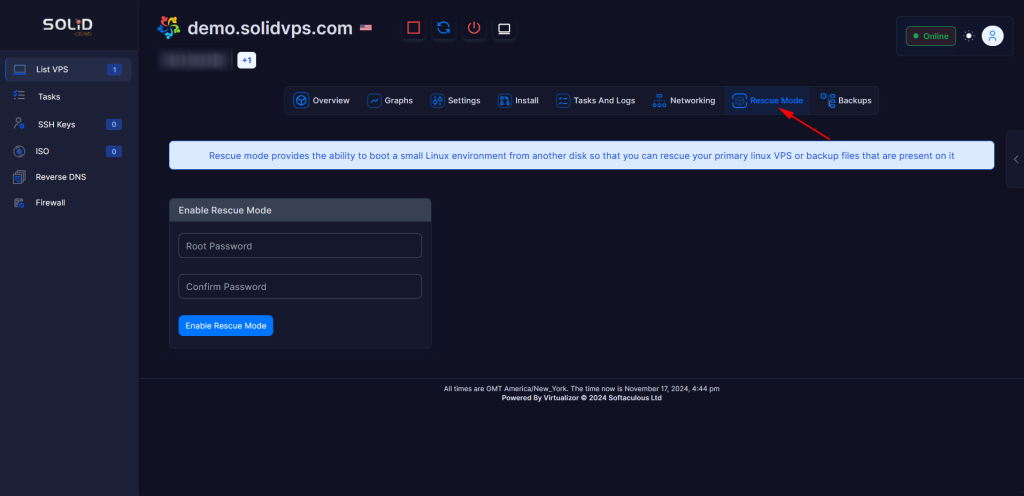
The “Rescue mode” tab allows you to boot your VPS into rescue mode for troubleshooting and recovery.
In this mode, you can access your server even if it is unresponsive, allowing you to perform tasks such as fixing configuration issues, recovering lost files, or repairing system errors.
Backup
The “Backup” tab allows you to create, manage, and restore backups of your VPS.
You can use this feature to ensure your data is secure and easily recoverable in case of any issues. It offers options for creating full or partial backups, as well as restoring from previously saved backups.
