Whether you’re running out of space on your macOS system or need to allocate more storage to a specific partition, extending your macOS drive partition is an important task.
Luckily, macOS includes built-in tools that make this process straightforward.
In this article, we’ll guide you through the steps to extend your macOS drive partition using Disk Utility and Terminal.
Why Extend Your macOS Drive Partition?
here are several reasons why you might want to extend a partition on your macOS system:
- Running Out of Space: If your primary partition is nearing full capacity and you need more space for files, apps, or system functions, extending your partition is a great solution.
- Optimizing Storage: For users with multiple partitions, reallocating unused space from other partitions to your main partition can optimize your macOS system’s storage capacity.
- Creating Larger Volumes for Work: If you’re working with large files, such as video or design projects, a larger partition may be needed to handle the increased data.
Important Considerations Before Extending Your macOS Partition
Before jumping into the steps, there are a few important considerations to keep in mind:
- Backup Your Data: Always back up your important data before modifying your disk partitions. Although macOS’s Disk Utility is reliable, there is always a risk of data loss when altering partition sizes..
Method 1: Open Disk Utility
- Launch Disk Utility: Start by opening Disk Utility. You can do this by going to Applications > Utilities > Disk Utility, or simply searching for it using Spotlight by pressing
Cmd + Spaceand typing “Disk Utility.”
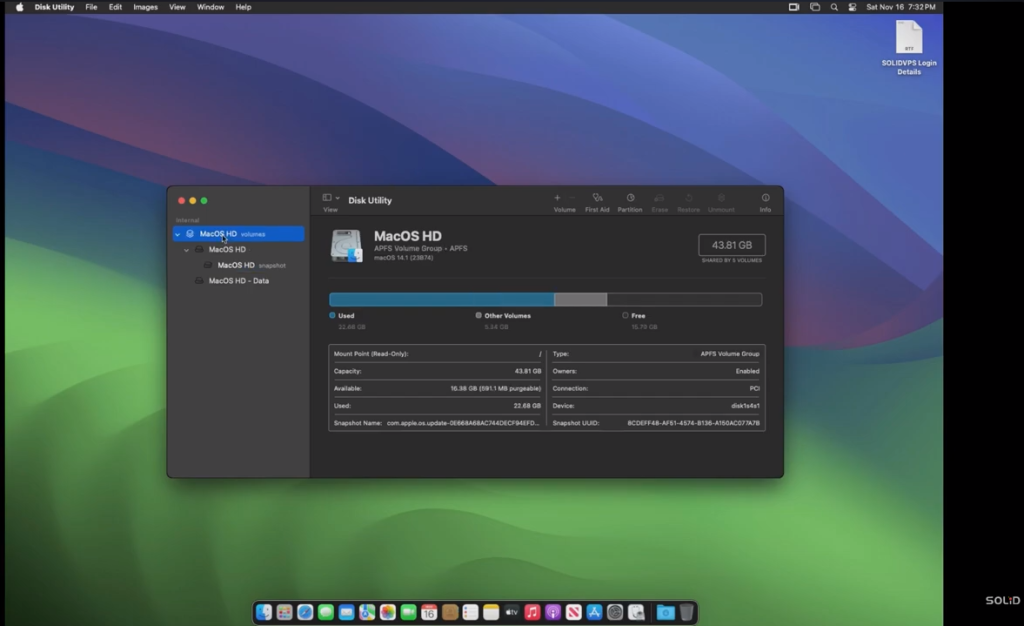
- Select Your Drive: In the Disk Utility window, you will see a list of all available disks and volumes. Select the drive or volume you want to extend (usually your main macOS partition).
Check Available Space
Before proceeding with resizing your partition, make sure there is enough unallocated space available to extend it. You can do this by selecting your disk and looking at the storage graph to see the free space.
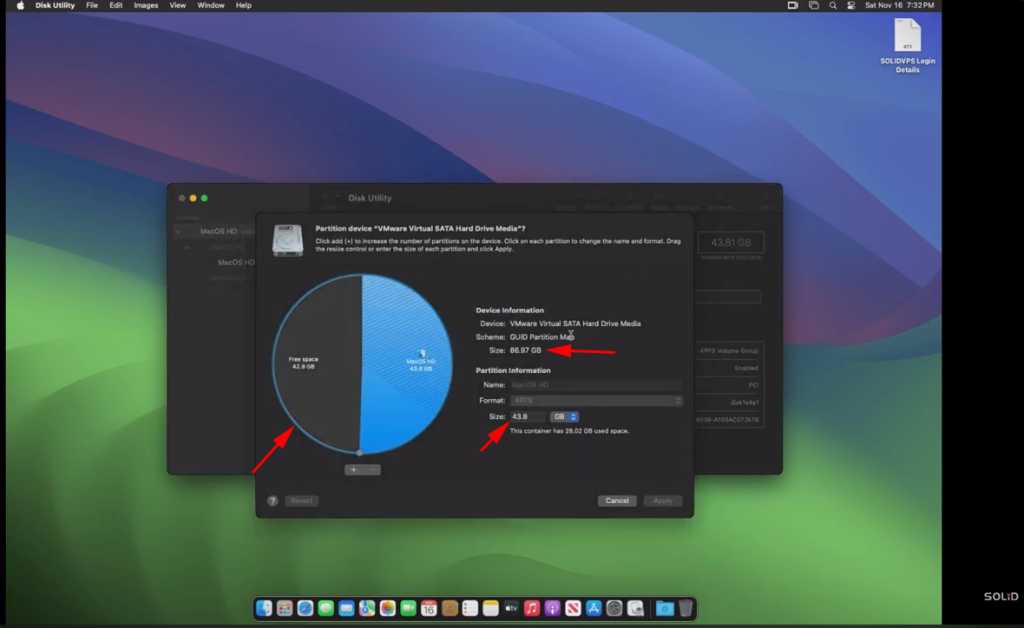
Note the drive total size and the total used size
Extend the Partition
Now, adjust the total used size to match the total drive size, or as closely as possible, in order to extend the partition
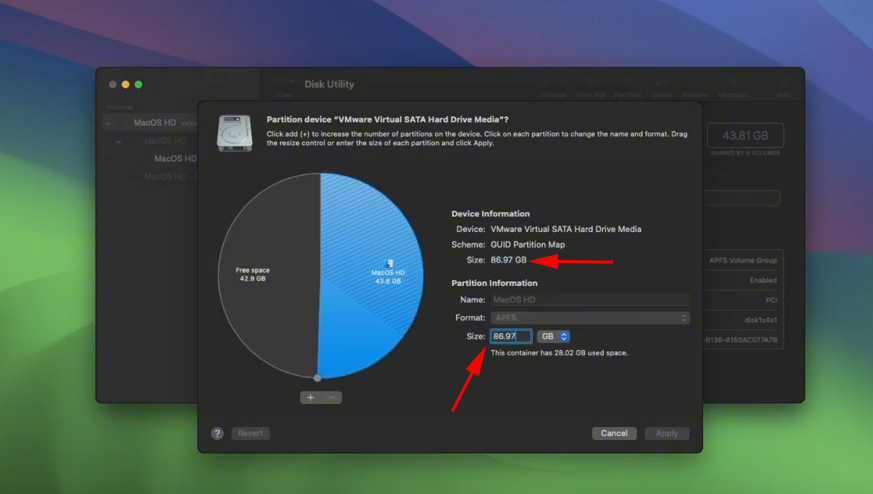
Click “Apply” to proceed.
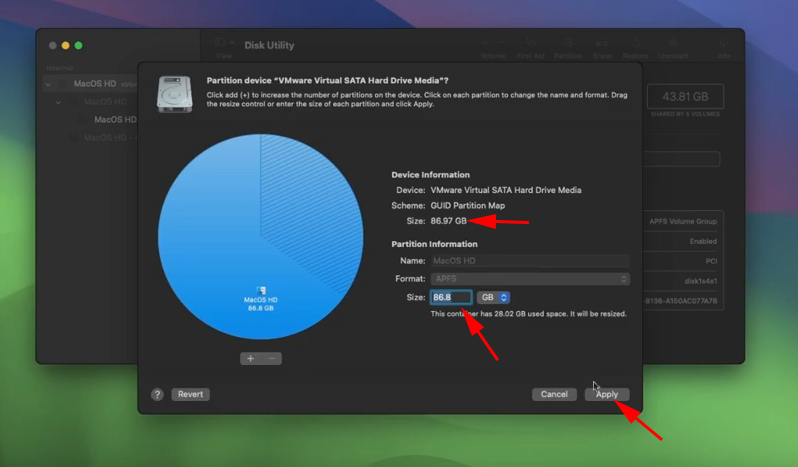
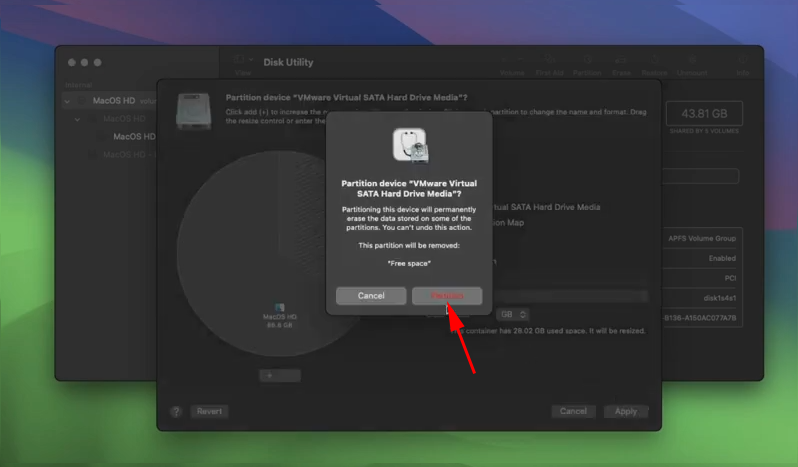
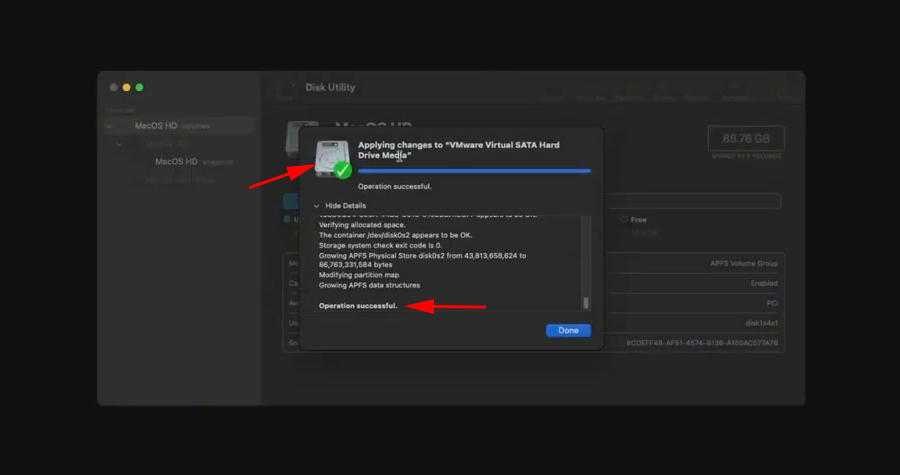
Your macOS partition has been extended successfully.
Method 2: Using the Terminal
Open Terminal: Launch the Terminal from Applications > Utilities or by searching for “Terminal“
Type the following command to elevate your privileges,
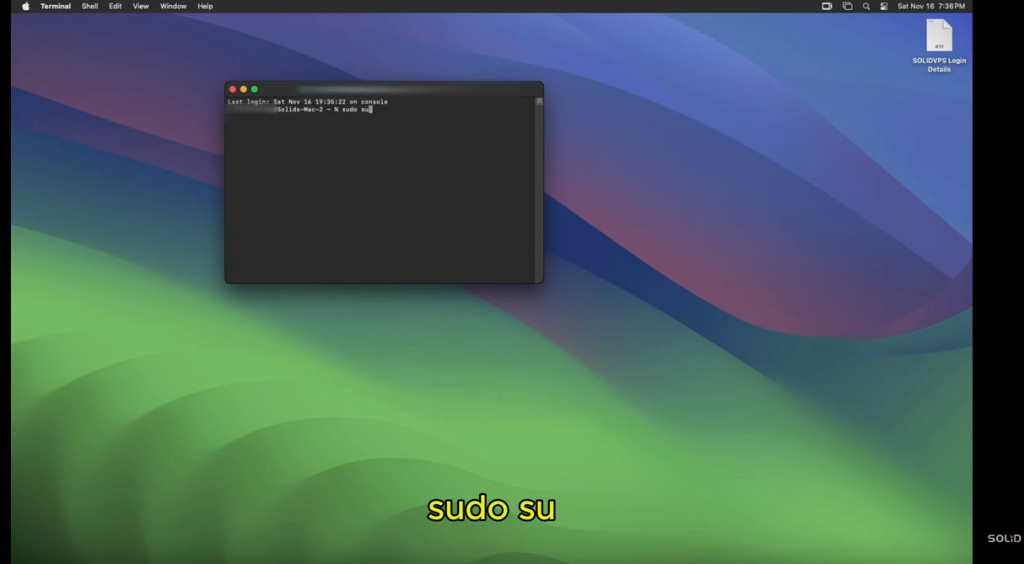
sudo suEnter your password when prompted.
Next, type the following command to extend the drive partition.
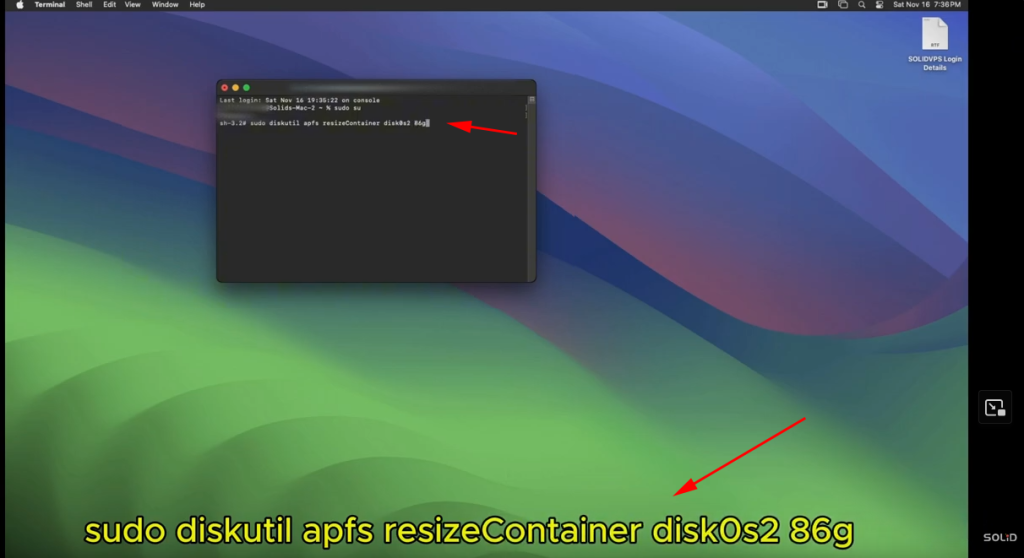
sudo diskutil apfs resizeContainer disk0s2 86GIn this example, we know that the maximum size of our drive is 86GB.
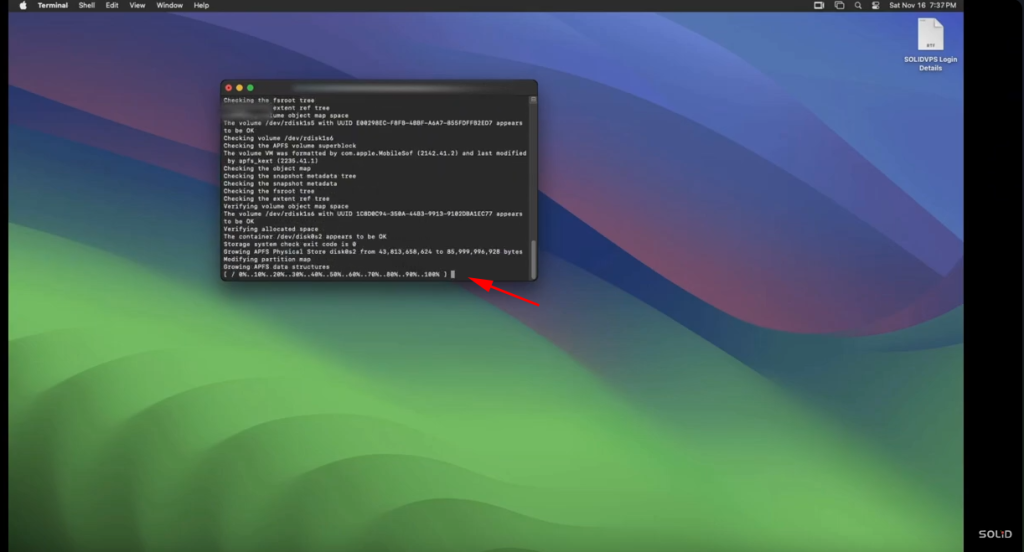
Congratulations, your macOS partition has been extended successfully.
Conclusion
Extending your macOS drive partition is a straightforward process that can help you optimize your storage when space runs low.
Whether you prefer using the graphical Disk Utility tool or the Terminal for advanced users, both methods provide reliable ways to resize your partitions.
Always remember to back up your data before making changes to your disk, and ensure you have enough unallocated space for the extension.
With the right steps, you’ll have your macOS partition extended and ready to handle more data!
