Adjusting the screen resolution on your macOS VPS can help you optimize your workspace for better visibility and performance. Whether you’re working with a high-definition display or just prefer a larger workspace, changing the resolution settings is an essential task.
In this guide, we will show you how to adjust the resolution on your macOS VPS.
Why Adjust the Resolution?
There are several reasons why you may want to adjust the screen resolution on your macOS VPS:
- Better Display Quality: Adjusting the resolution can provide a sharper, clearer image, especially if you’re working with a high-DPI monitor.
- Improved Performance: On lower-resolution settings, macOS can run more smoothly, especially if your VPS has limited resources.
- Workspace Customization: Increasing or decreasing the resolution can give you more screen real estate or make text and icons easier to see, depending on your preferences.
Adjust Resolution Using Terminal Console
Open Terminal: Press Cmd + Space, type “Terminal“, and hit Enter or by searching for ‘Terminal“

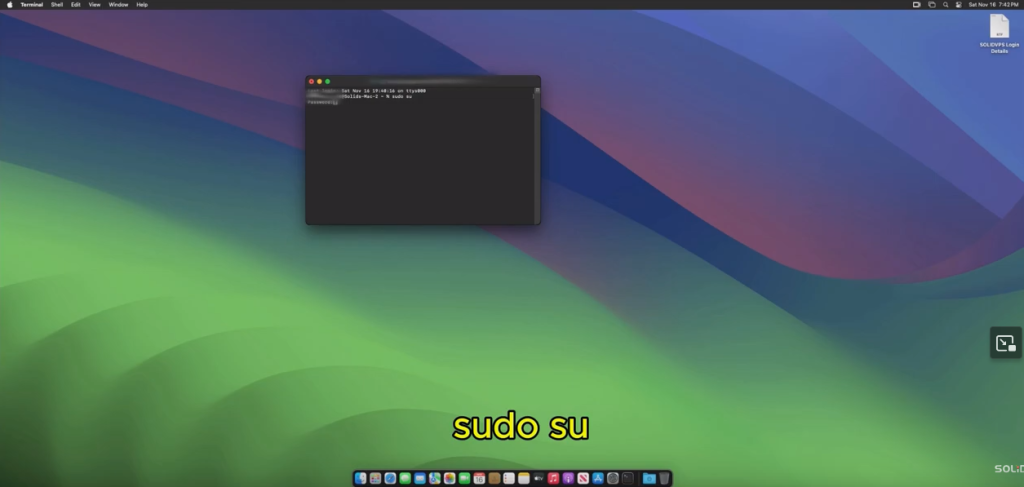
Once the Terminal is open, type the following command
sudo suWhen prompted, enter your password and hit enter

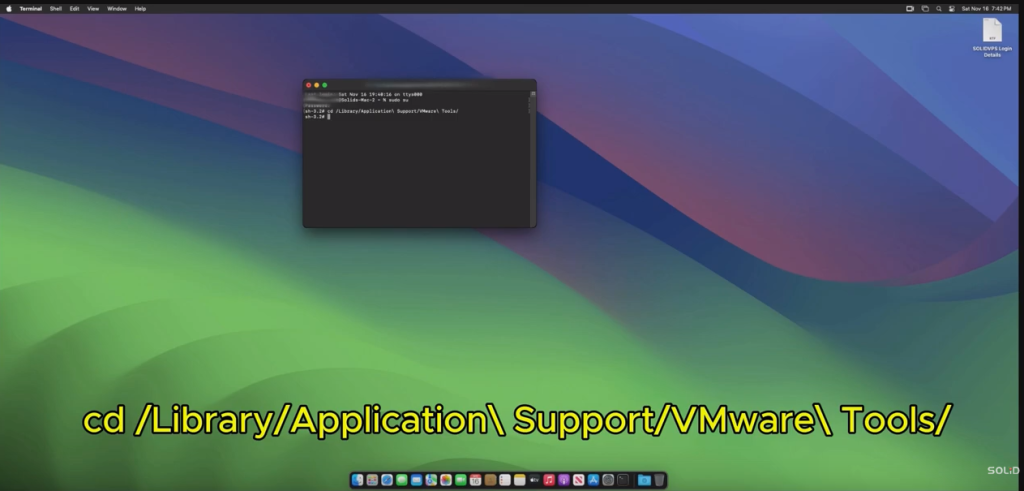
Then type the following commands
cd /Library/Application\ Support/VMware\ Tools/
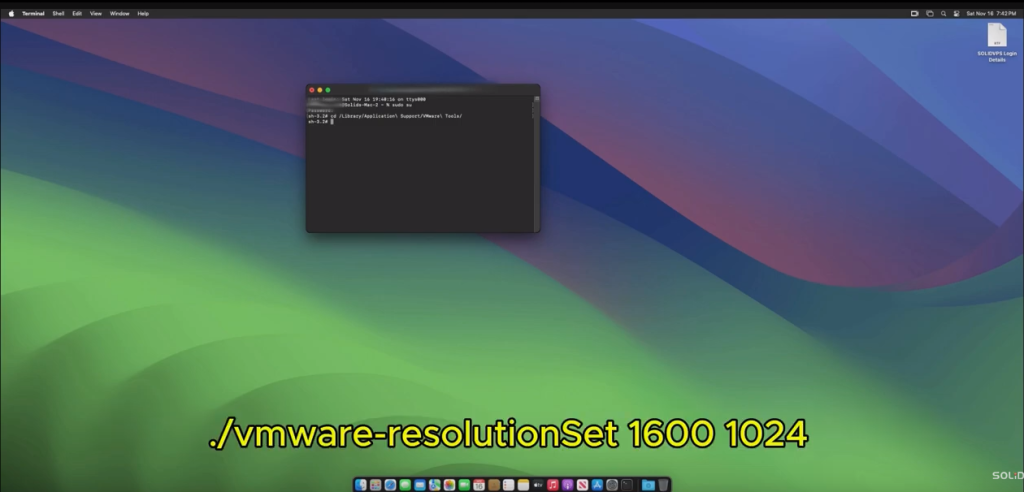
sudo ./vmware-resolutionSet 1600 1024The 1600×1024 resolution is just an example; you can adjust the resolution to your preferred settings, including up to a 2K resolution.
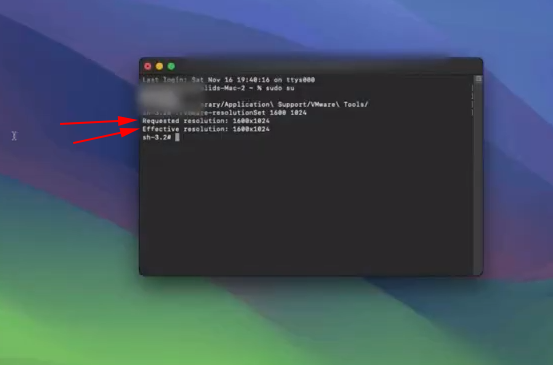
Verify the Changes
Verify that the requested resolution matches the effective resolution displayed in the terminal

Conclusion
Adjusting the screen resolution using Terminal commands provides flexibility and control over your macOS display settings, especially for advanced users and those managing systems remotely.
By following the steps in this guide, you should be able to fine-tune your macOS VPS or machine’s resolution for optimal performance and display quality.
