Introduction
Managing your Linux Cloud VPS has never been easier, thanks to the user-friendly panel and streamlined access from the client area.
This guide walks you through how to access the end-user features in your Linux Cloud VPS panel from the client area, enabling you to handle essential functions efficiently.
Step 1: Log in to the Client Area
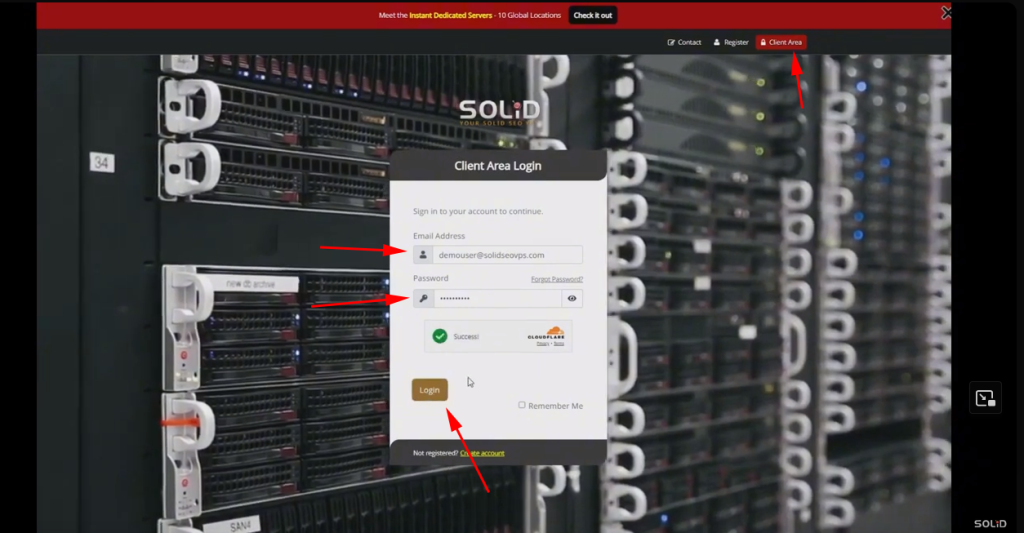
1- Open your Web Browser: Start by launching your preferred web browser.
2- Visit the Client Area URL: By clicking on the client area login button located on the top right corner
.3- Enter Your Credentials: Log in with your username and password.
Step 2: Navigate to the Linux Cloud VPS
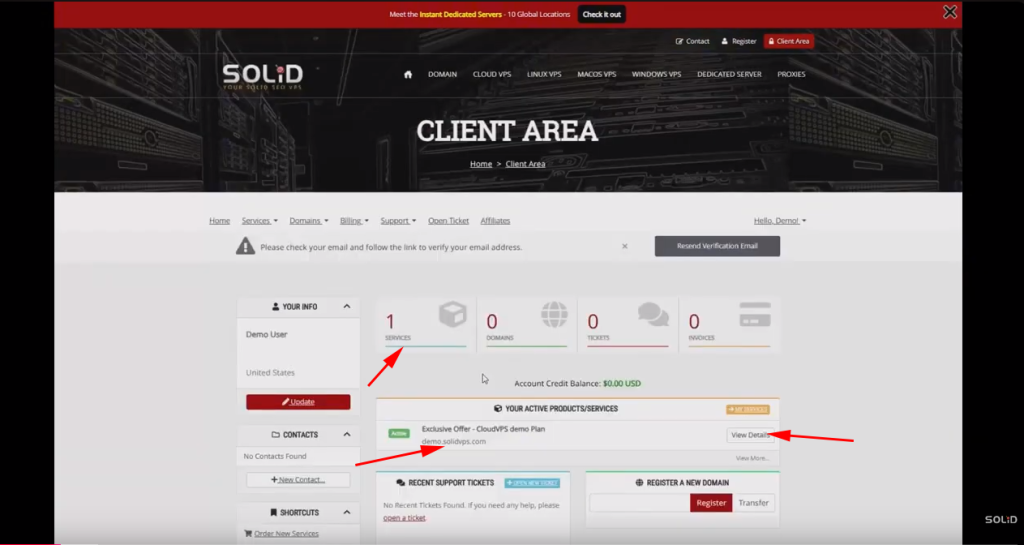
- Find the Services Tab: Look for a tab or section labeled “Services” or “My Services.”
- Select Your Linux Cloud VPS Plan: Click on the service related to your Linux Cloud VPS. This will open up specific details about your VPS plan and configuration.
This page displays an overview of your VPS status, including usage stats and basic information about the plan.
Step 3: Access the Linux Cloud VPS ClientArea Panel
1- Locate the VPS Panel Option: Within the VPS service details, look for an option like “View Details”
2- Click to Enter the Panel: Selecting this option should automatically open the Linux Cloud VPS client area panel.
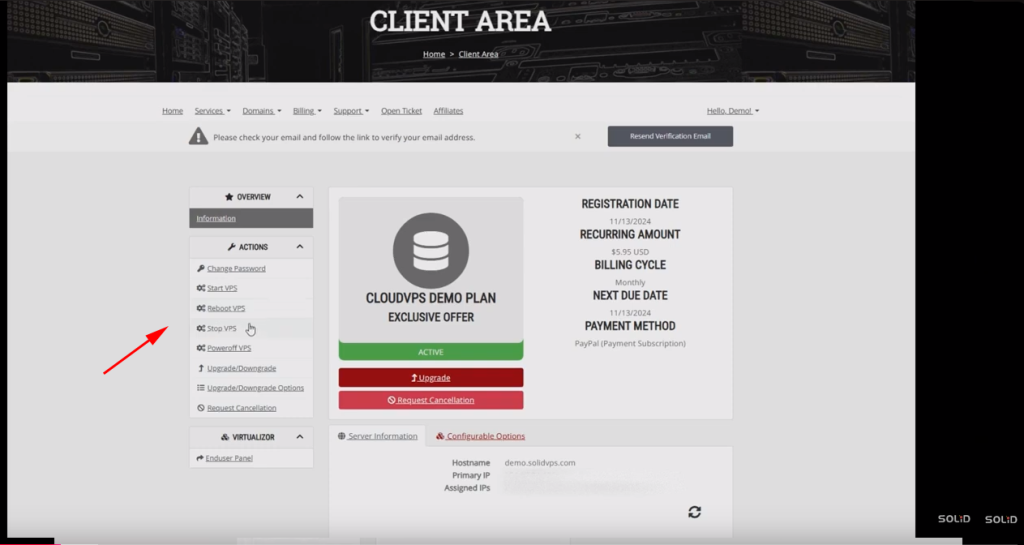
On the left side, you’ll find quick action buttons to
- Change the VPS password
- Start
- Reboot
- Stop
- Power off the VPS.
- There are also options to upgrade or downgrade the service
- Cancel the service if needed
- And access the Enduser panel link.
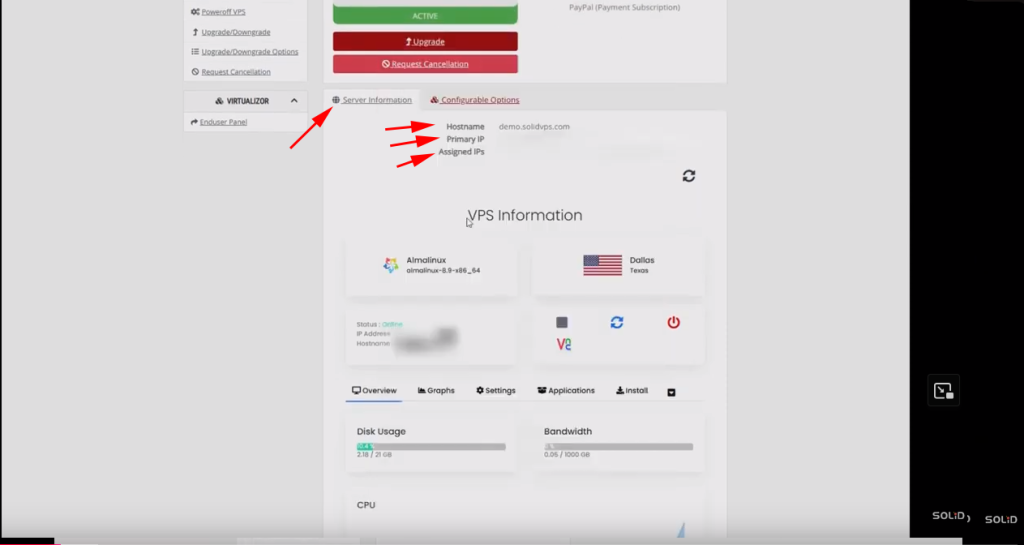
Under the Server Information tab, you’ll find the server hostname, primary IP, and assigned IPv4 and IPv6 addresses.
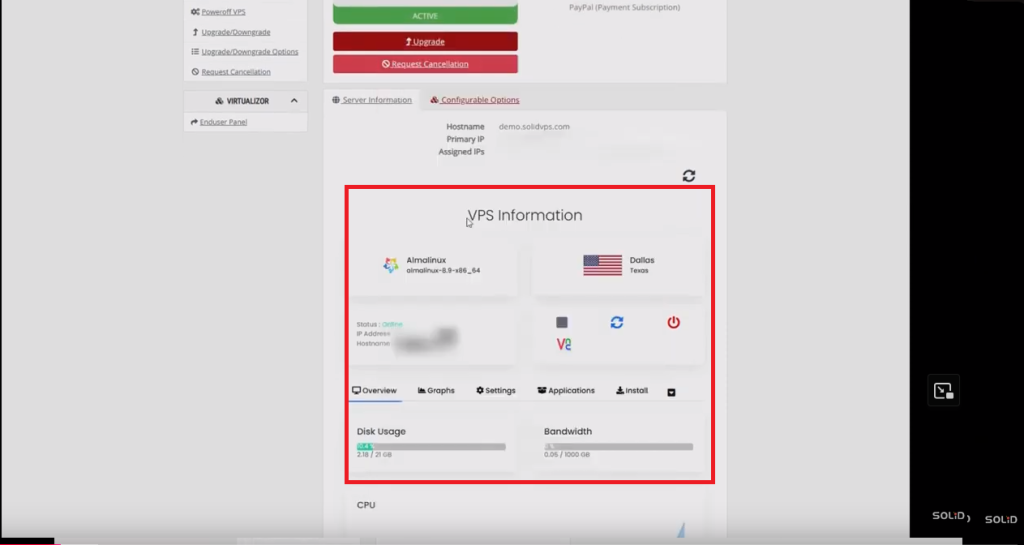
Under the VPS Information section:
The left box displays the installed Linux distribution and its version
The right box shows the service location, including the city and state.
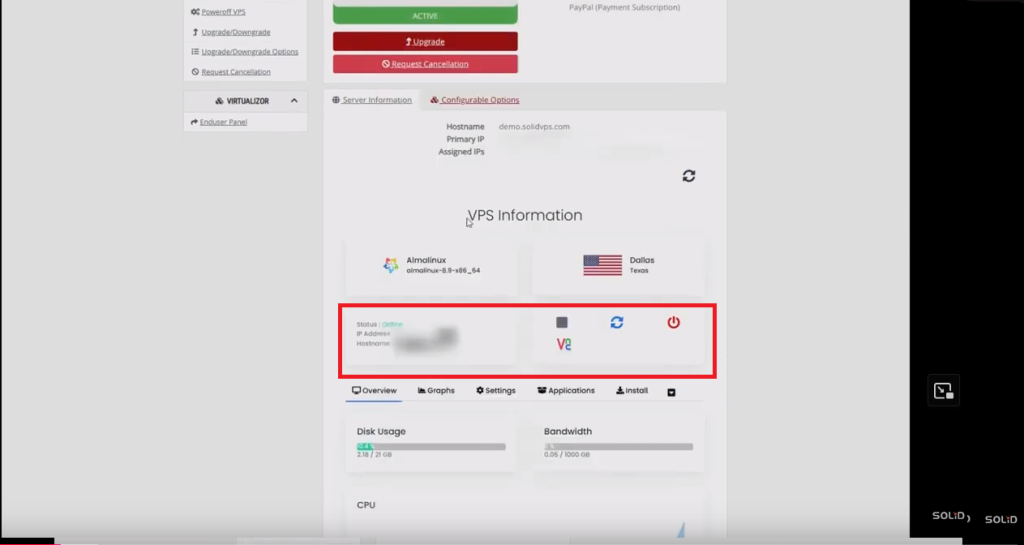
As you scroll down, you’ll find
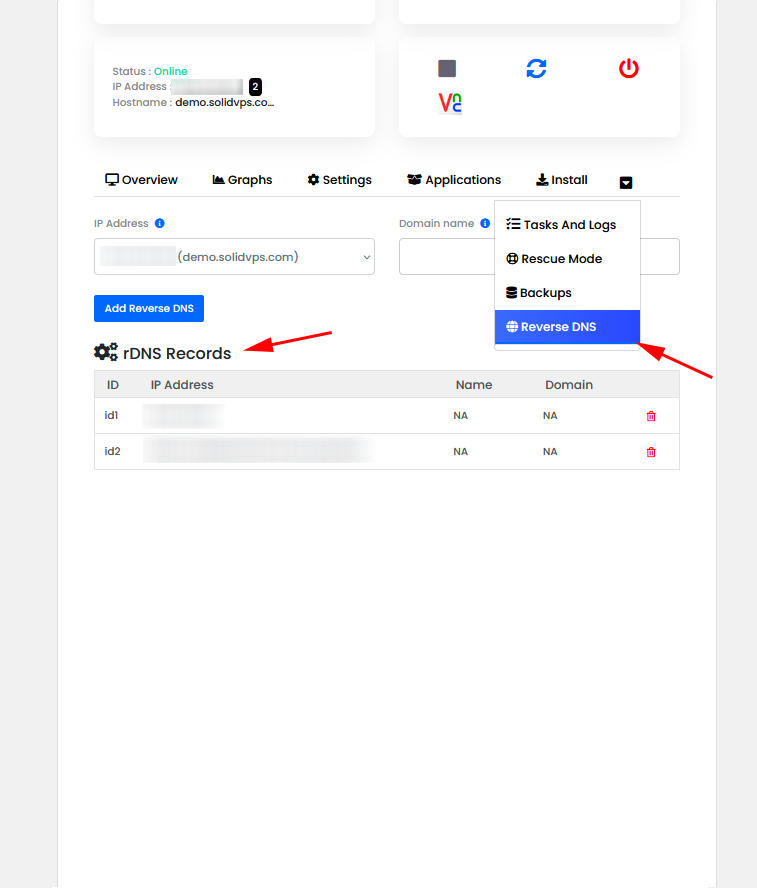
The left box shows the server’s power status, IP address, and hostname.
The right box provides buttons for powering off, restarting, stopping the server, and launching the VNC console.
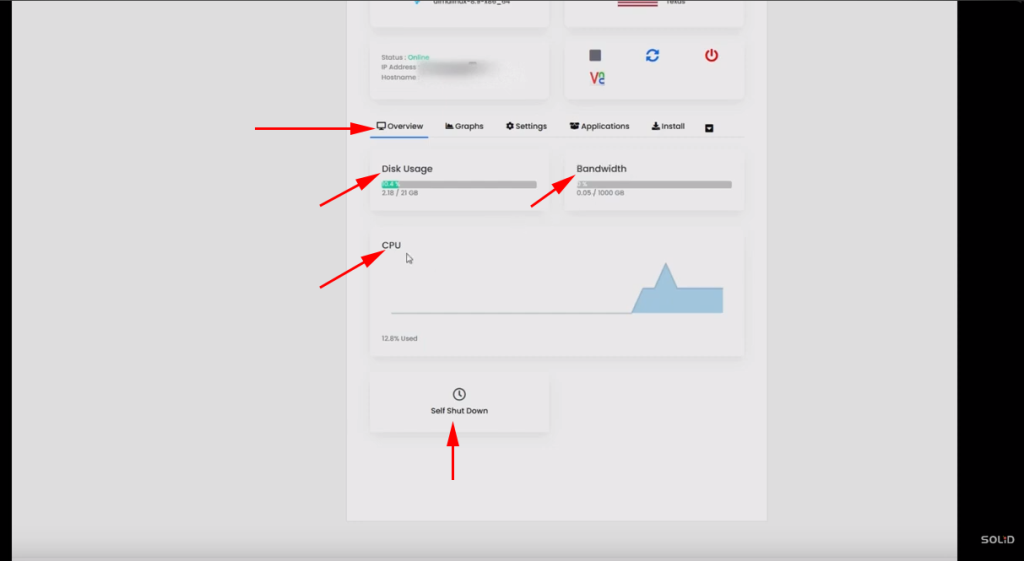
In the “Overview” tab, as you scroll down, you’ll find key server statistics, including disk usage, bandwidth usage, and CPU usage.
There is also an option to set a self-shutdown timer if needed.
The “Graphs” tab provides detailed information on bandwidth usage and server resource statistics, including CPU usage, all presented in a graphical format.
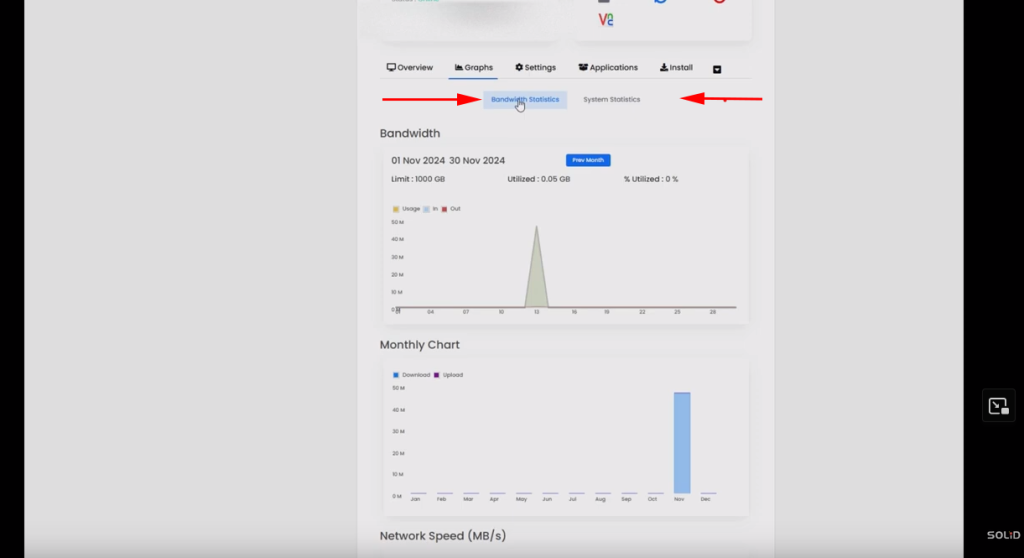
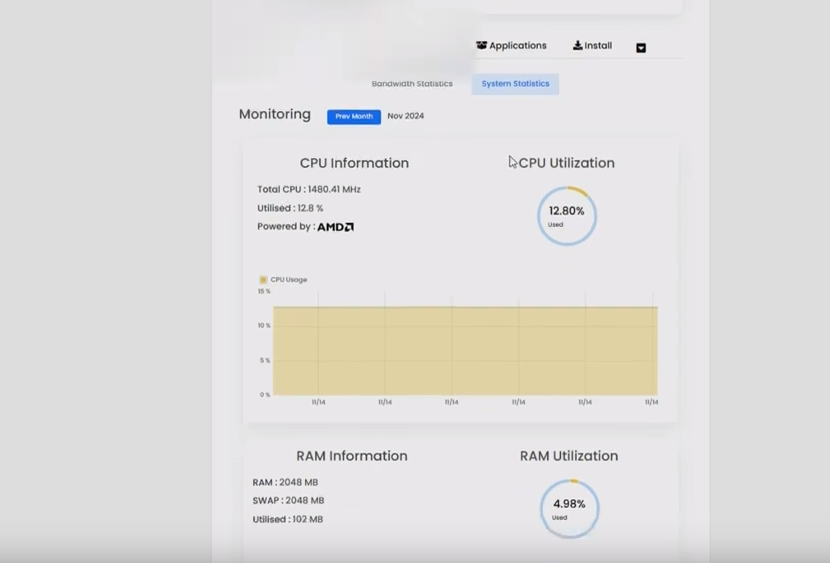
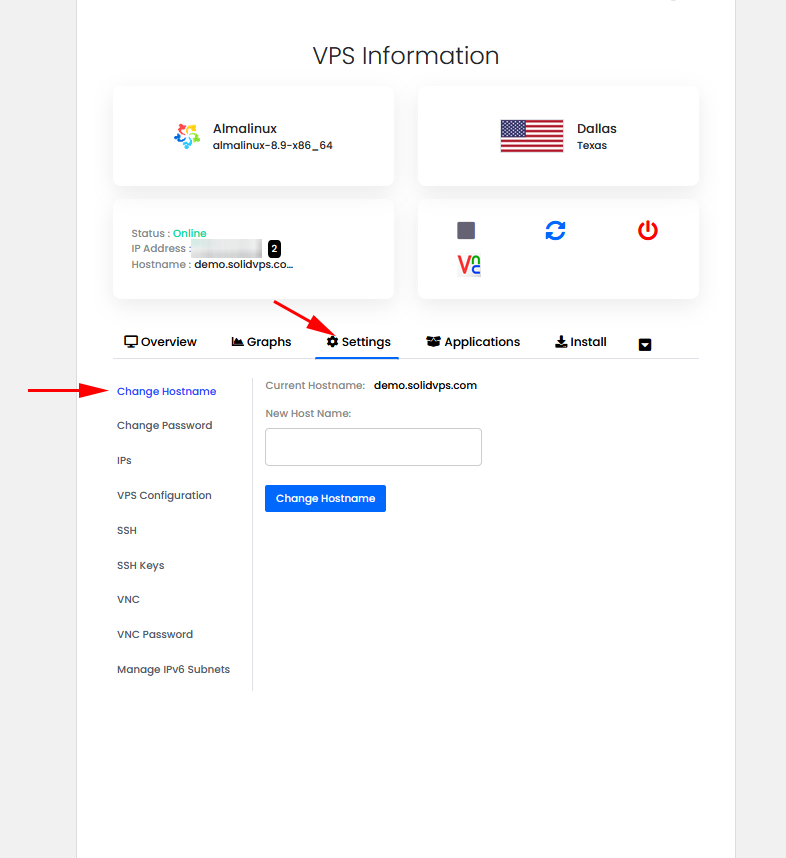
The “Settings” tab provides options to manage the VPS such as:
Change Hostname
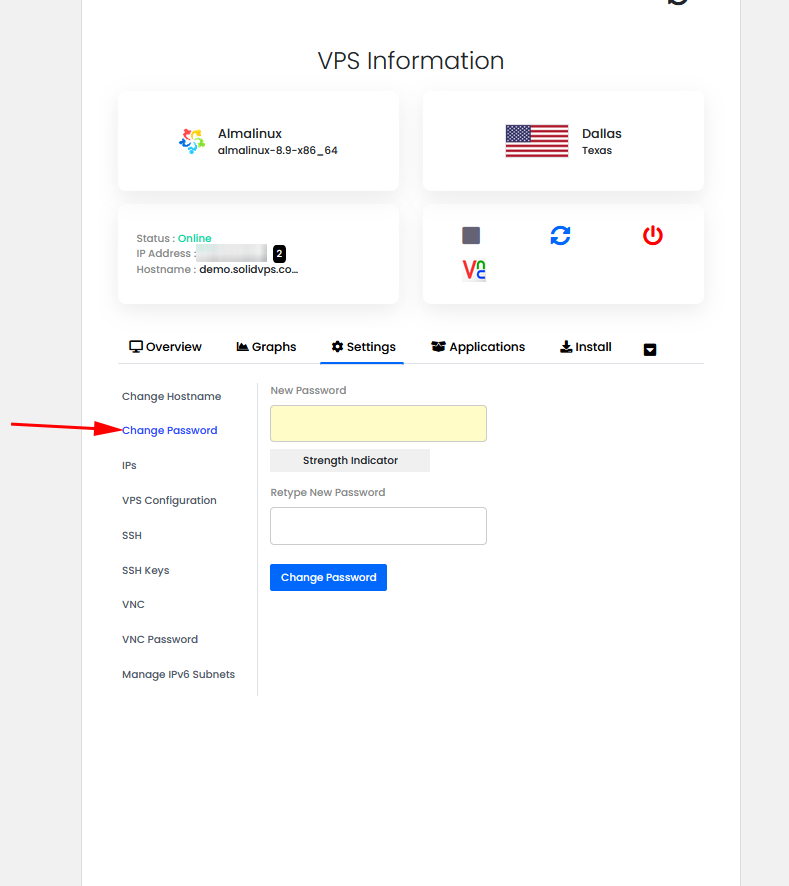
Change the Password
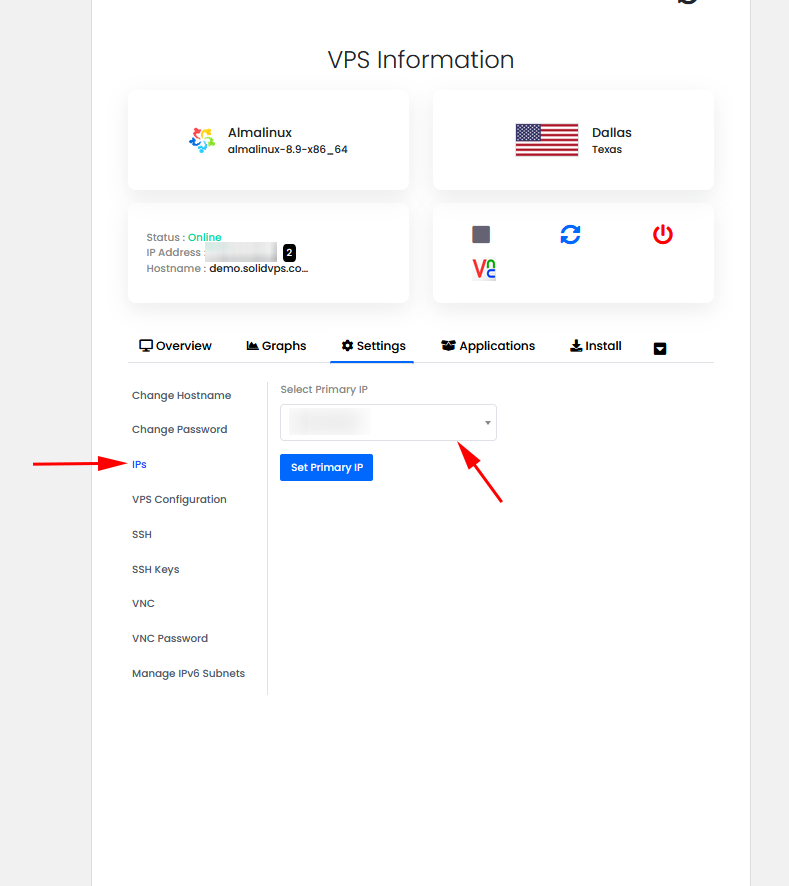
Manage IPs
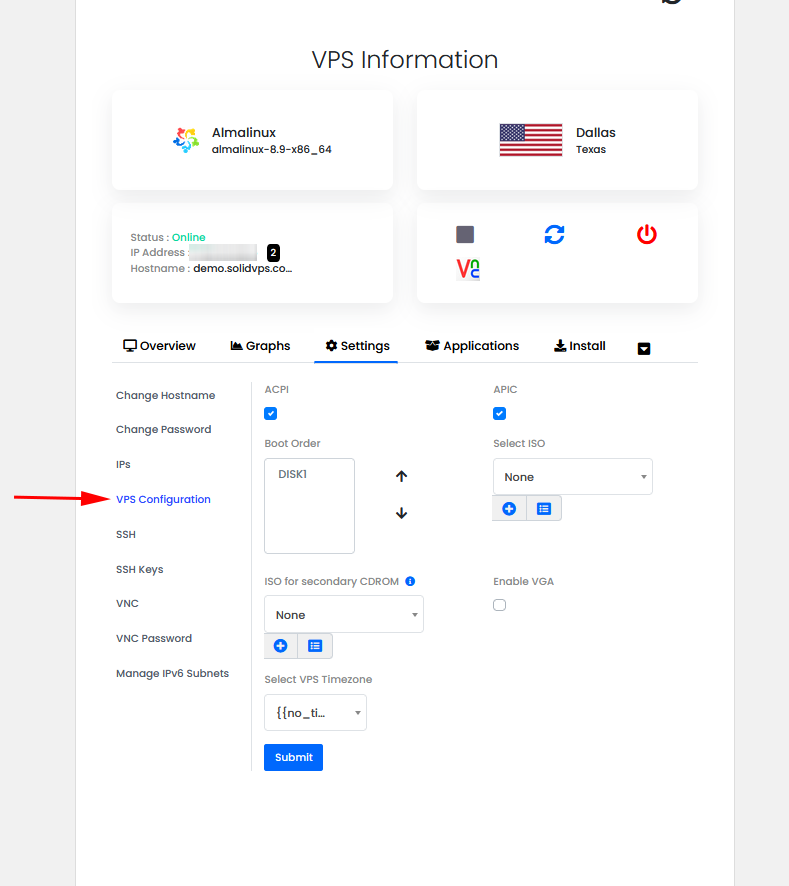
VPS Configuration
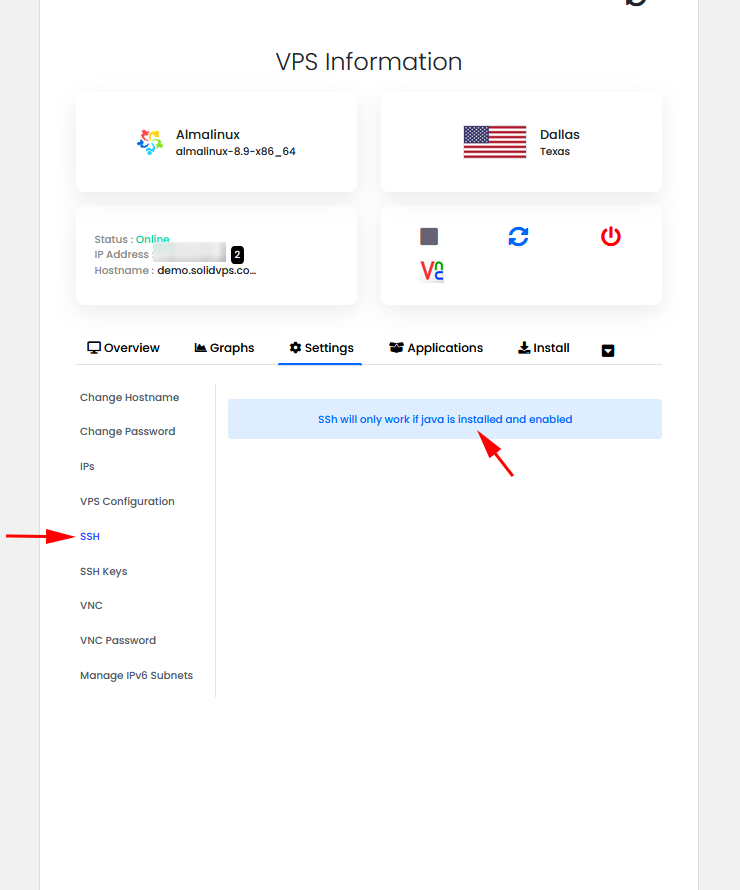
Manage SSH Keys
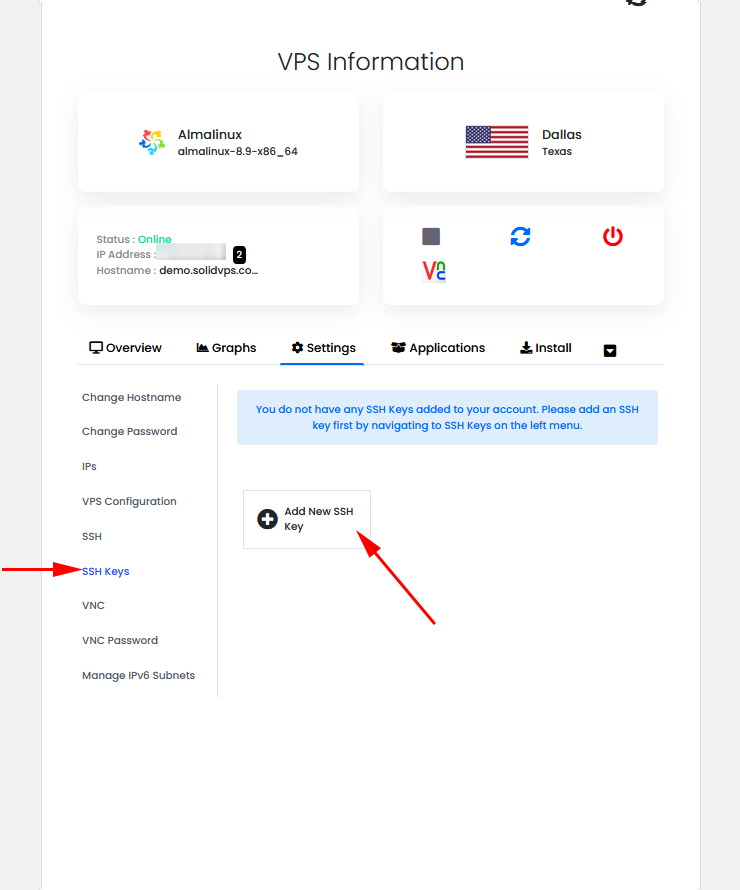
Add SSH Keys
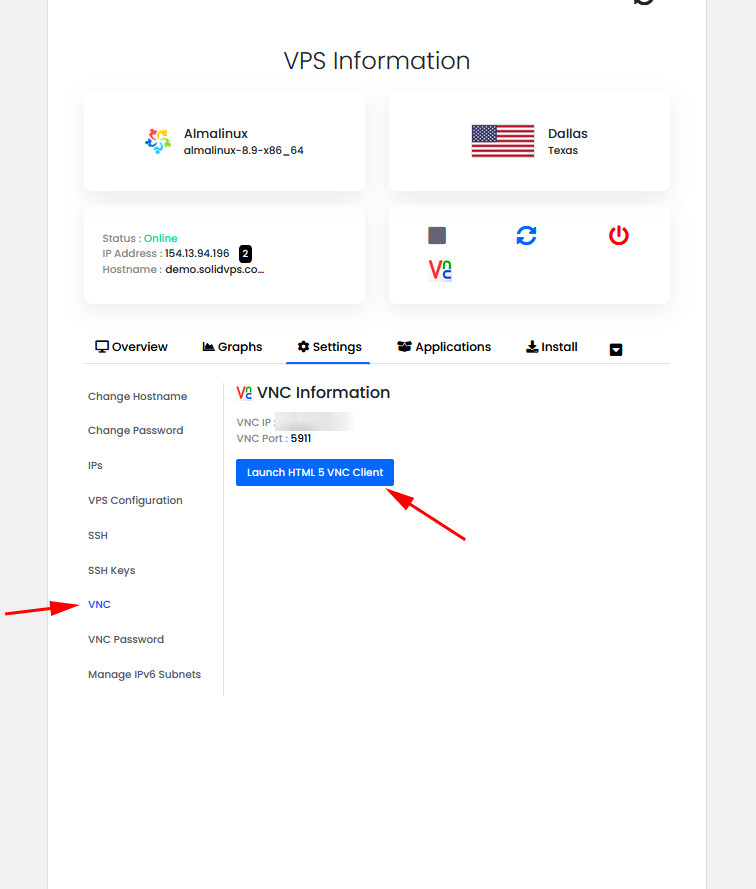
Launch VNC Console
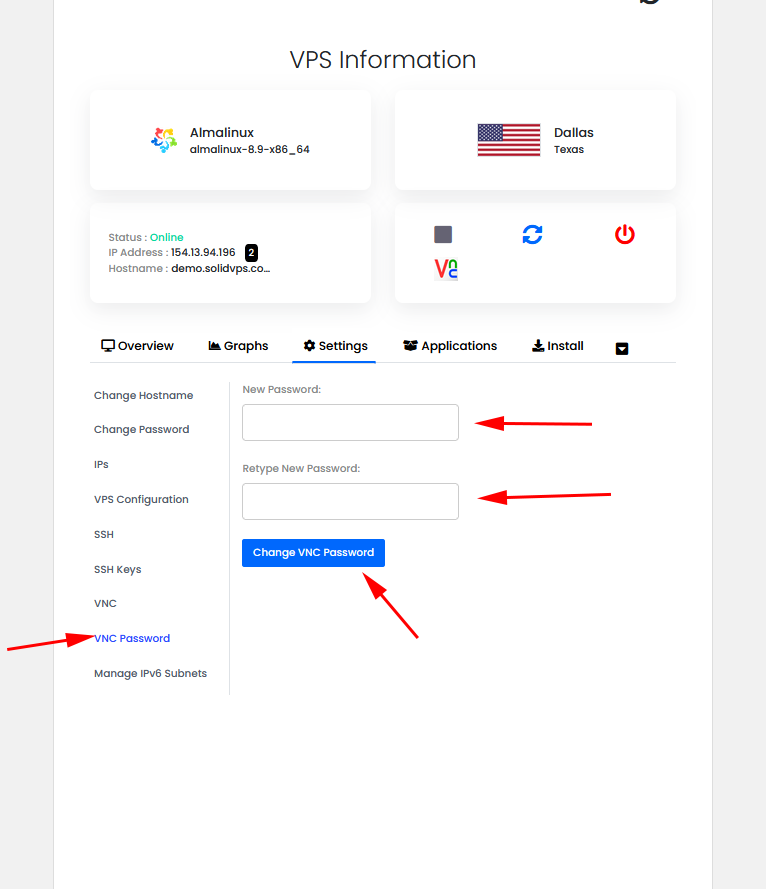
Change VNC Password
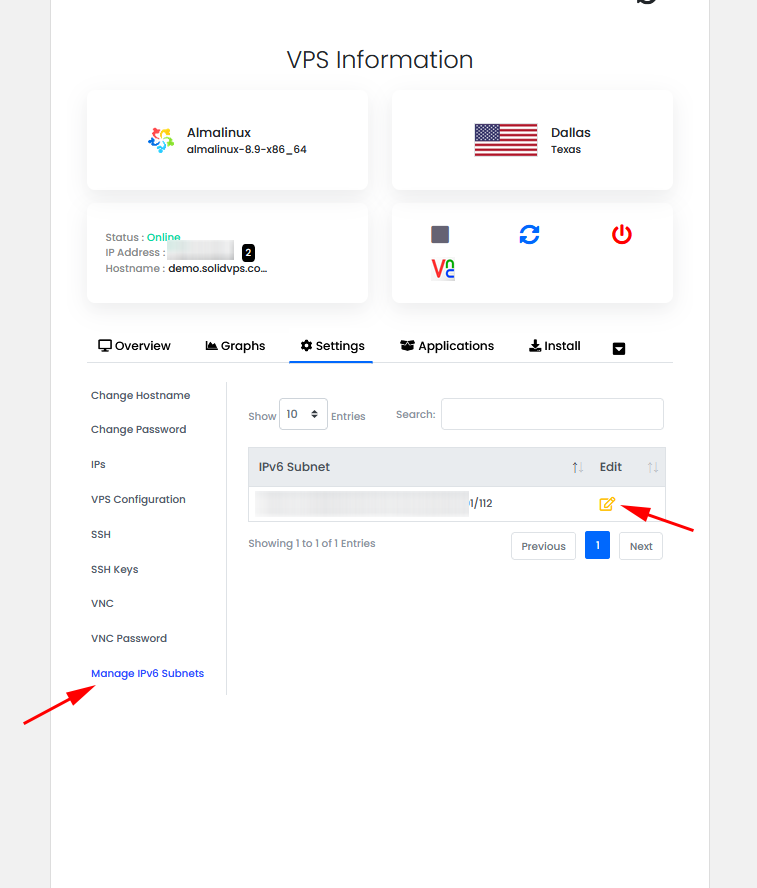
Manage IPv6 Subnets
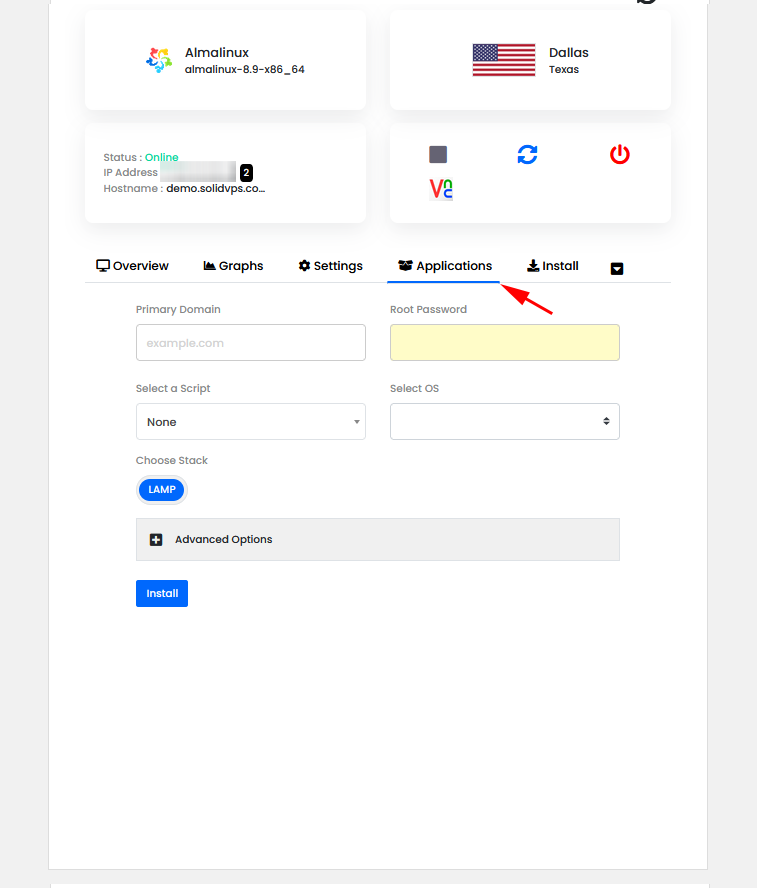
The “Applications” tab provides options to manage all your application deployments and scripts:
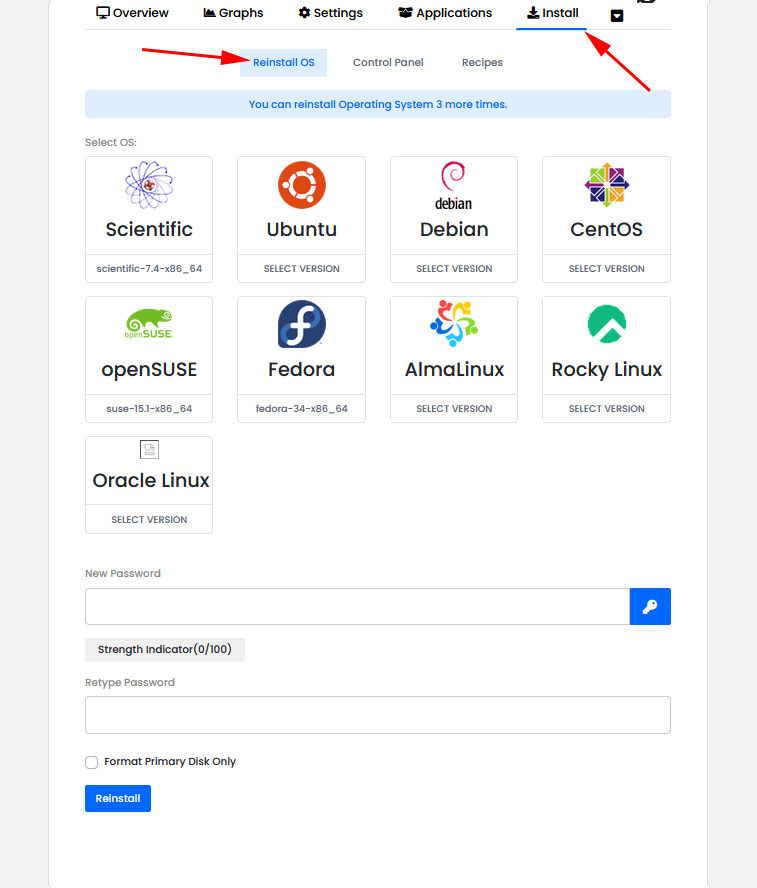
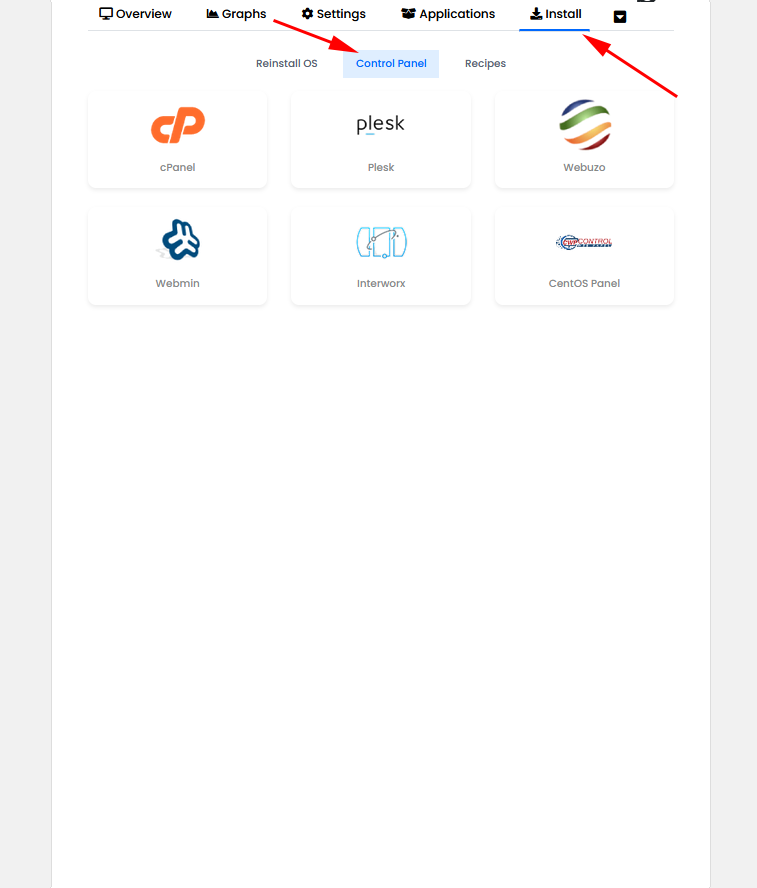
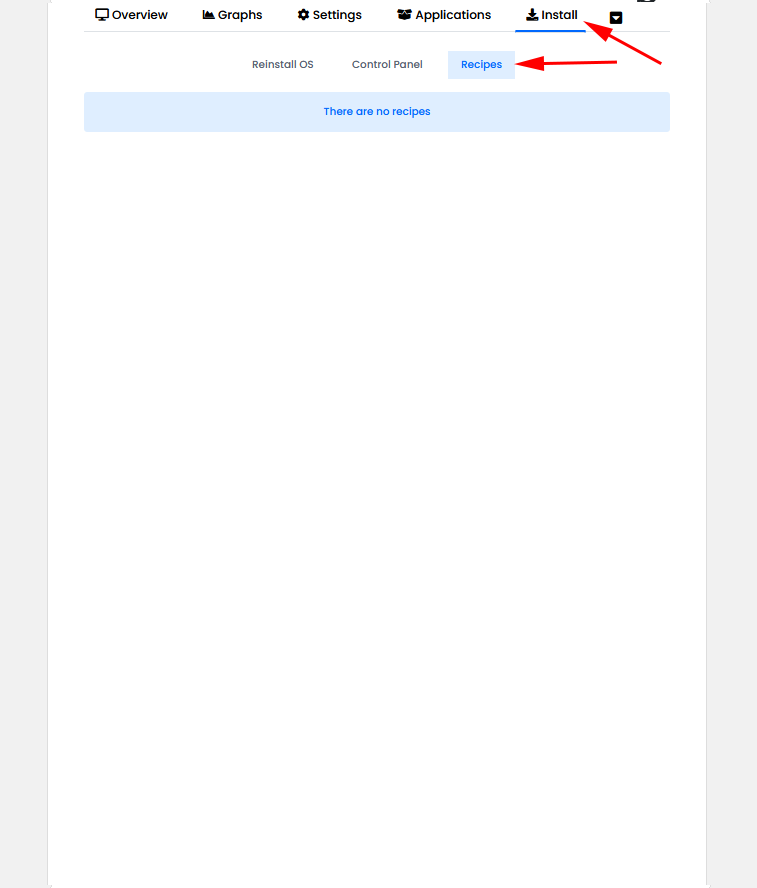
The “Install” tab provides options to Reload OS, install a Control Panel and to add a recipe if needed.
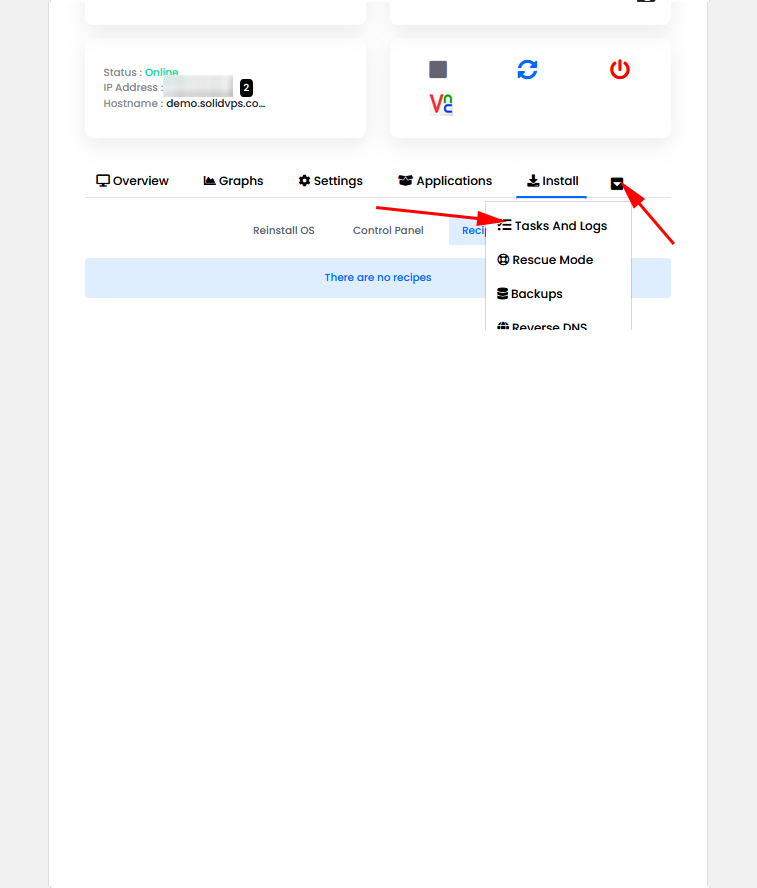
The “Tasks and Logs” tab provides detailed information on all completed tasks and logs related to your servers.
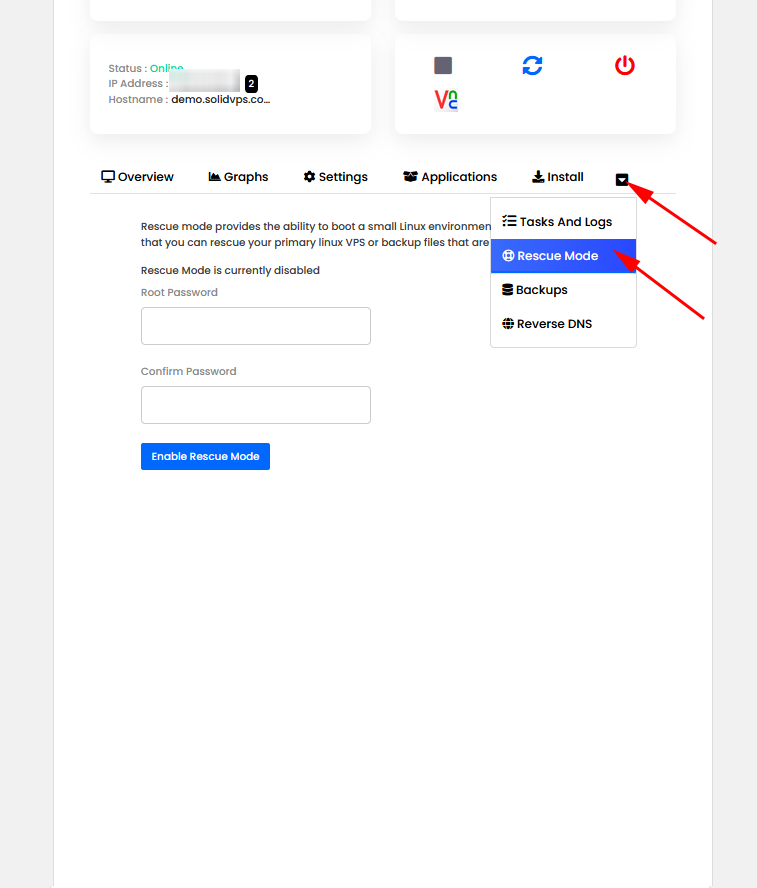
The “Rescue mode” tab allows you to boot your VPS into rescue mode for troubleshooting and recovery.
In this mode, you can access your server even if it is unresponsive, allowing you to perform tasks such as fixing configuration issues, recovering lost files, or repairing system errors.
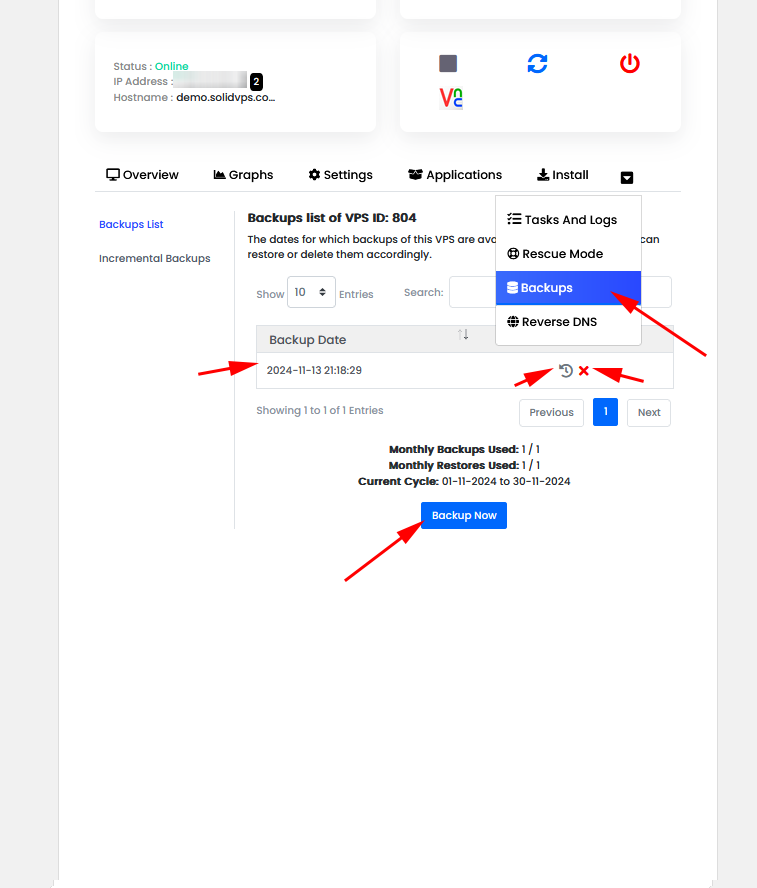
The “Backup” tab allows you to create, manage, and restore backups of your VPS.
You can use this feature to ensure your data is secure and easily recoverable in case of any issues. It offers options for creating full or partial backups, as well as restoring from previously saved backups.
The “Reverse DNS” tab allows you to configure reverse DNS (rDNS) for your server’s IP addresses. This feature is essential for ensuring proper email delivery and improving your server’s reputation by associating your IP address with a domain name.
You can set up and manage reverse DNS records to match your server’s hostname or a custom domain.
