Getting Started
Having a Windows VPS (Virtual Private Server) provides you with the power and flexibility of a remote Windows operating system. Accessing your VPS can be easy if you follow the right steps, whether you’re using a Windows PC, a Mac, or a mobile device. Here’s a simple, step-by-step guide to help you get connected to your Windows VPS.
What You’ll Need?
To access your Windows VPS, you’ll need:
- VPS IP Address: Provided in the welcome email.
- Username: Provided in the welcome email.
- Password: Provided in the welcome email.
- Remote Desktop Protocol (RDP) software: Typically pre-installed on Windows but can be downloaded on other devices.
Steps to Access Your Windows VPS on a Windows PC
There are three ways to connect to your Windows VPS from a Windows PC
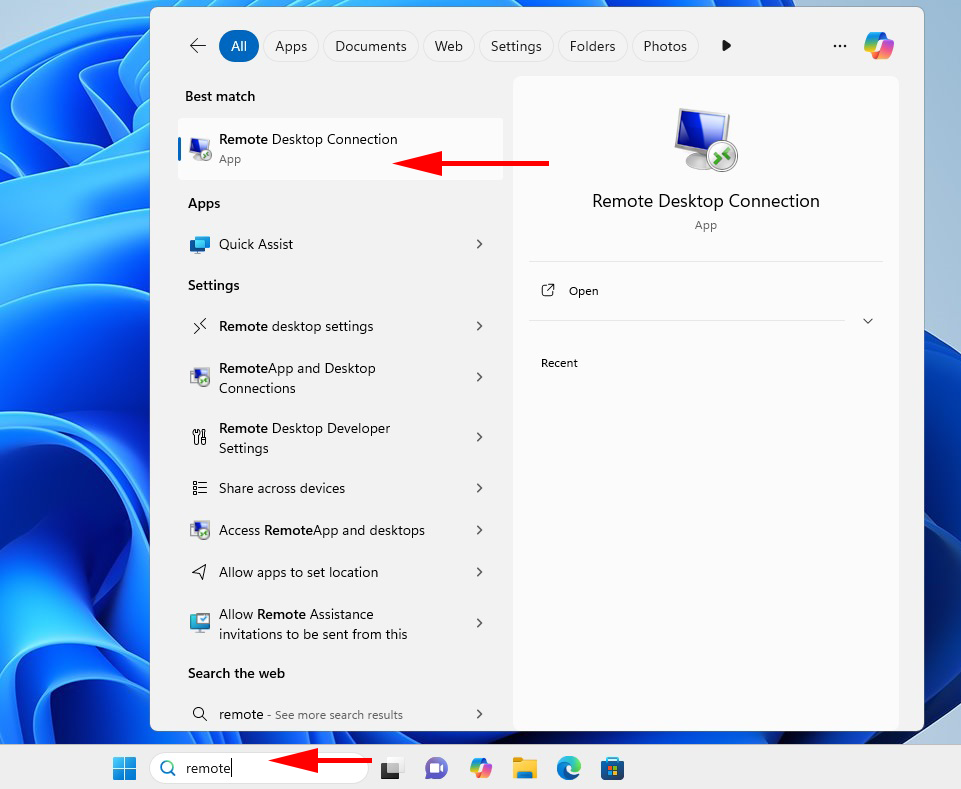
1st Method:
Click on the magnifying glass icon in your Windows taskbar and type “Remote Desktop Connection” into the search bar
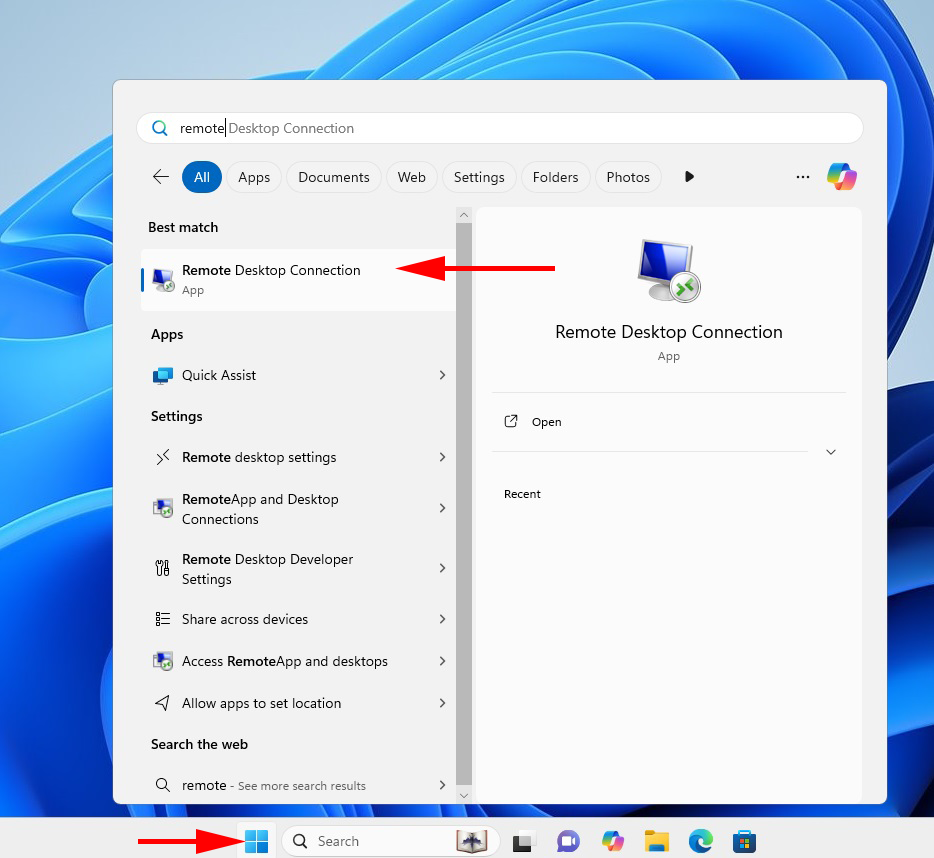
2nd Method:
Click the Start button and type “Remote Desktop Connection” into the search box.
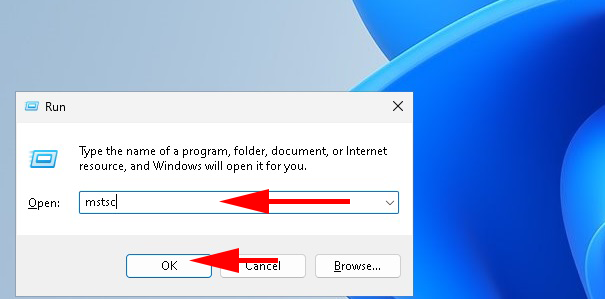
3rd Method:
Press Win + R on your keyboard, type “mstsc” and press Enter.
Connecting via Remote Desktop Connection:
In the Remote Desktop Connection’s “Computer” field, enter the IP address of your server.
Then click “Connect.”
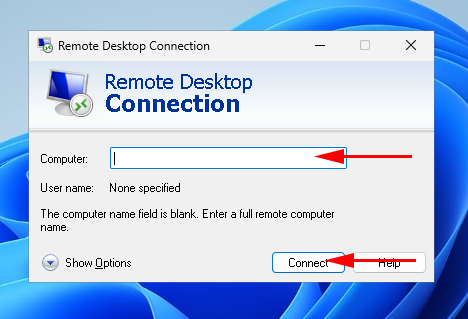
Enter Your Credentials:
When prompted, enter your VPS username and password.
Optionally, check the box to remember your credentials for faster access in the future.
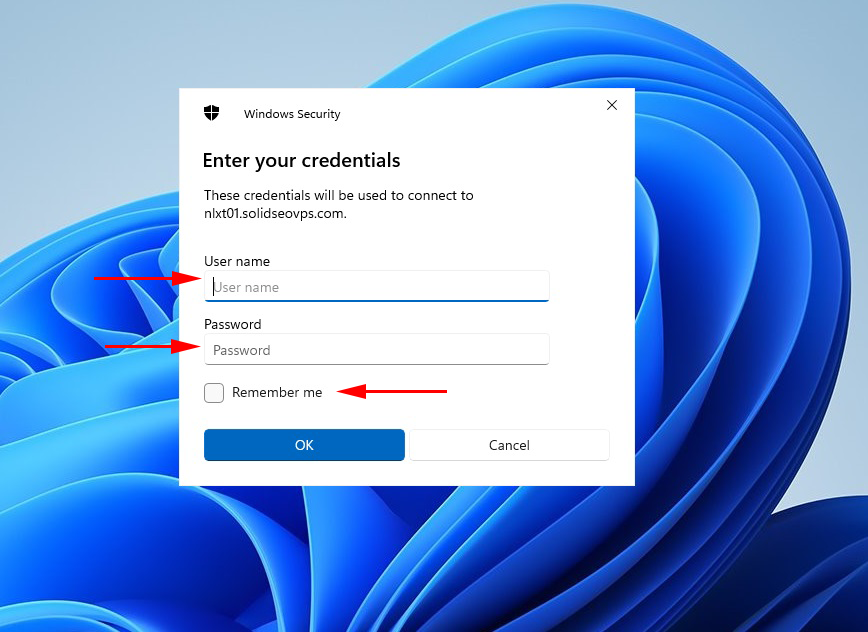
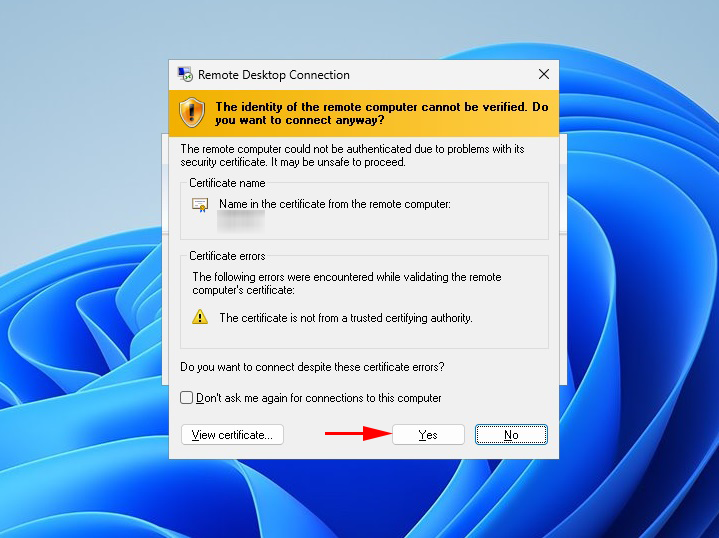
After entering your server username and password in Remote Desktop Connection and clicking “OK,” you may see a server certificate warning, which you can safely ignore.
Click “Yes” to proceed with the connection.
Optionally, you can check the box next to “Don’t ask me again for connections to this computer,” or leave it unchecked if you prefer.
