GSA Search Engine Ranker (GSA SER) is a powerful SEO tool that automates backlink building.
Adding private proxies to GSA SER is essential for managing high-volume link building while keeping your IP addresses safe from bans.
This guide walks you through adding private proxies to GSA SER for maximum performance and security.
Step 1: Purchase High-Quality Private Proxies
1- Select a Reliable Proxy Provider: Choose a reputable provider offering fast, anonymous private proxies. Ensure they’re compatible with GSA SER and provide IPs from diverse locations.
Important: Avoid using rotating proxies or public proxies, as these are often associated with blacklisted or compromised IP addresses. Such proxies may be heavily flagged by search engines and can harm your SEO efforts.
2- Test Proxy Speed and Reliability: Some providers offer a trial or allow you to test the proxies, so ensure they’re quick and reliable before committing.
Step 2: Access Proxy Settings in GSA SER
1- Open GSA SER: Launch your GSA SER software and navigate to the settings menu.
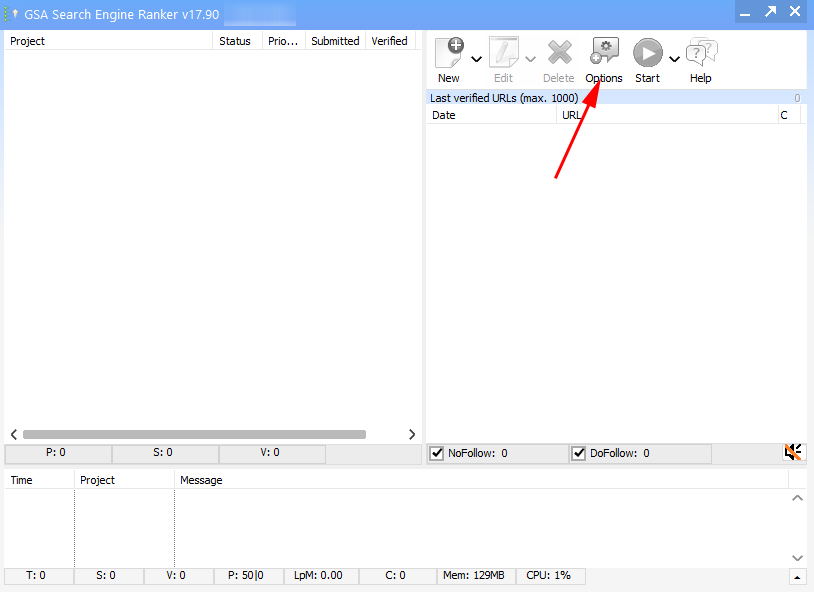
2- Go to Proxy Settings: Click on Options at the top
3- Then check “Use Proxies” and click on the Configure option.
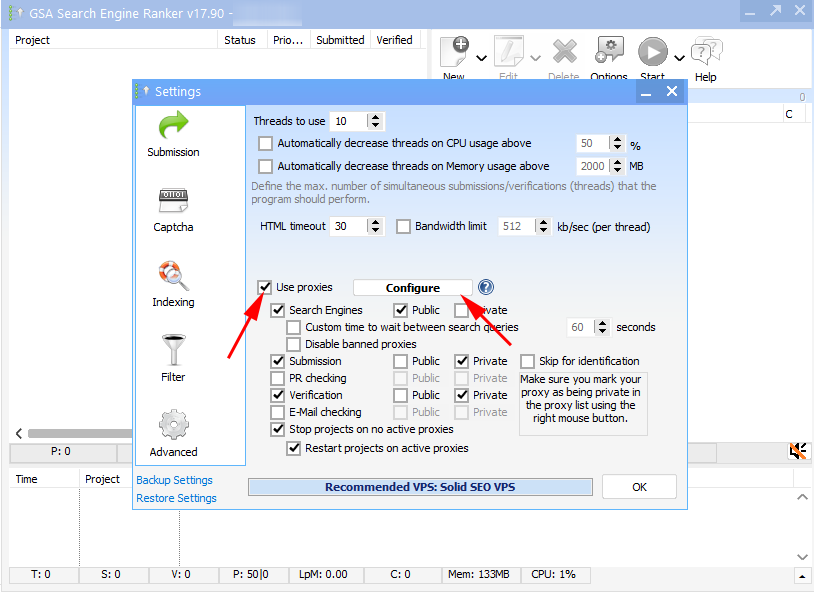
This will open the proxy management window where you can add, test, and manage your proxies.
Step 3: Add Private Proxies
Before adding private proxies, it’s essential to disable GSA’s automatic search for public proxies.
To do this, go to the Options tab in GSA and uncheck the option to “Search for new proxies.”
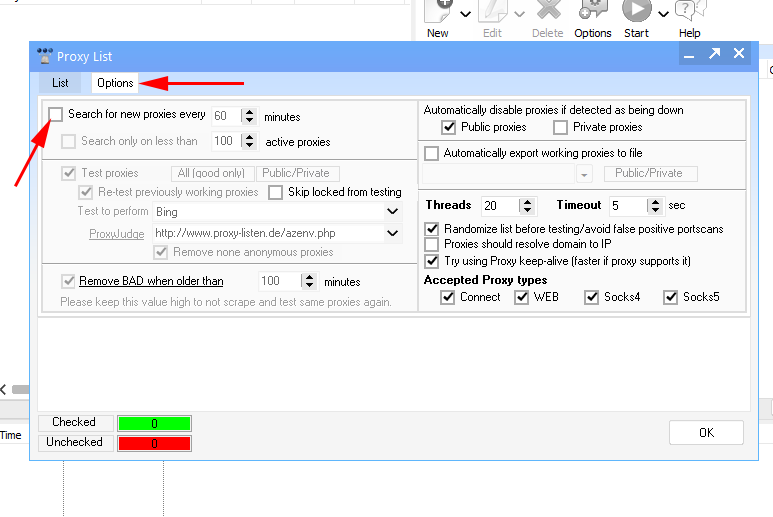
This step ensures that only your private, high-quality proxies are used, avoiding issues with unreliable public proxies.
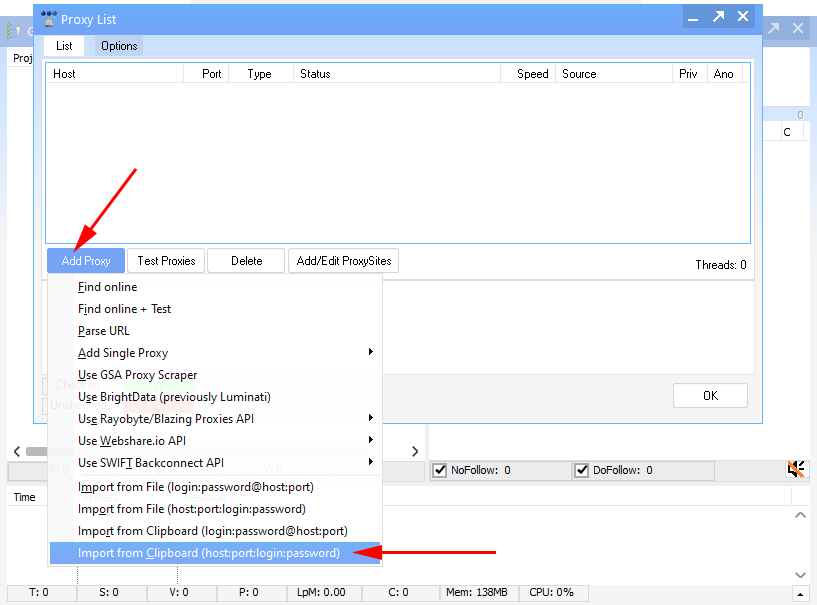
1- Click on “Add/Edit Proxies”: In the proxy management window, click on Add/Edit Proxies and choose Add Proxy from the drop-down menu.
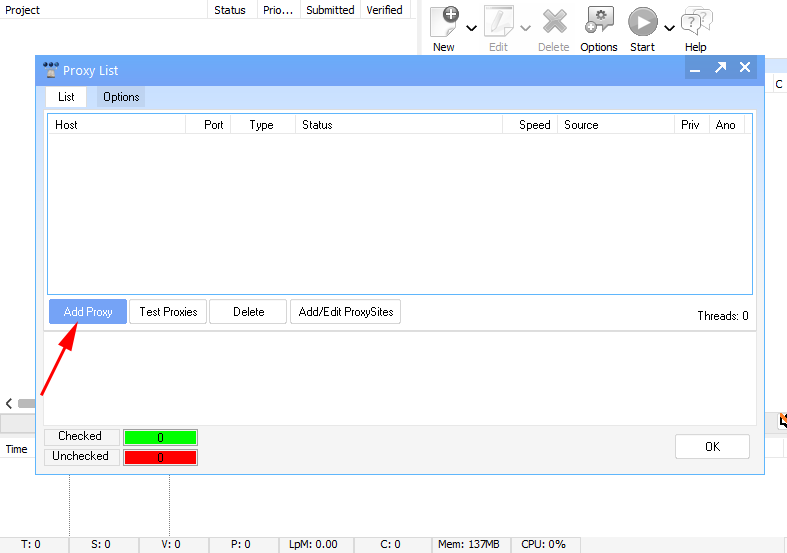
2- Enter Your Proxy Details: Here’s where you enter each proxy’s IP address, port, and login credentials if required.
Use the format IP:PORT:USERNAME:PASSWORD for proxies that require authentication.
Step 4: Test Your Proxies
Now that your proxies are added, configure how GSA SER will use them.
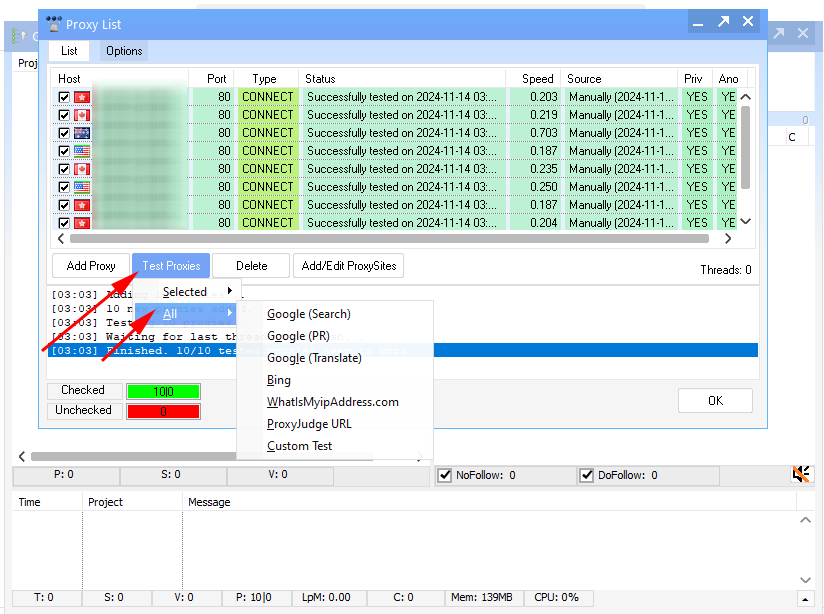
Now that your proxies are added, you can test their functionality by clicking on the “Test Proxies” button.
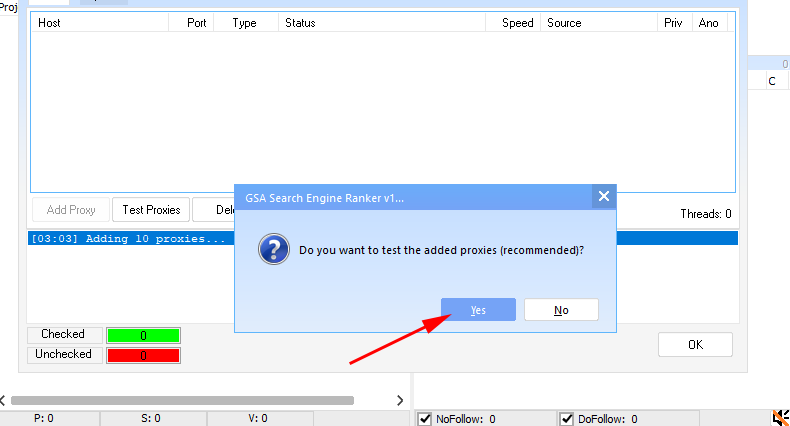
You’ll have the option to test them across several different settings to ensure they’re working properly and providing reliable performance
.
Adding private proxies to GSA SER significantly enhances security, reduces IP bans, and optimizes link-building performance.
By following these steps and maintaining your proxies, you can maximize the effectiveness of your GSA SER campaigns.
